Azure Active Directory configuration
This how-to guide describes how to configure Unit4 Identity Services with Azure Active Directory (AAD).
Prerequisites
- Administrative access to Azure Active Directory (AAD)
- Knowledge of AAD and how to create an AAD application
- U4IDS authority address (in the rest of this topic we use the value of
https://<u4ids basepath>/identityas the address of the U4IDS installation's identity endpoint) - Access to U4IDS in order to create tenant
The list of official IDS environments can be found here
Steps
Setup trust between U4IDS and your AAD as follows:
- Register U4IDS as an application in AAD
- Create a new AAD application
- Generate a secret
- Register U4IDS reply urls
- Register the AAD application as a tenant in U4IDS
- Select a unit4IdClaimType
- Get the authority
- Get the idpRegId
Register U4IDS as an application in AAD
Follow these steps:
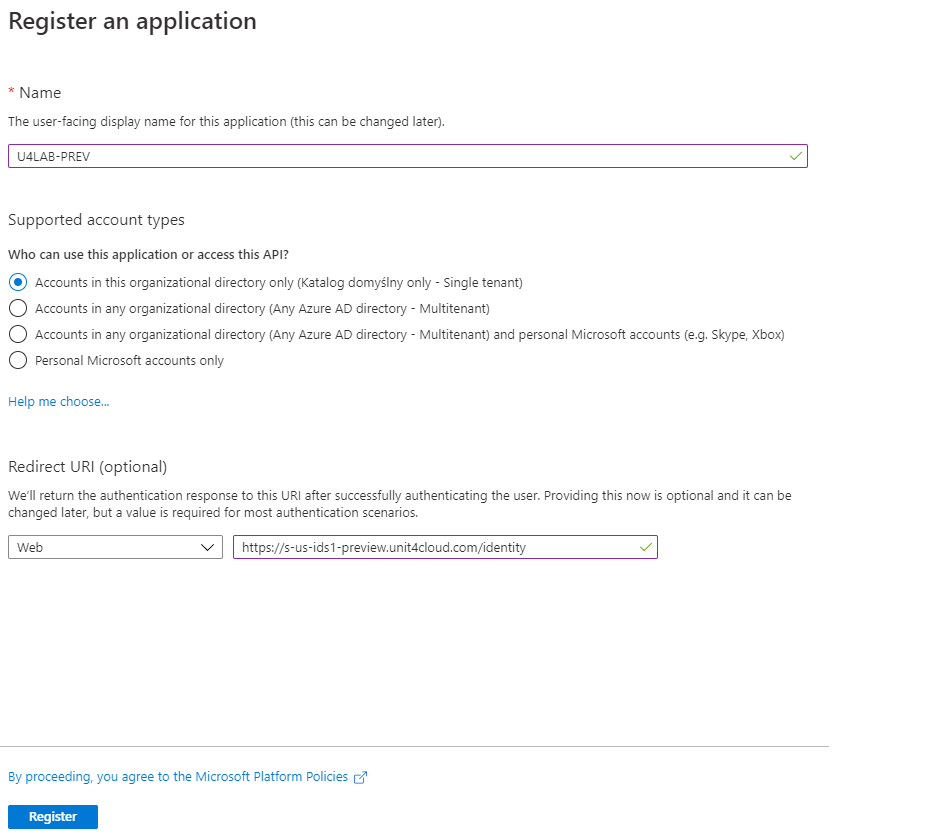
Create a new AAD Application
Choose the correct AAD if you have access to multiple AADs
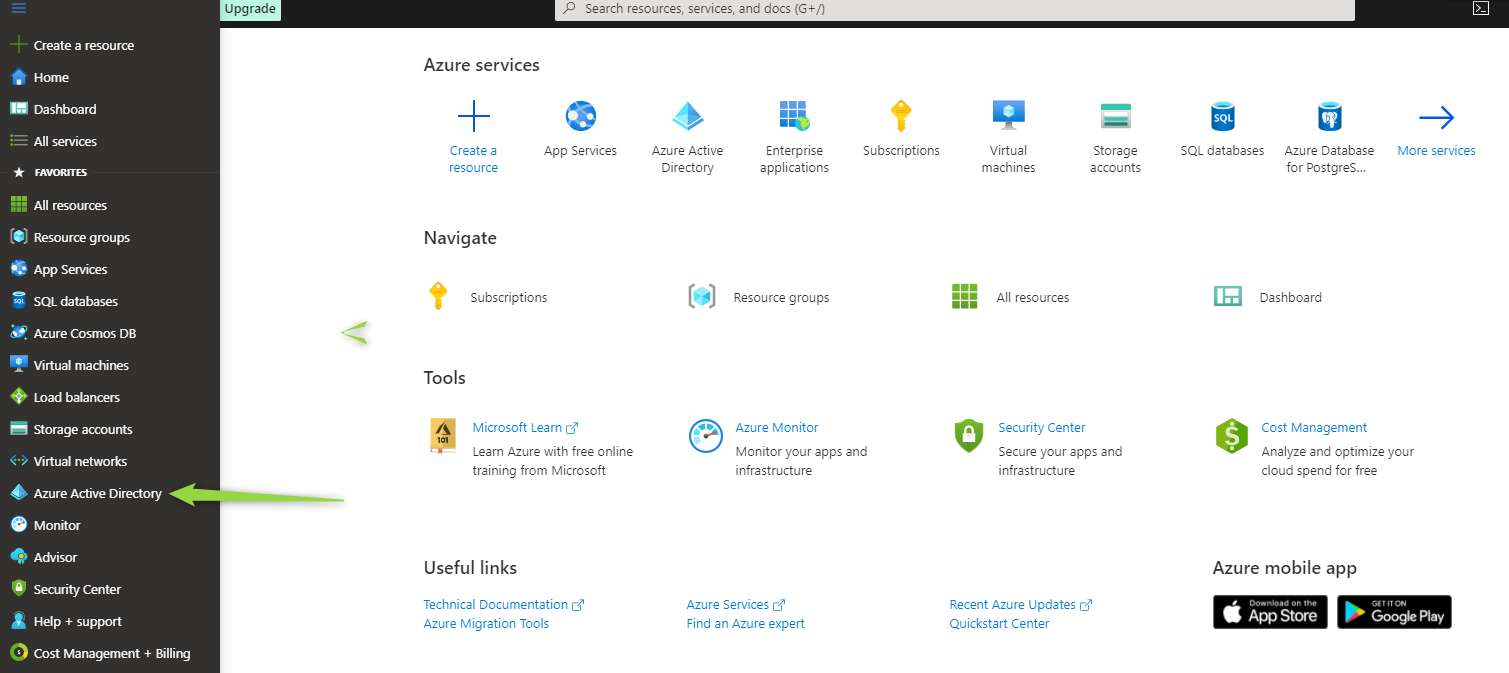
Log in to Azure portal: https://portal.azure.com/ and go to Azure Active Directory:
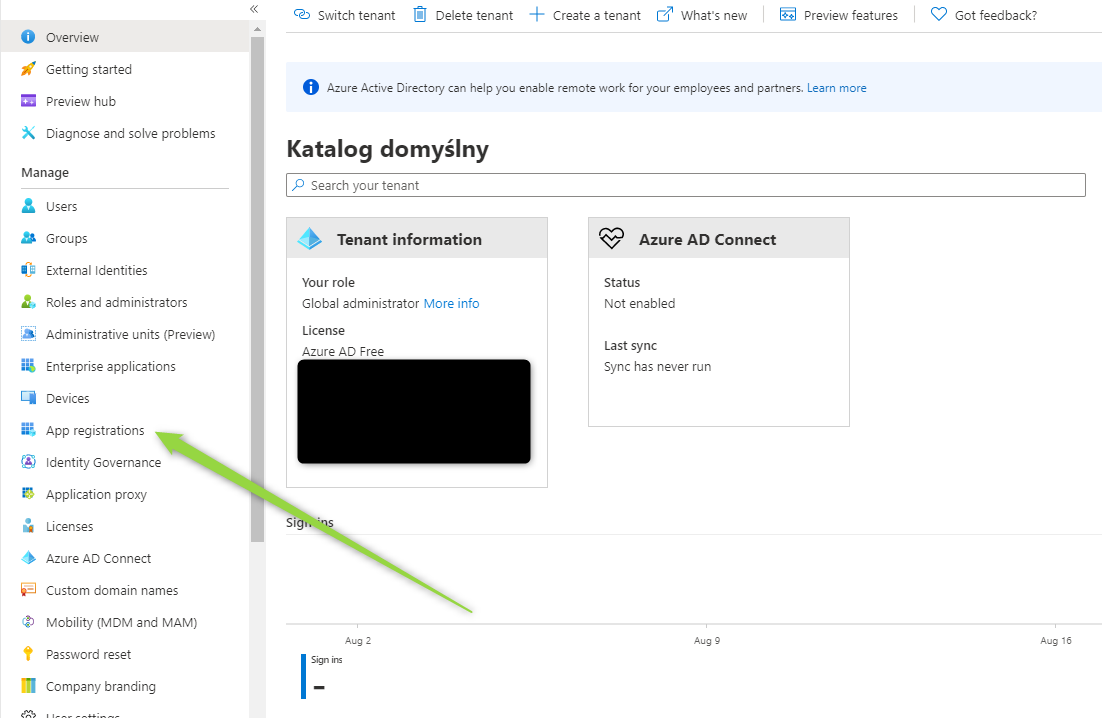
and go to App registration menu:
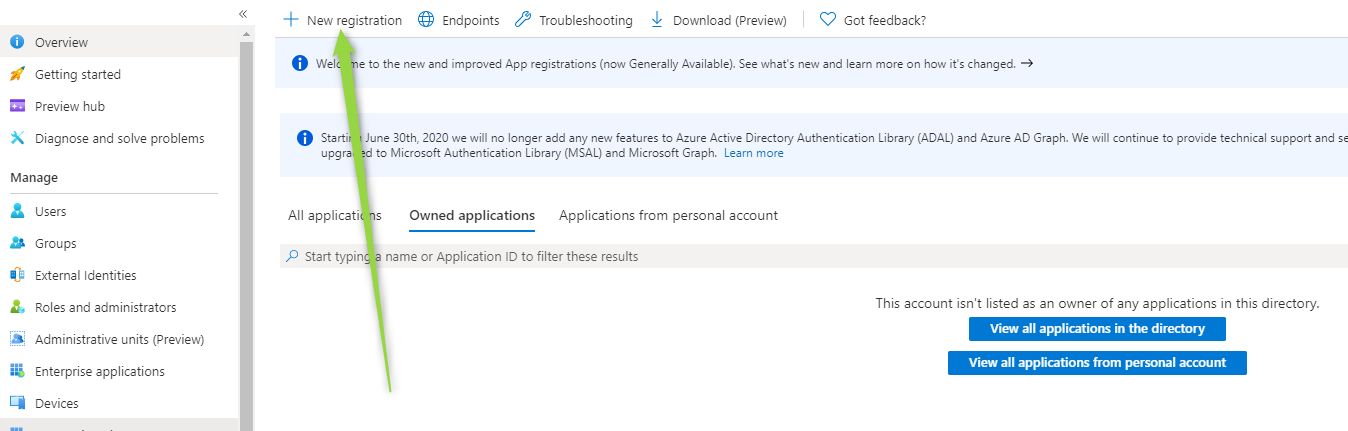
click New registration:
Enter your application name, select account type and provide 1 of required Redirect Uris properly as below and register your application:
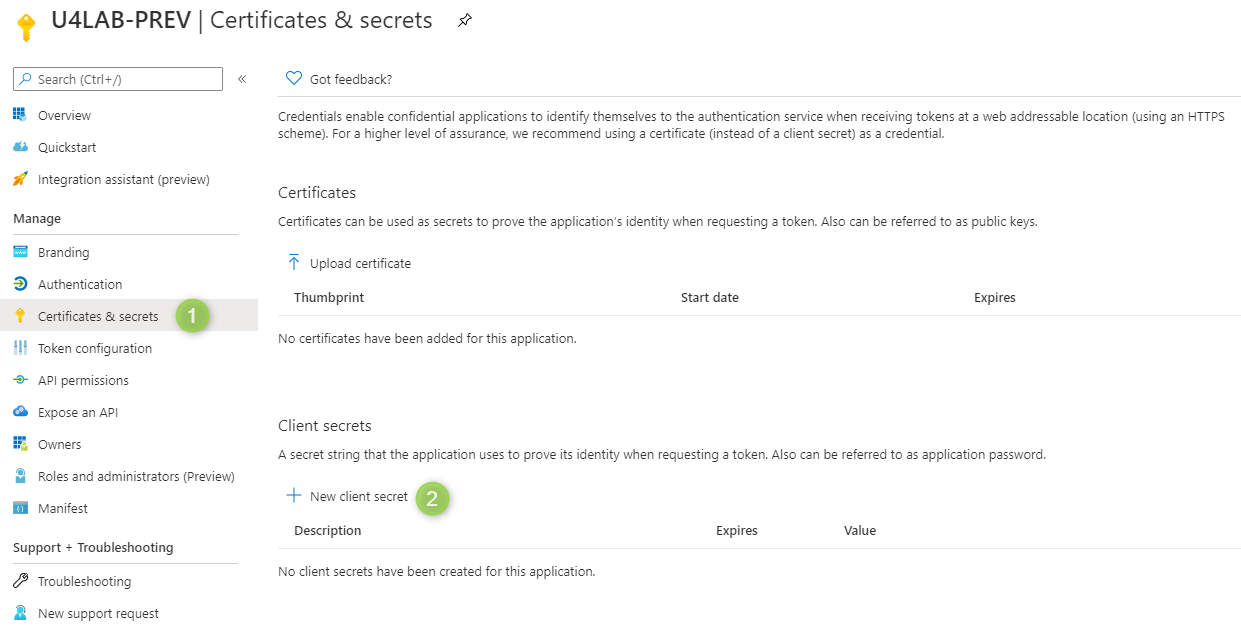
Generate a secret
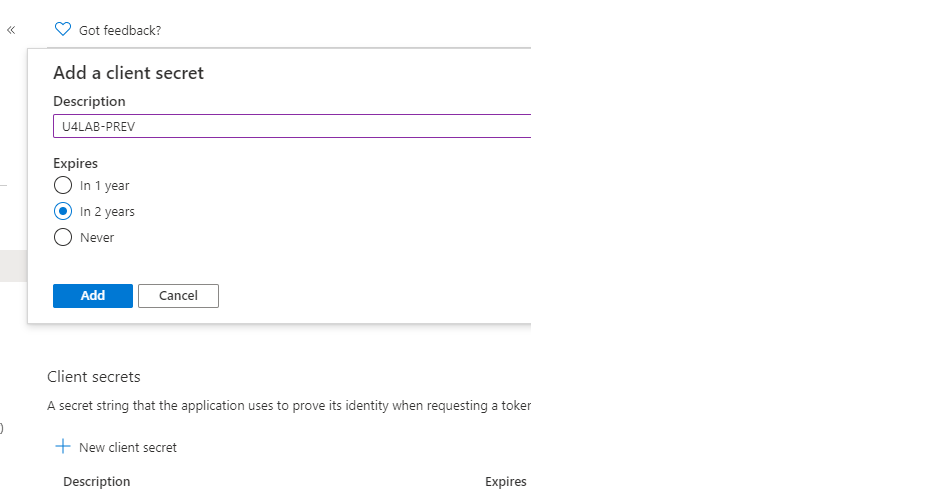
Create a secret:
Set expire time:
Register U4IDS reply urls
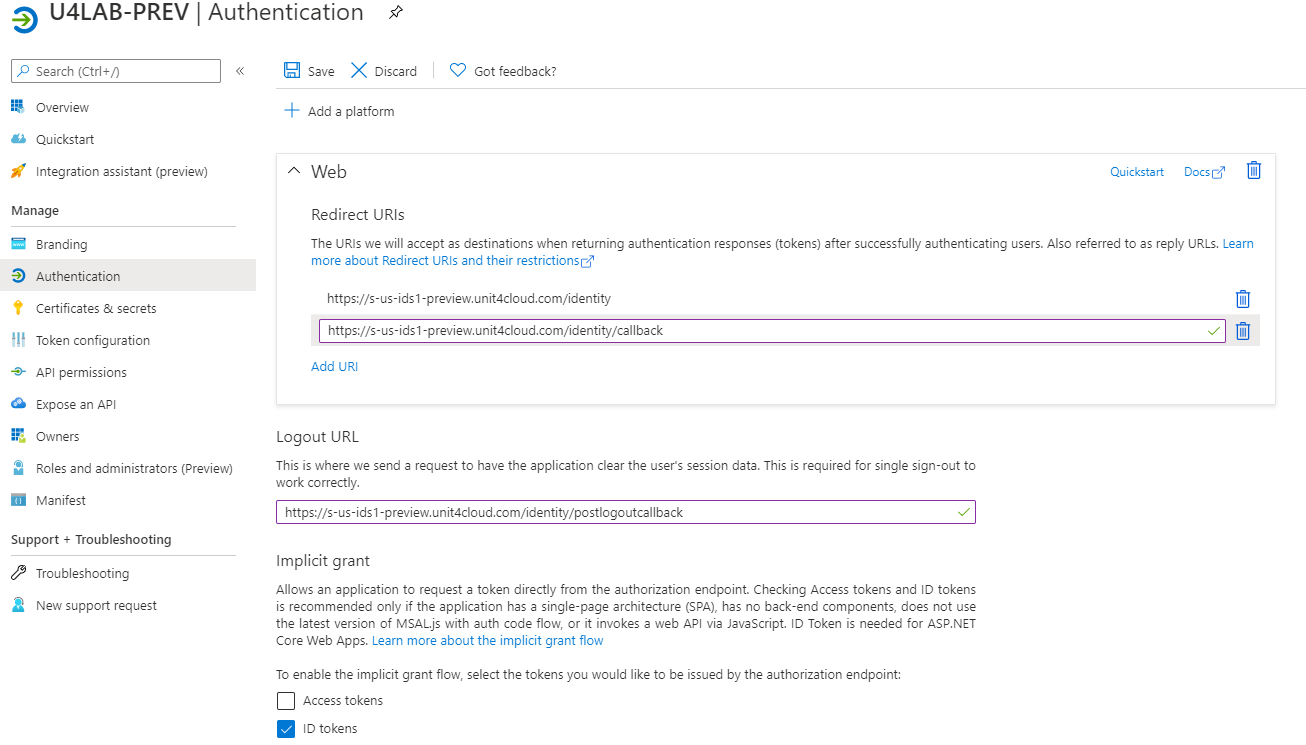
Navigate to Authentication menu and make sure the Reply URL contains two U4IDS installation addresses:
- one for redirect to ids:
https://<address of U4IDS installation>/identity/callback - one for post logout :
https://<address of U4IDS installation>/identity/postlogoutcallback)
Also make sure that the ID tokens checkbox is ticked.
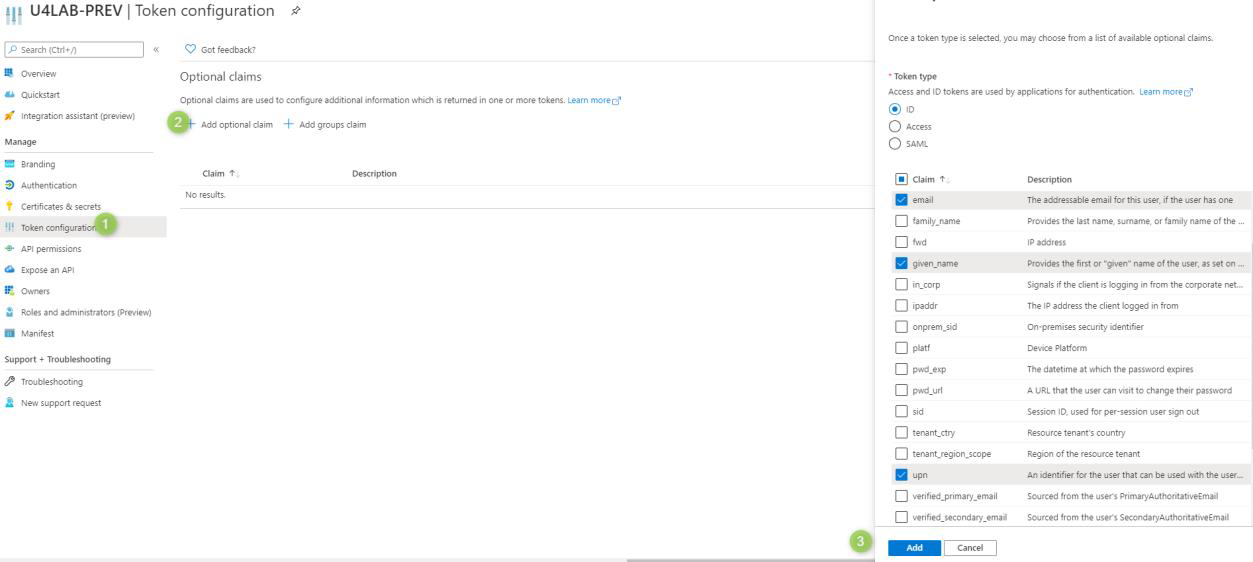
In the Token configuration menu you can configure your claims: