Deployments
To make an Integration Flow reusable and generic, all properties that are tenant-specific are marked as tenant-specific configuration properties in the Integration Flow. An Integration Flow by itself does nothing. An Integration Flow combined with a tenant's context for that Integration Flow can be seen as an integration solution for that tenant. The tenant's context for an Integration Flow is what we call a deployment. Each configuration property is provided with metadata (e.g. name, type, default value) to ensure that proper values can be filled in during deployment and that validation of configuration values can be applied. To make transformations inside an Integration Flow reusable and generic, mapping tables can be applied. Each mapping table will be designed when creating the Integration Flow. E.g. name, key columns and value columns are defined with specific configuration properties so that @deployment time the values in rows can be validated.
On list of deployments you can filter by Integration Flow and tenant (only on admin tenant)
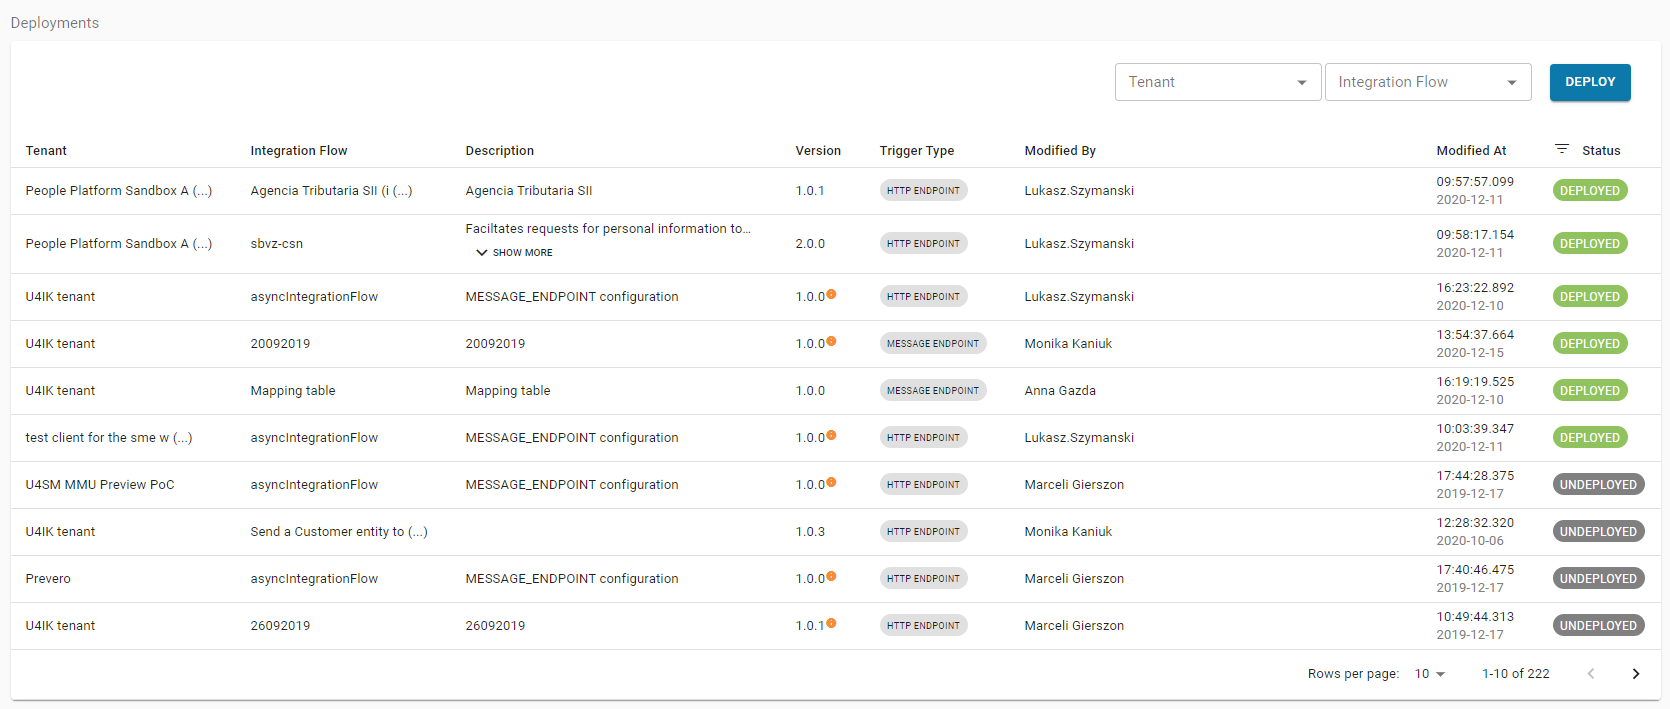
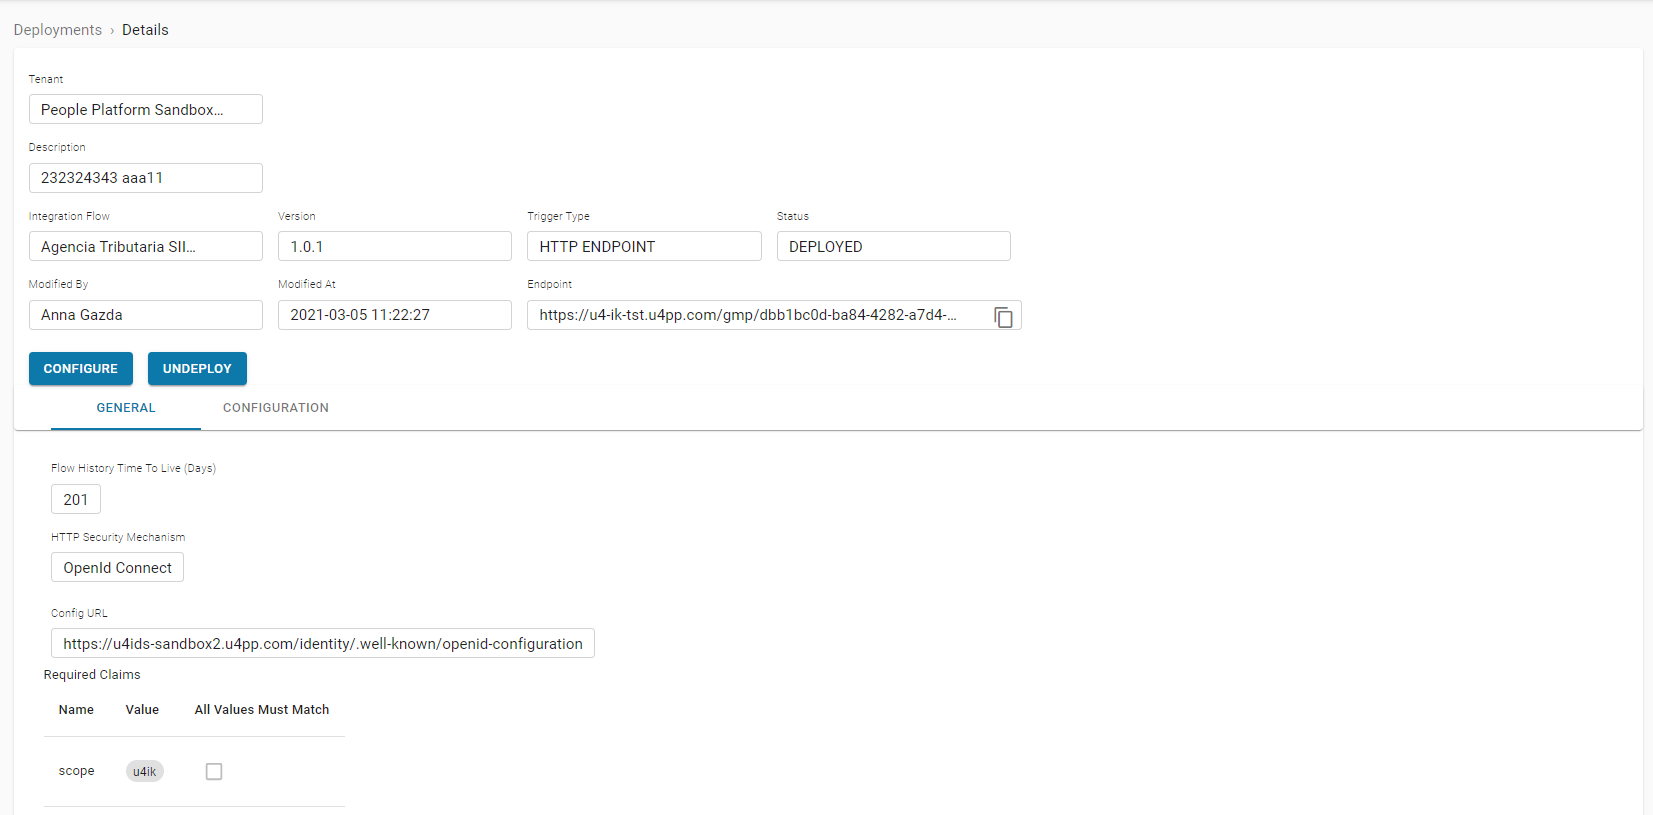
When you click on a deployment, details of selected deployments will be presented.
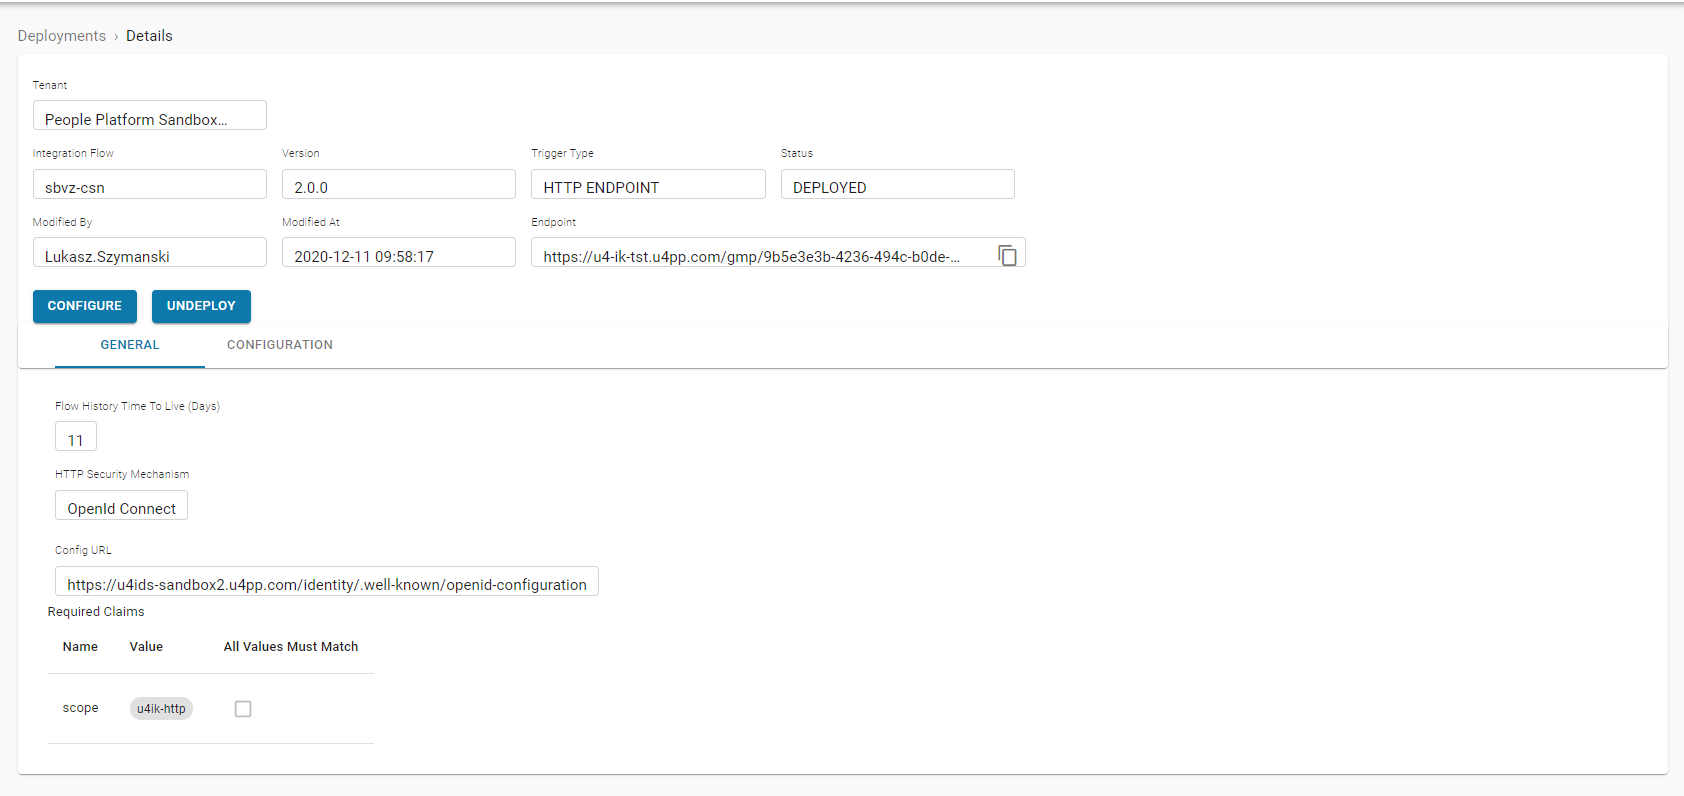
On deployment details screen you can undeploy it and modify configuration (with upgrading version).
Modify configuration (button configure) moves you to the stepper.
Multiple deployments for the same Integration Flow for the same tenant
Integration Kit supports multiple deployments for one Integration Flow for one tenant, that is why we have two processes of managing deployments - Create new deployment (using Deploy button on list of deployments screen). This process will always create completely new entry on deployment list. - Modify configuration (using Configure button on deployment details screen). Using this process you can modify existing deployment with change version of used Integration Flow.
In case when you create more than one Deployment for specific Integration Flow for one tenant then:
For HTTP_ENDPOINT trigger: - each of deployment has its own endpoint so you need to call proper endpoint to run this deployment
FOR MESSAGE_ENDPOINT trigger: - It depends which event types you will select in deployment moment: - if there are different event types in separate deployments then only these deployment where event are matched will be started - if in separate deployments event types are the same then all of them will be started. If you want to decide based on e.g. message headers (CompanyId) then you need to add this checking direcly inside your flow and stop the flow if not match.
Create new deployment an Integration Flow for a tenant
When an Integration Flow is deployed for a tenant, a workflow has to be executed to create the proper tenant context for that Integration Flow. All configuration properties that are marked as tenant-specific in the Integration Flow have to be filled with a value. Validation of configuration values will be applied. If mapping tables are part of the Integration Flow, the mapping table must be filled according to design. Client certificates can be used in Integration Flows. Client certificates have to be registered upfront before deploying the Integration Flow for a tenant. Deployment provides a wizard-like workflow by dividing content into logical steps. These steps are listed and described below:
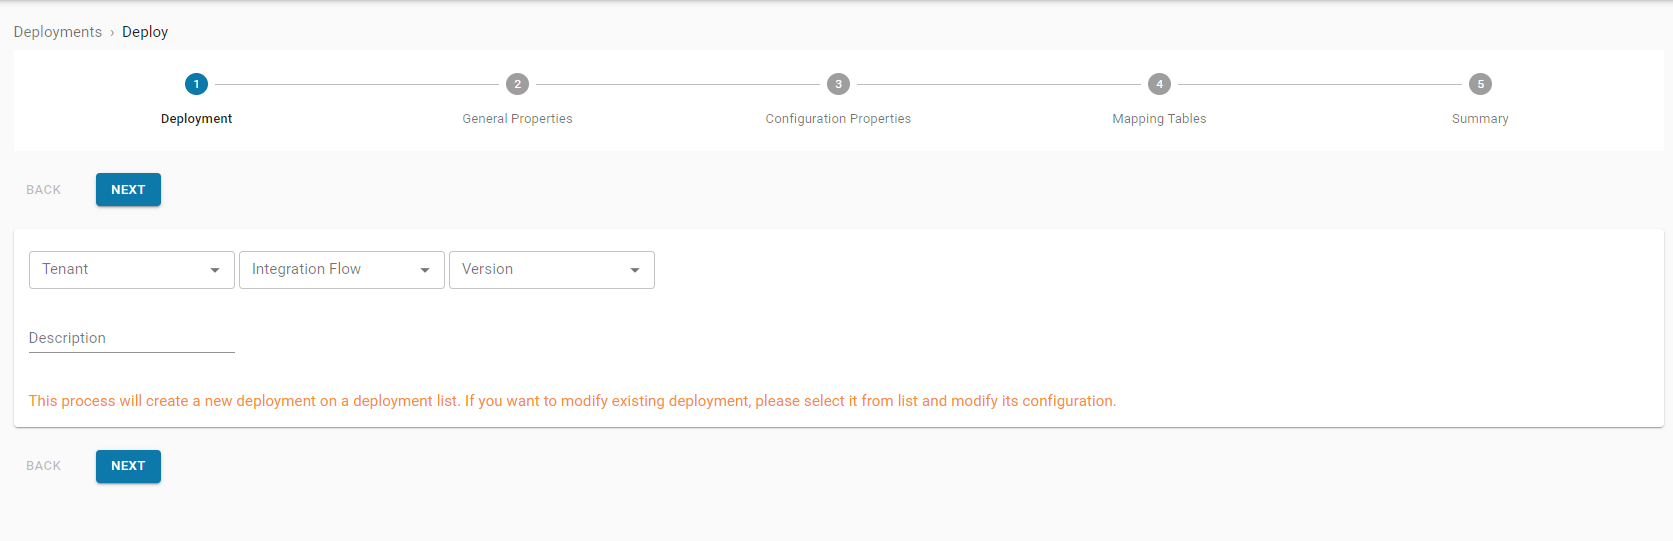
STEP 1: General deployment information
On the first step the user will be asked to select a tenant (only on admin tenant), Integration Flow and the version of the Integration Flow and description (optional) for the deployment:
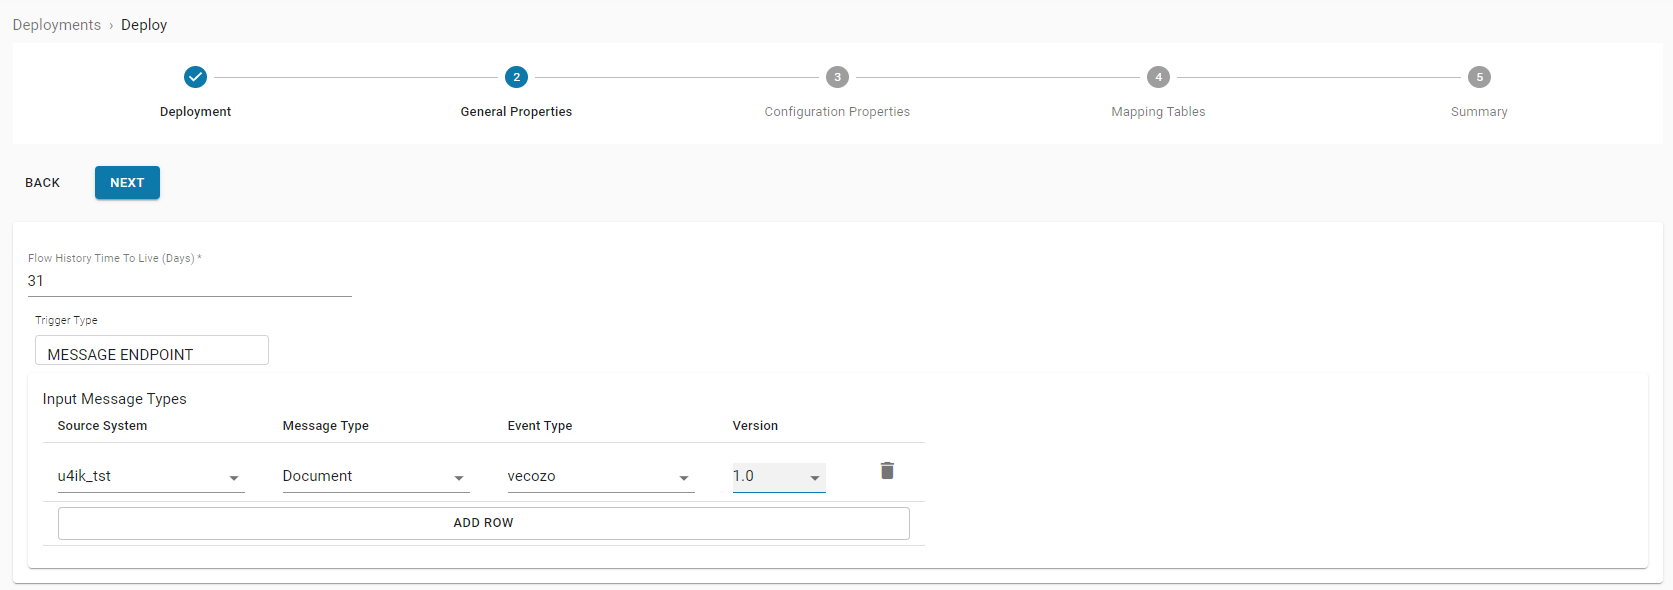
STEP 2: General properties
Next step is to set Flow History Time To Live (TTL) in days and depends on trigger type:
- security for HTTP_ENDPOINT
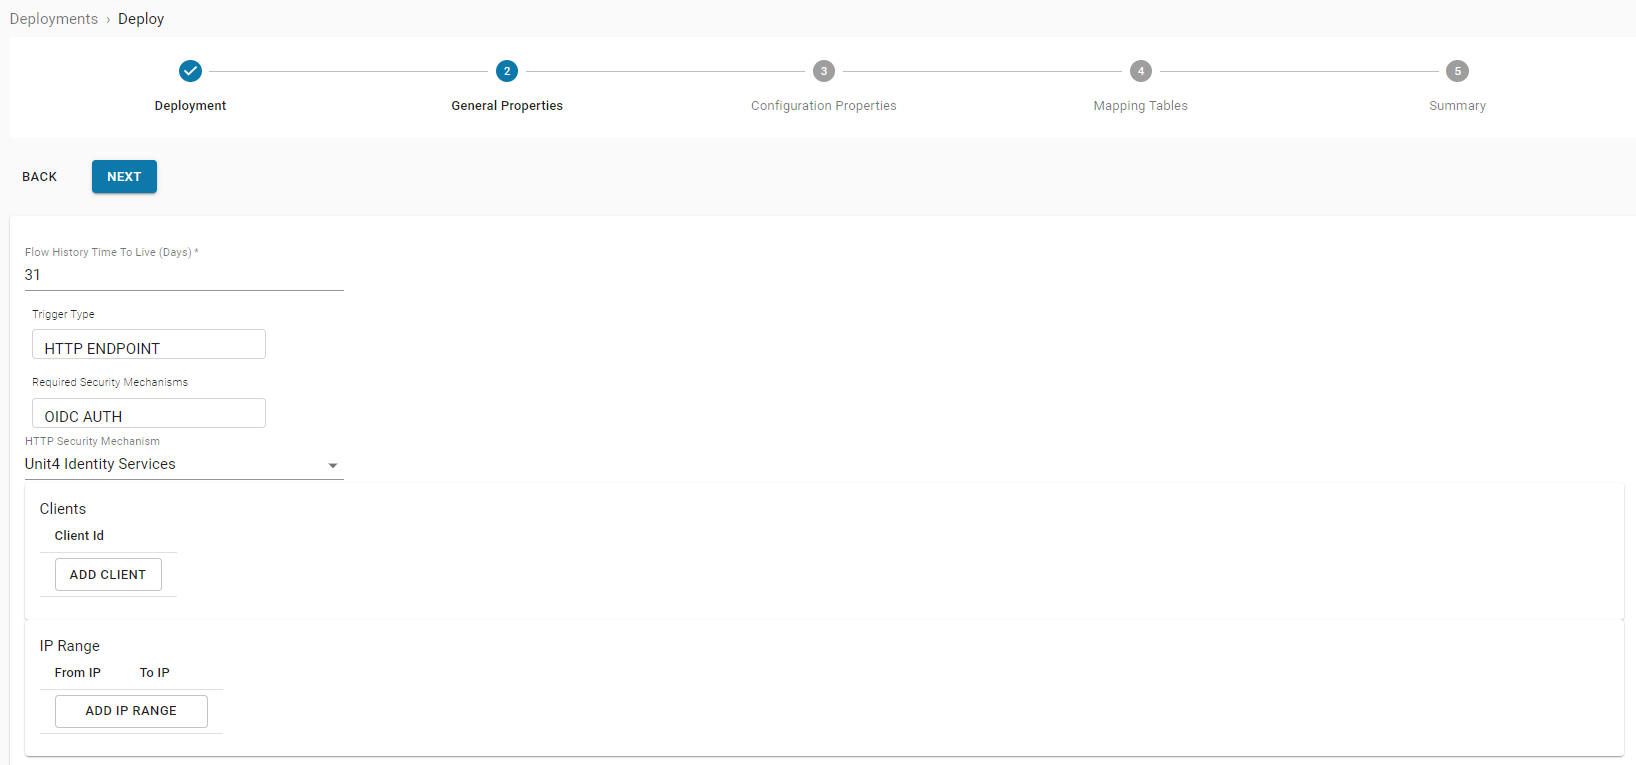
- Input message types for MESSAGE_ENDPOINT (which must correspond to the events defined in Message HUB)
STEP 3: Configuration properties
The third wizardframe of the deployment will be rendered dynamically based on the configuration properties that were set in the Integration Flow Configuration Propeties metadata. More detailed information about Configuration Properties can be found in Configuration Properties Metadata and Using Configuration Properties Controls are correspondent with the property's: - type - for example a boolean is presented as a checkbox, a password field with mask, an integer with counter control and a dropdown with a selection control. Example of type "DROPDOWN":
json
  {
      "name": "property_Dropdown",
      "type": "DROPDOWN",
      "allowedValues": ["test1","test2","test3"],
      "displayName": "property dropdown",
      "description": "property dropdown description"
  }

- display name - the label of the configuration property is presented according to its display name;
- default value - if a default value is configured for the property, this value is presented by default.
json
  {
      "name": "propertyInteger",
      "type": "INTEGER",
      "displayName": "property integer",
      "defaultValue": 2,
      "description": "property integer description",
      "min": 1,
      "max": 3
    }
As you can see in the image below, the default value 2 for property integer has been pre-filled according to defaultValue of property "propertyInteger"; - description - the description of the configuration property will be presented as a tooltip. Notice that the description of the integer property is shown as a tooltip:

Configuration properties values will be validated.

When all configuration values are set correctly you can proceed to the next step
STEP 4: Mapping tables
Next step in the deployment stepper is defining possible mapping table(s) for the Integration Flow. More detailed information about Mapping tables can be found in Mapping Table Definitions and Using Mapping Tables.
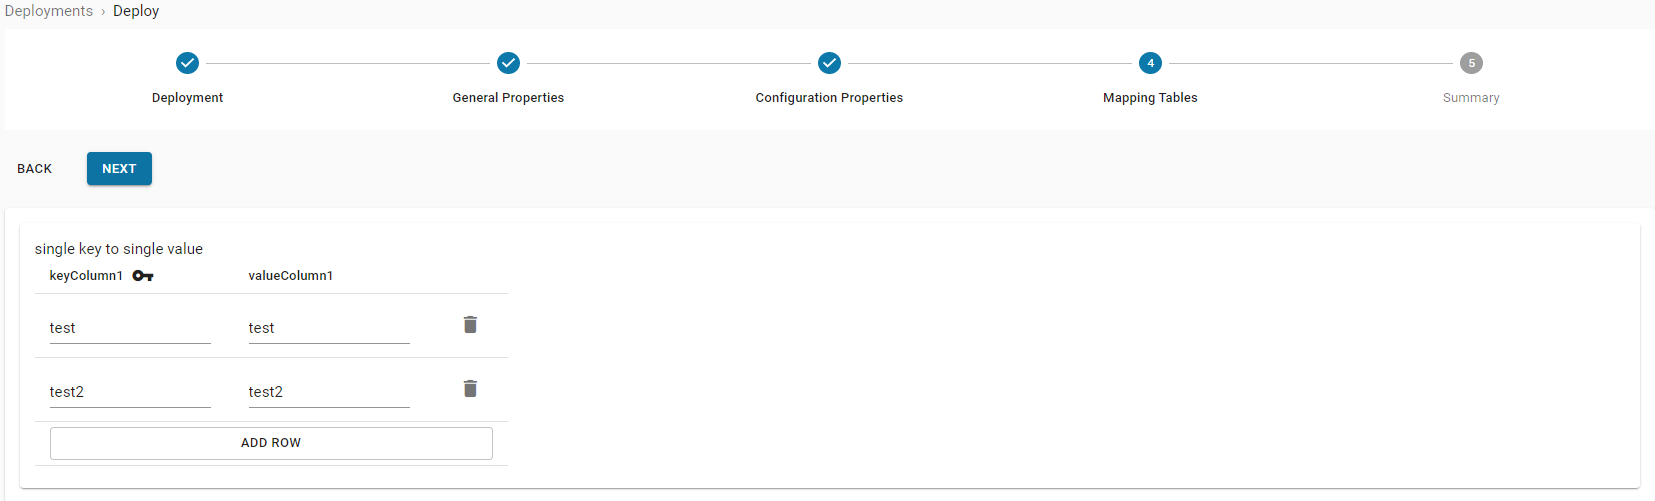
If no mapping tables are defined for the Integration Flow this step can be skipped.
STEP 5: Summary
Finally the deployment can be created by clicking Deploy:

Modify existing deployment
To modify existing deployment you need to select deployment from deployment list. And then click configure
Deployment modification stepper looks jus like the one for deployment creation In first step you can change integration flow version used in this deployment. Rest of fields will be prefilled with values from existing deployment. In case of change version only fields for which name match will be prefilled from existing deployment.