
Private Key JWTs
The OpenID Connect specification recommends a client authentication method based on asymmetric keys. This is now supported by Unit4 Identity Services.
This guide will show you how to:
- Create a certificate and private key using openssl
- Create a Client in U4IDS with a PrivateKeySecret
- Create C# code that:
- Creates a JWT that we sign with the private key
- Send a token request to U4IDS with the JWT in the assertion body field
You can also find a sample Client here: Sample Client
The sample client is a Blazor app, and use the code shown in this QuickStart.
Create a test certificate and a private key
Let's generate a new test certificate (-x509) and a new private key (-newkey).
openssl req \
-x509 \
-newkey rsa:4096 \
-days 1024 \
-keyout test-key.pem \
-out test-cert.pem \
-subj "/C=NO/L=Oslo/O=U4IDS test cert/CN=U4IDSTest/emailAddress=test.user@unit4.com" \
-passout pass:"Secret pass phrase"
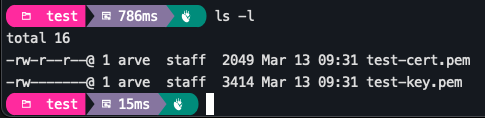
You should now have two new files:
We will also create a .pfx combining both the key and the cert into a single file:
openssl pkcs12 -inkey test-key.pem -in test-cert.pem \
-export -out test-pfx.pfx \
-passin pass:"Secret pass phrase" \
-passout pass:"Secret pass phrase"
NOTE: You can use -noenc instead of -passout if you don't want to use a pass phrase. If don't use a pass phrase for the req command, then you don't need the -passin parameter for the pkcs12 command.
Create a Client in U4IDS using Postman
We'll create a ClientCredentials client and use the certificate we just created as the value for the secret.
Create Client
Using Postman, create a ClientCredentials Client:
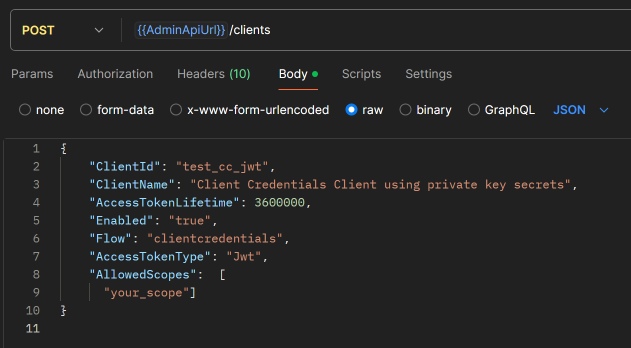
A SharedSecret is automatically generated when you create a ClientCredentials Client, but we want a PrivateKeySecret.
Add a PrivateKeySecret
The PrivateKeySecret can have one of these types:
- SharedSecret (default)
- X509CertificateBase64
- JWK
When working with secrets in C# code, use the string constants you find in the DTO.Constants.SecretType class from the U4.IdentityServices.DTO NuGet
In this example, we will use X509CertificateBase64.
Before we POST a new secret to our newly created Client, we need to base64 encode the certificate. Use your favourite tool, e.g. https://www.base64encode.org/. Note that you can open the test-cert.pem file as normal text and copy the content.
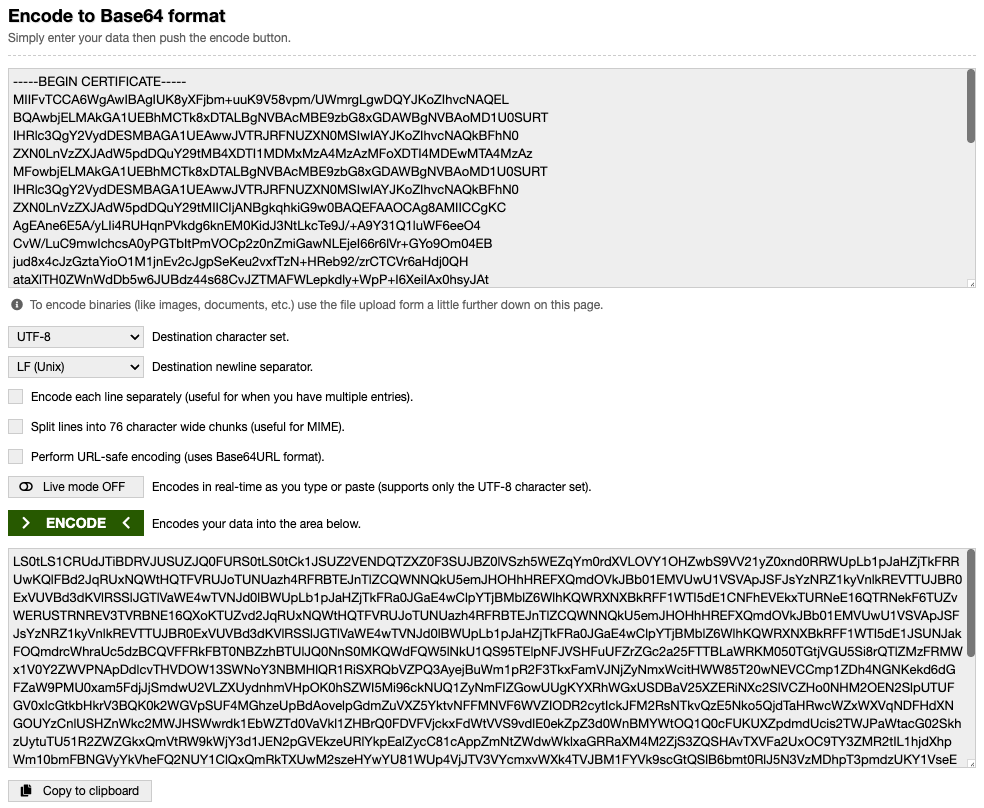
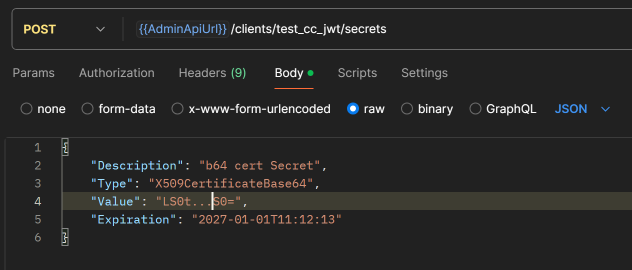
Then we POST a new secret with the base64 encoded certificate as the value:
Make a Token request using a private key JWT
When you send a token request to Unit4 Identity Servcies, you either use a shared secret or you can use a signed JWT. Previously, U4IDS only supported the first method, but the OpenID Connect specification recommends a client authentication method based on asymmetric keys. With this approach, instead of transmitting the shared secret over the network, the client creates a JWT and signs it with its private key. In U4IDS, we then only need to store the corresponding public key to be able to validate the signature.
Below, we show how this can be done using C# and NuGet packages from Microsoft and Duende.
First we create some SigningCredentials. For this, we need the .pfx file we created earlier. Here is an example of a method that creates the SigningCredentials you need:
public static async Task<SigningCredentials> CreateCredAsync(IBrowserFile? pfxBrowserFile, string passPhrase)
{
    ArgumentNullException.ThrowIfNull(pfxBrowserFile);

    await using var stream = pfxBrowserFile.OpenReadStream();
    using var memoryStream = new MemoryStream();
    await stream.CopyToAsync(memoryStream);
    var certData = memoryStream.ToArray();

    var cert = new X509Certificate2(certData, passPhrase);
    return new SigningCredentials(new X509SecurityKey(cert), SecurityAlgorithms.RsaSha256);
}
With the SigningCredentials, we can create the JWT:
var token = new JwtSecurityToken(
    clientId,
    audience,
    new List<Claim>()
    {
        new(JwtClaimTypes.JwtId, Guid.NewGuid().ToString()),
        new(JwtClaimTypes.Subject, clientId),
        new(JwtClaimTypes.IssuedAt, now.ToEpochTime().ToString(), ClaimValueTypes.Integer64)
    },
    now,
    now.AddMinutes(1),
    credential
);

var tokenHandler = new JwtSecurityTokenHandler();
var clientToken = tokenHandler.WriteToken(token);
In the code above, the credential variable is of type SigningCredentials. To get the audience, we use the Duende.IdentityModel NuGet. It has an extension method for getting the discovery document:
var disco = await httpClient.GetDiscoveryDocumentAsync(idsUrl);
With the discovery document, we have the issuer, and the issuer is the audience in the JwtSecurityToken.
We can now use another extension method in Duende.IdentityModel to send the token request:
var response = await httpClient.RequestClientCredentialsTokenAsync(new ClientCredentialsTokenRequest
{
    Address = disco.TokenEndpoint,

    ClientAssertion =
    {
        Type = OidcConstants.ClientAssertionTypes.JwtBearer,
        Value = clientToken
    },

    Scope = scope
});
If the response is successful, it contains the access token:
if (response.IsError)
{
    WriteMessage(response.ErrorDescription??response.Error??"");
}
if (response.AccessToken is null)
{
    WriteMessage("Failed to get access token");
    return;
}

WriteMessage($"Access token returned from IDS: {response.AccessToken}");
(the response is of type Duende.IdentityModel.Client.TokenResponse)
You now have what you need to get an access token using a JWT.