
Unit4 Identity Services Portal
You can administer Unit4 Identity Services (U4IDS) with the U4IDS Portal, where you log in and configure a specific U4IDS installation through the public U4IDS API.
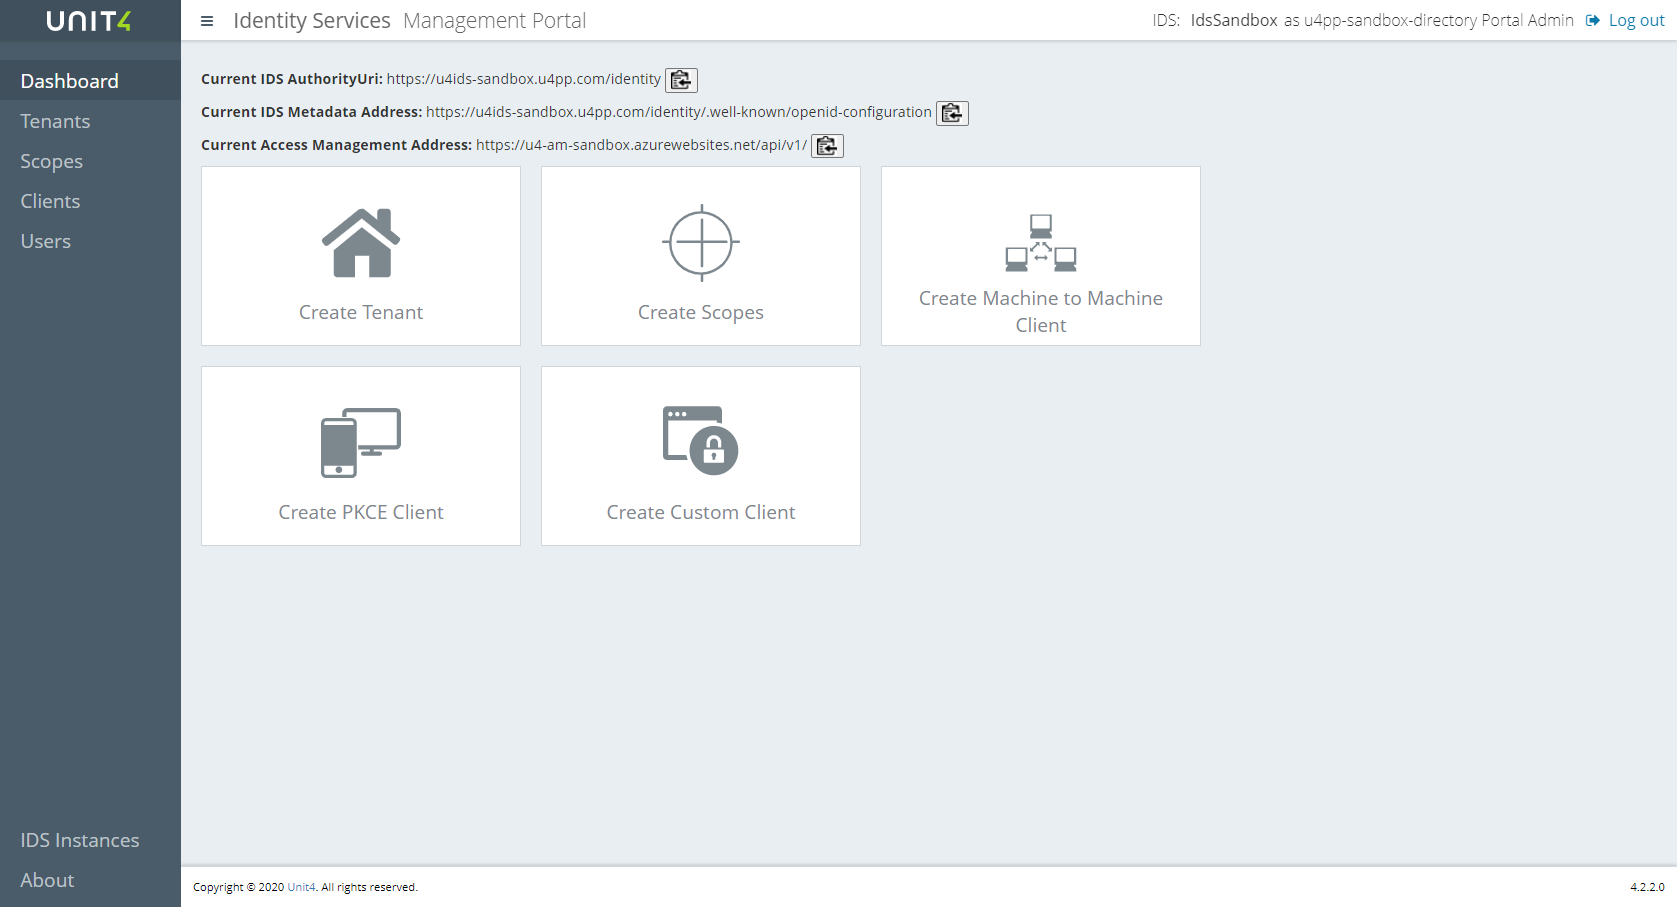
The Portal allows you to configure:
- Clients (list of applications that are allowed to authenticate using U4IDS)
- Tenants (defines external Identity Providers)
- Secrets for clients and scopes (optional)
- Users in Access Management
- New IDS Instances
Access
To log in to a specific U4IDS service you first must be a valid user for the Portal Admin Tenant specified in the configuration or the specific Tenant you are logging in to. An Access Management service must be configured for the U4IDS service in order to use the Portal. When a user is authenticated in the Portal but has no access in Access Management, an access request is sent and an administrator can either accept or reject the request. The Access Management service provides three basic roles - Owner, Contributor and Reader. The Owner has complete access and lets you also administer other users in the system. The Contributor has complete access but can't administer users. The Reader only read access.
See https://thehub.unit4.com/docs/access-management for more information.
Portal Admin
When you log in to the portal you choose the configured IDS that you want to administer and then choose what Tenant (organization) you want to log in to. If you log in to the "Administrator Tenant" you will have access to all Scopes, Clients and Tenants in that IDS instance. You can also choose what Tenants people should be able to log in to and invite users that should administer them.
Tenant Admin
If you log in to a specific Tenant and have the Owner role you will be a Tenant administrator and will be able to add users and clients to this Tenant. If you log in as a Contributor you will be able to add clients to the Tenant and if you log in as a Reader you can only see Tenant specific information.
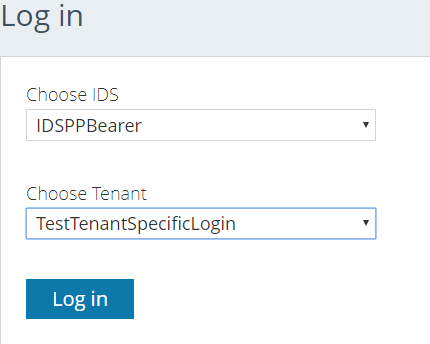
As soon as you try to log in to something you don't have access to, you will be prompted to send an access request with your preferred role (Owner, Contributor, Reader). It's then up to the Administrators (Owners) to either accept or deny your access request.
Actions
When you choose Tenants, Scopes, Clients or Users in the left menu you will get a list of all items that you have access to. If you select an item in the list, you will see the details of that item and buttons for the actions you can take on it. The complete list of actions consists of Edit, Delete, History, Secrets and Back but it can look a little different depending on that type of item it is or the type of access you have.
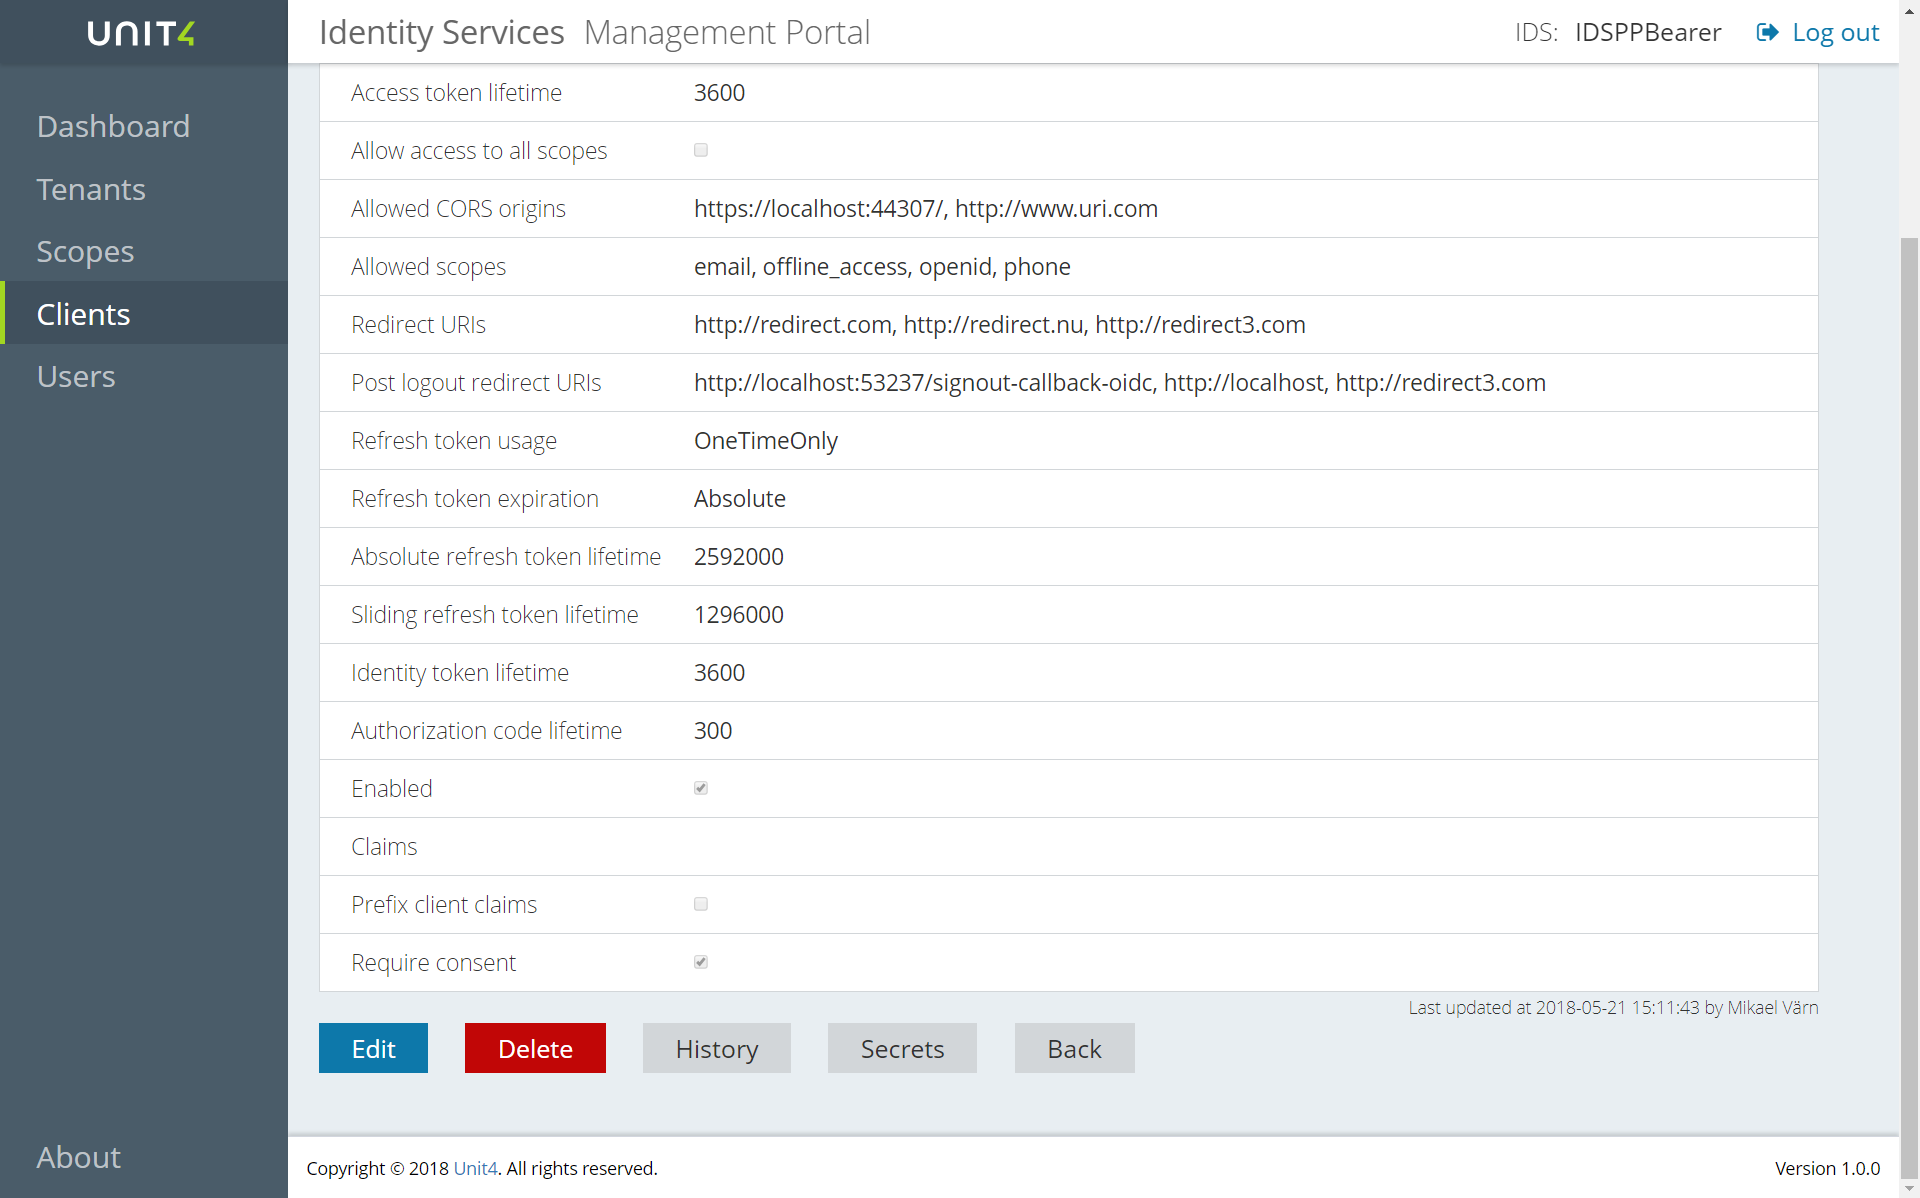
- Edit is used to edit the item and gives you a window that looks like the Create window.
- History shows you a list of all the changes that have been done on the item. If you press the + sign after the row you will see the object as it was saved in the database.
- Secrets shows you a list of the secrets that have been created for the item. It does not show you the secret value as that must be hidden. You can also add a new secret to the list. You will see the description and expiry date and you will have an action menu with the possibility to delete the secret.
- Delete lets you delete the item.
- Back lets you return to the previous screen.
Clients
In the portal the Clients are divided into Machine To Machine clients that will use the Client Credentials flow, Proof Key for Code Exchange Flow or PKCE (pronounced pixie) type client that is the recommended choice for any user centric login. Implicit Clients that will use the Implicit Flow, Hybrid Clients that can use the Hybrid or the Authorization code flows and Custom clients that use Custom flow with either user-impersonation or claims-upgrade as Allowed Custom Grant Type. All client types except for Implicit clients and PKCE clients will create secrets by default. You can always create a new secret using the Secret action in the list, but not for Implicit clients. If you don't create a secret for a PKCE client, you dont need to provide one but as soon as one is created it must be provided by the connecting client.
You can view deleted clients from a button above the client list.
See Configure Clients for more details on how to create and configure Clients.
Tenants
If you are a Portal Administrator, you can choose to make a tenant the "login Tenant". That means that you will be able to log in to the portal and only administer this tenant.
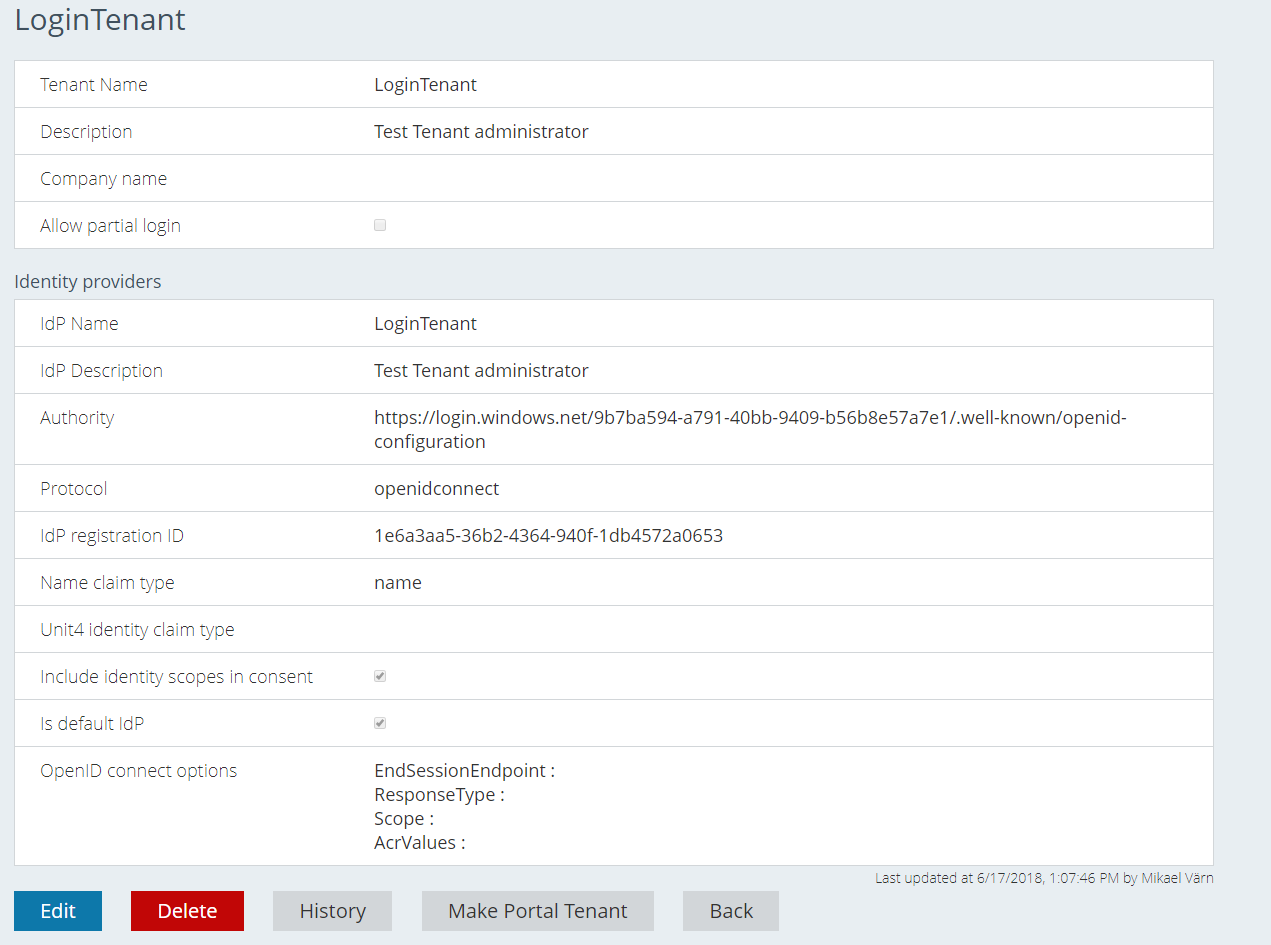
A Portal Administrator can either create users for this Tenant or invite users and accept their access requests.
One Tenant can have multiple IDPs. The default IDP will be the one with the lowest priority number. Tenants do not have the secrets action.
A Portal Administrator can view deleted Tenants from a button above the Tenant list.
Users
Users in the Portal could be invited manually or because of a user trying to log in to a specific IDS Service through the Portal. When a user that can be authenticated by the IDS, but does not have rights in Access Management tries to log, in a new user is created with the default role Reader and state pending. Then when users with the Owner role open the user list, they will see the new users with status pending and Approve and Reject buttons and can take action.
To invite a new user you choose the Invite new user button above the Users list. Then you only need their email address, and everything else will be fetched from their login attempt.
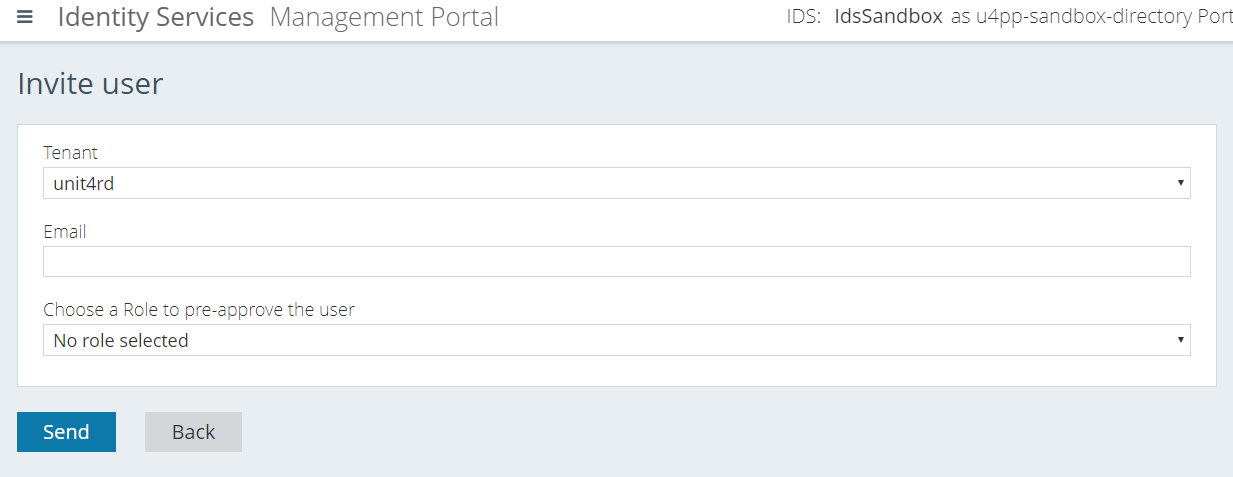
If you choose a role for the invite the user will be preapproved. The invite for the user will contain a code that can be used to gain access to the portal as long as the user's email claim is consistent with the email from the invite. If you don't choose a role in the invite, the user must select the chosen level of access (Owner, Contributor, Reader). An administrator then must approve the request before the user can log in. All users must be valid users in the IDP for the Tenant that they are trying to log in to. All users in the list could be edited or deleted in the action menu. So, you dont need to reject a user if you dont agree with the chosen level of access. You can just change it and approve. If you use the Approve or Reject button on user details AND if a SendGrid:EmailConfirmationService has been set up the user will get an email with the outcome of the request.
You can view deleted Users from a button above the Users list.
Approving or rejecting a pending user after he has requested access
After a user requests access, an administrator user may either approve or reject said request.
Requesting access
Access the portal and press the “Log in” button.
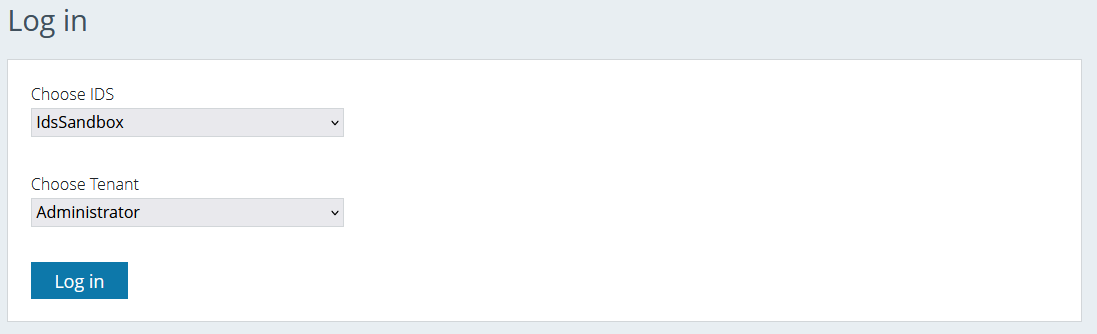
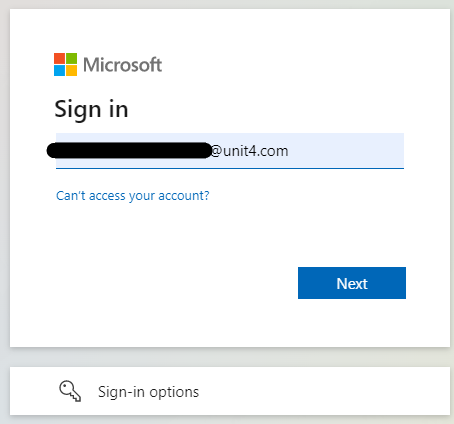
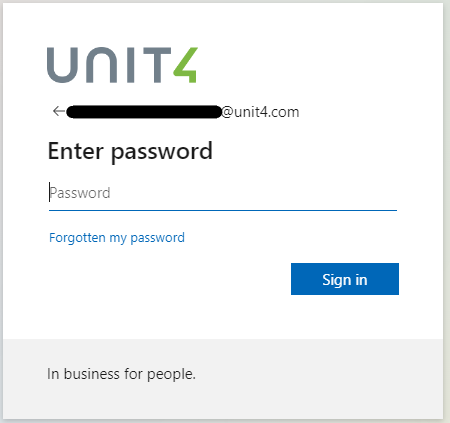
Insert your login credentials.
The access request screen now appears. Here, you can choose the desired level of access from the dropdown list. Once you’re happy with your choice, click the “Send access request” button.
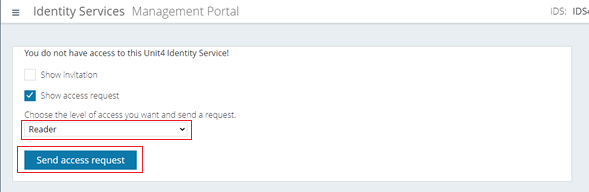
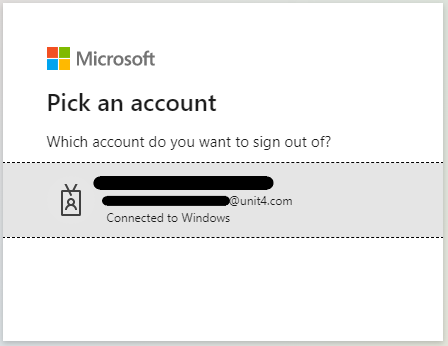
A log out screen now appears. Log out.
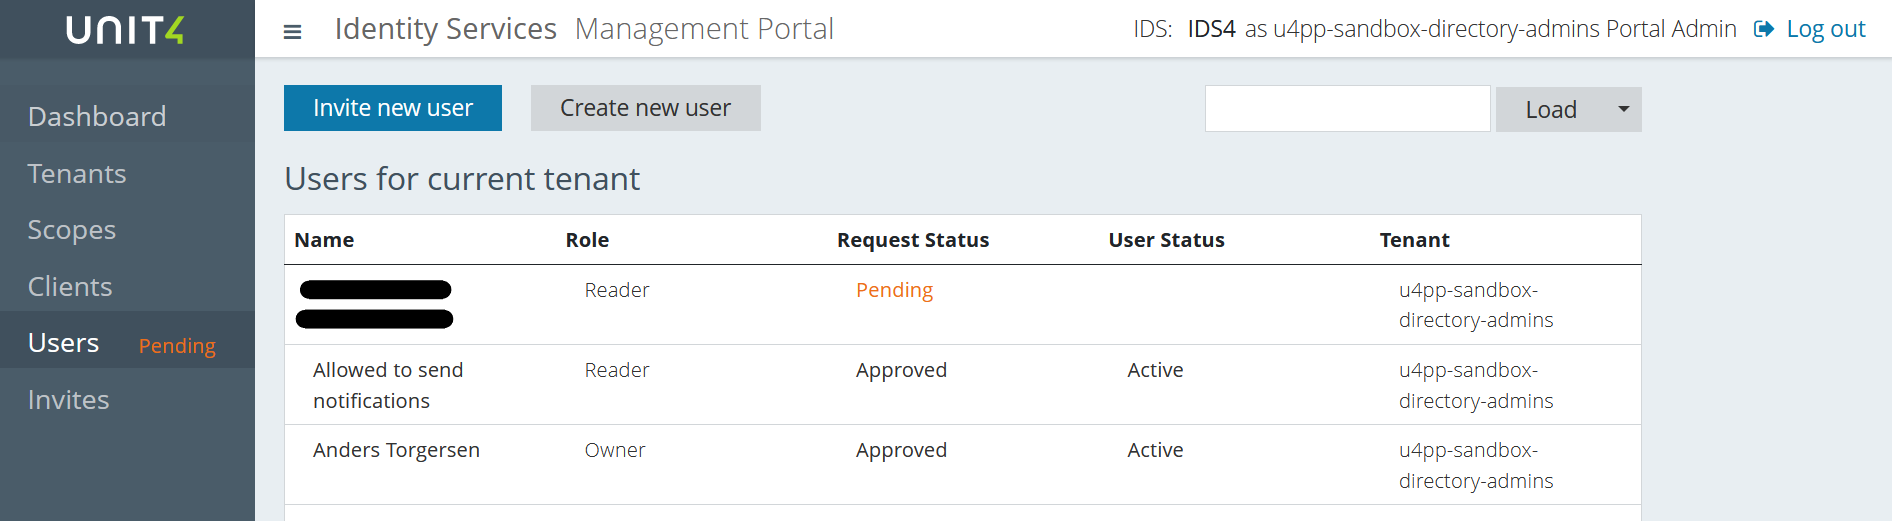
Accessing the pending user as an administrator user to approve or reject the request
Once logged in as an administrator user, you’ll see a notification saying "Pending" to the right of “Users” in the left menu. Click it.

Now, you’ll be able to see the user that is requesting the access in the "Users" screen.
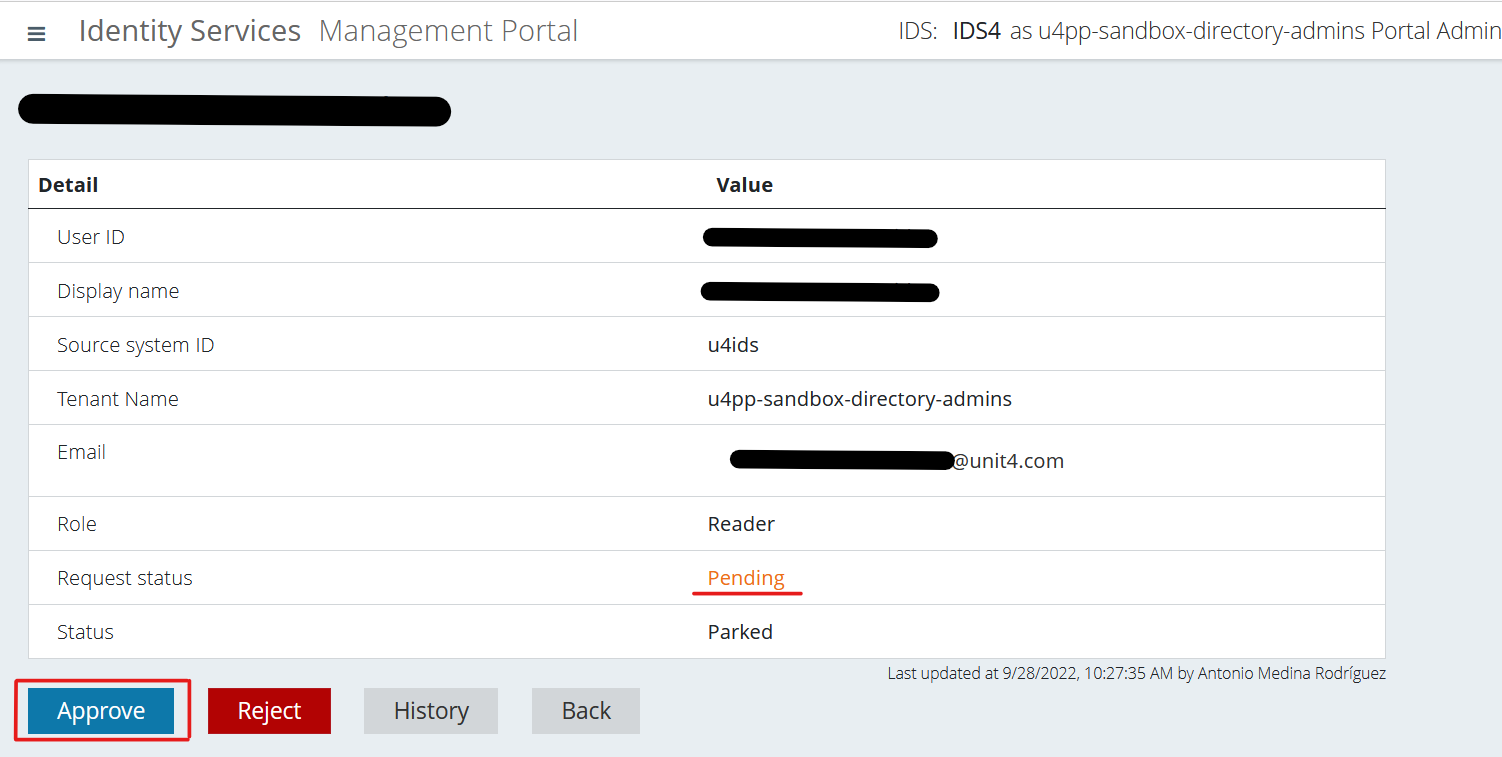
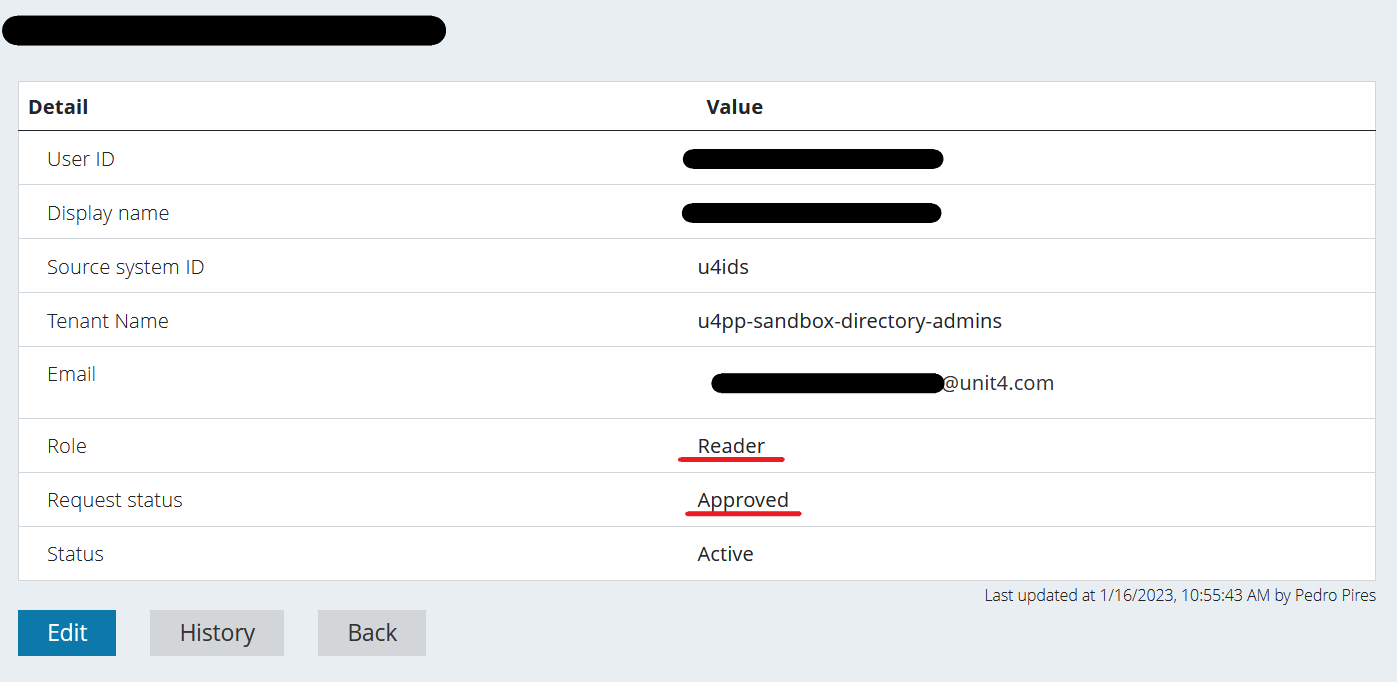
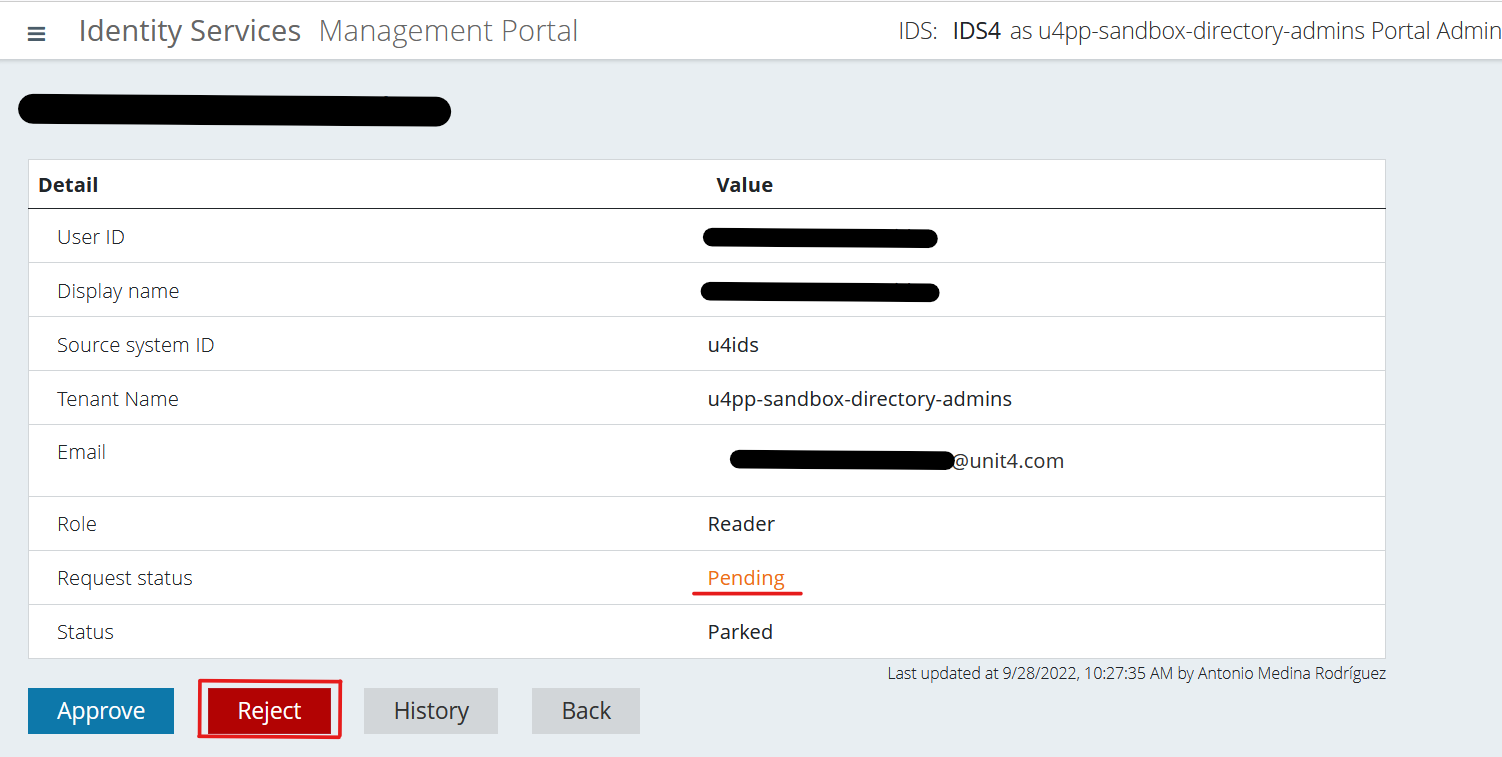
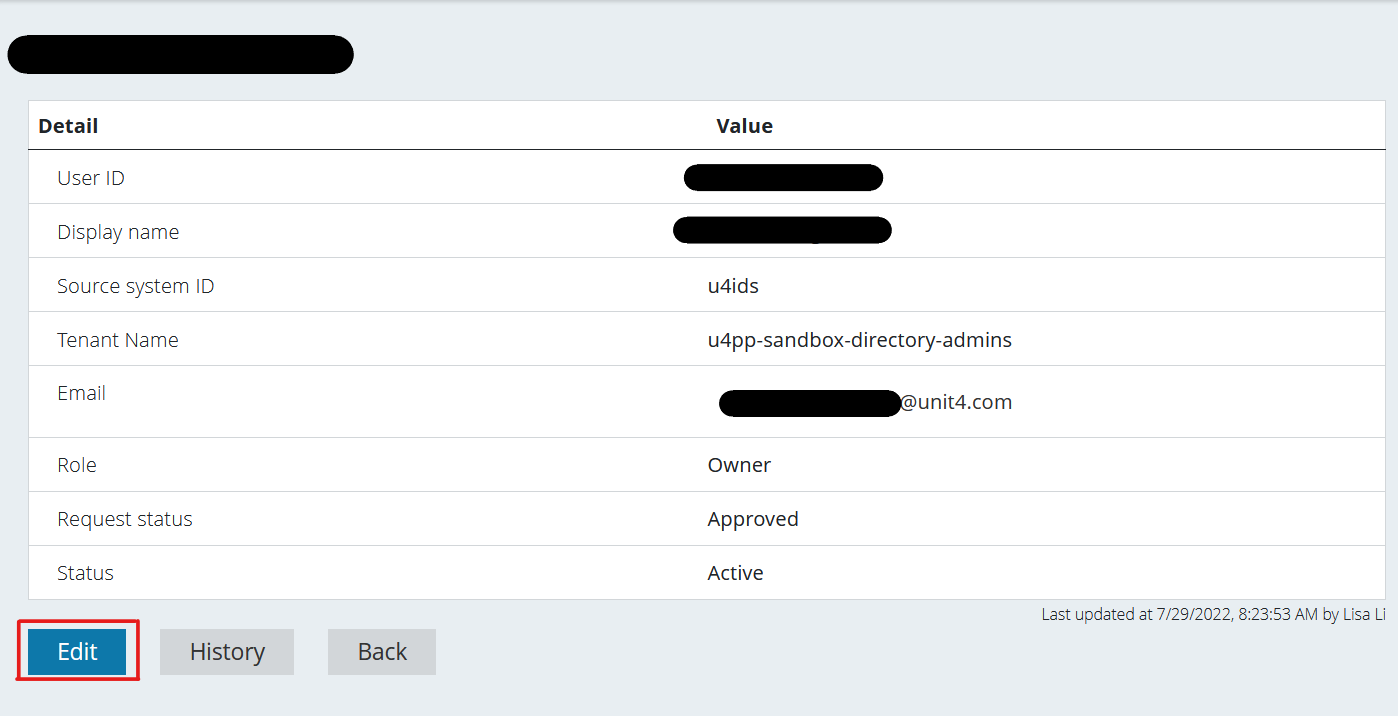
Select that user and you’ll be able to see their information. You’ll also see that the “Request status” is, as expected, "Pending". This is where you’ll be able to either approve or reject the user.
(1) Approve the user
Click on the “Approve” button.
You can now confirm that the user is approved both in the User details screen and the Users screen.

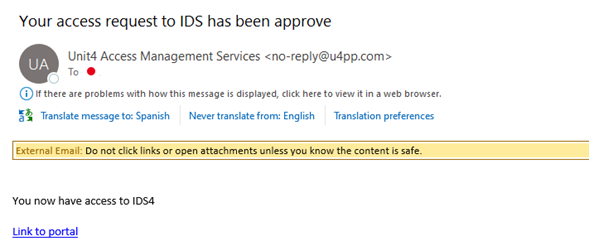
Once you've approved the user, a notification email is sent.
(2) Reject the user
Click on the “Reject” button.
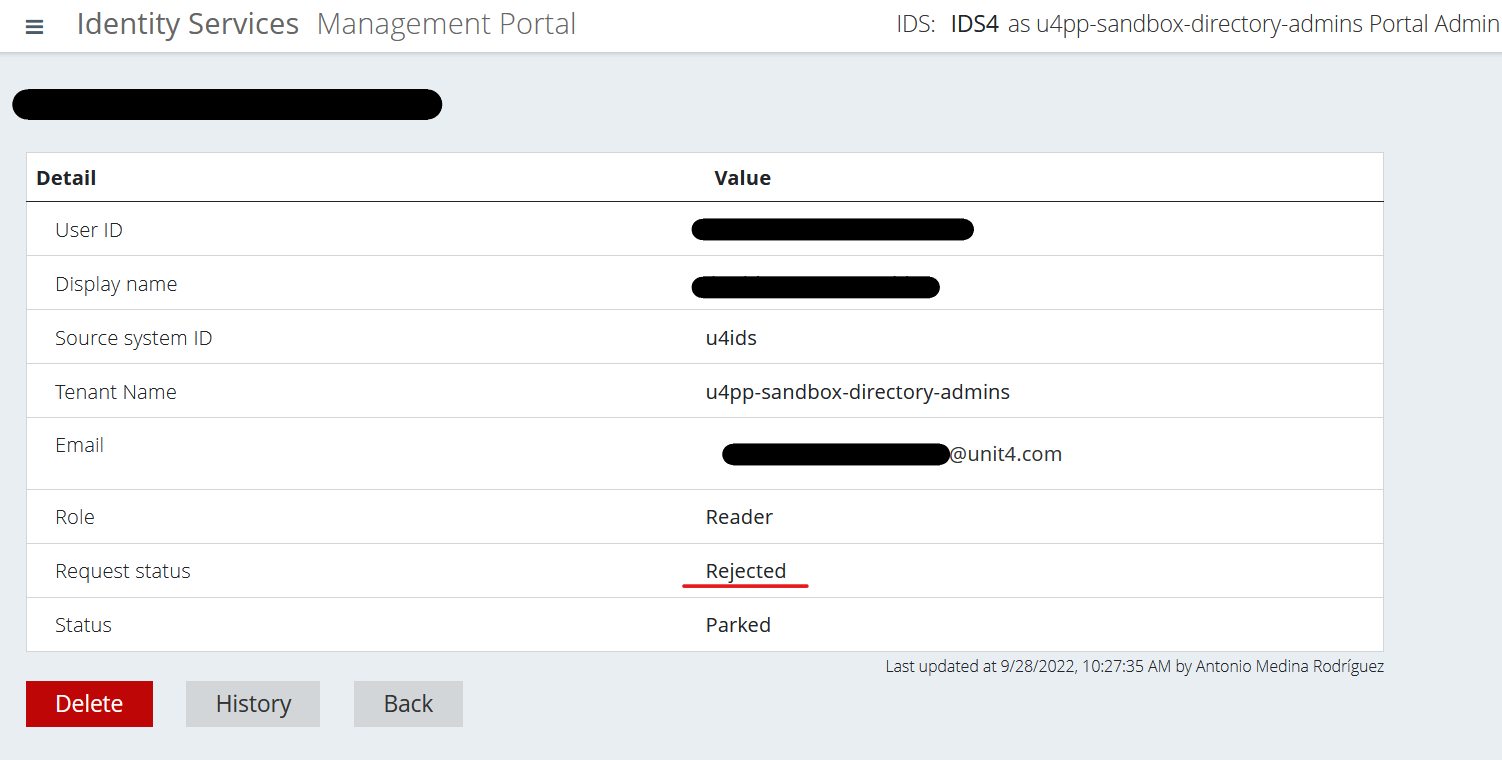
You can now confirm that the user is rejected both in the User details screen and the Users screen.

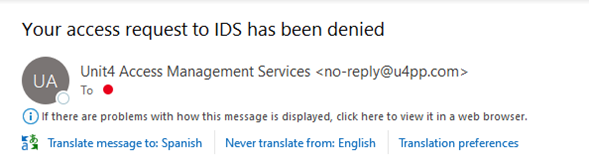
Once you've rejected the user, a notification email is sent.
Editing or deleting a user
As an Administrator user, you may also edit any user's information as well as delete any user. Here are the flows to do so:
Opening the user in question
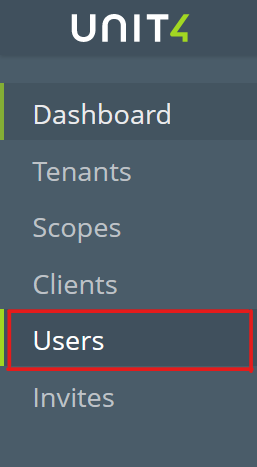
Click on "Users" on the left menu and choose the user you want to edit or delete.
Once that’s done, click the “Edit” button.
You’ll be redirected to this screen where you’ll be able to either - (1) edit the user’s information or - (2) delete it.
Also notice that the "Request Status" is not editable.
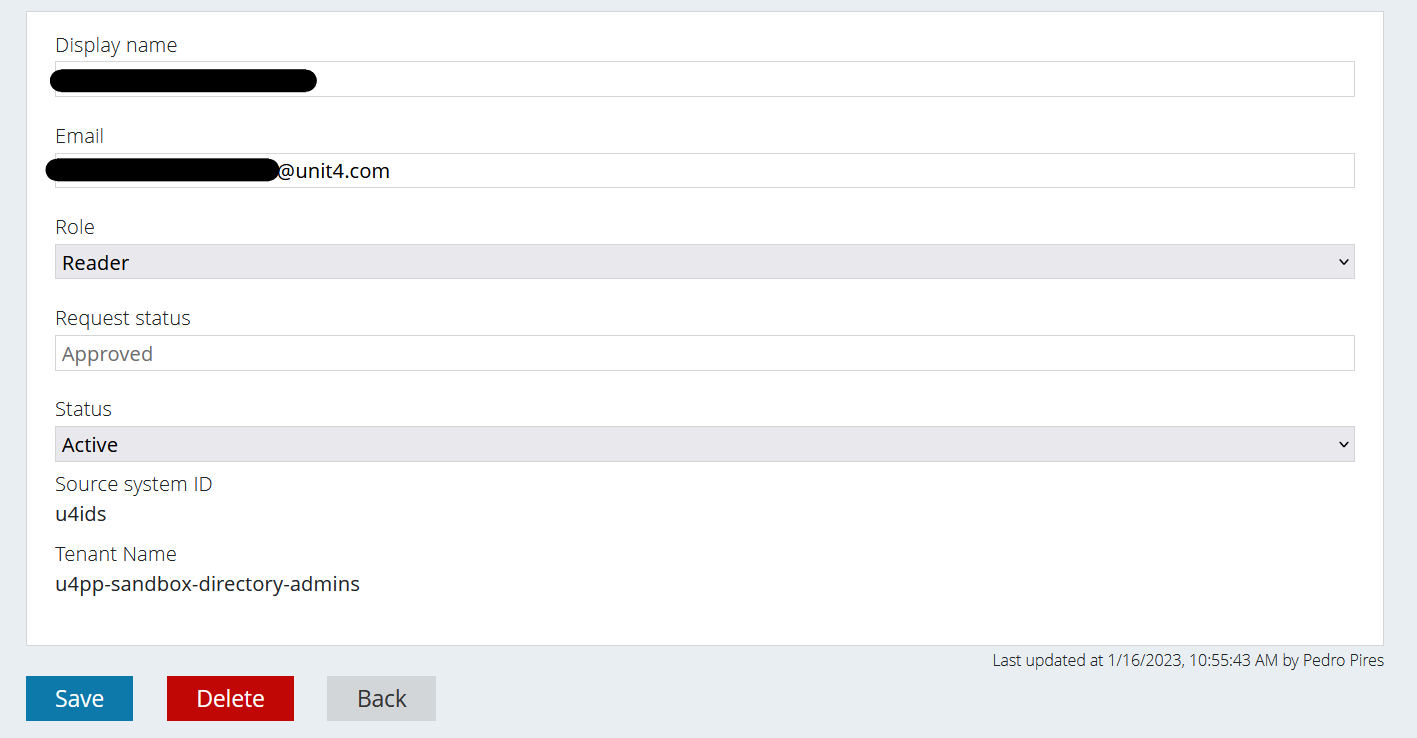
Editing the user (role)
The Role and the Status are dropdown lists for the Administrator users to choose from in case they want to change those values.
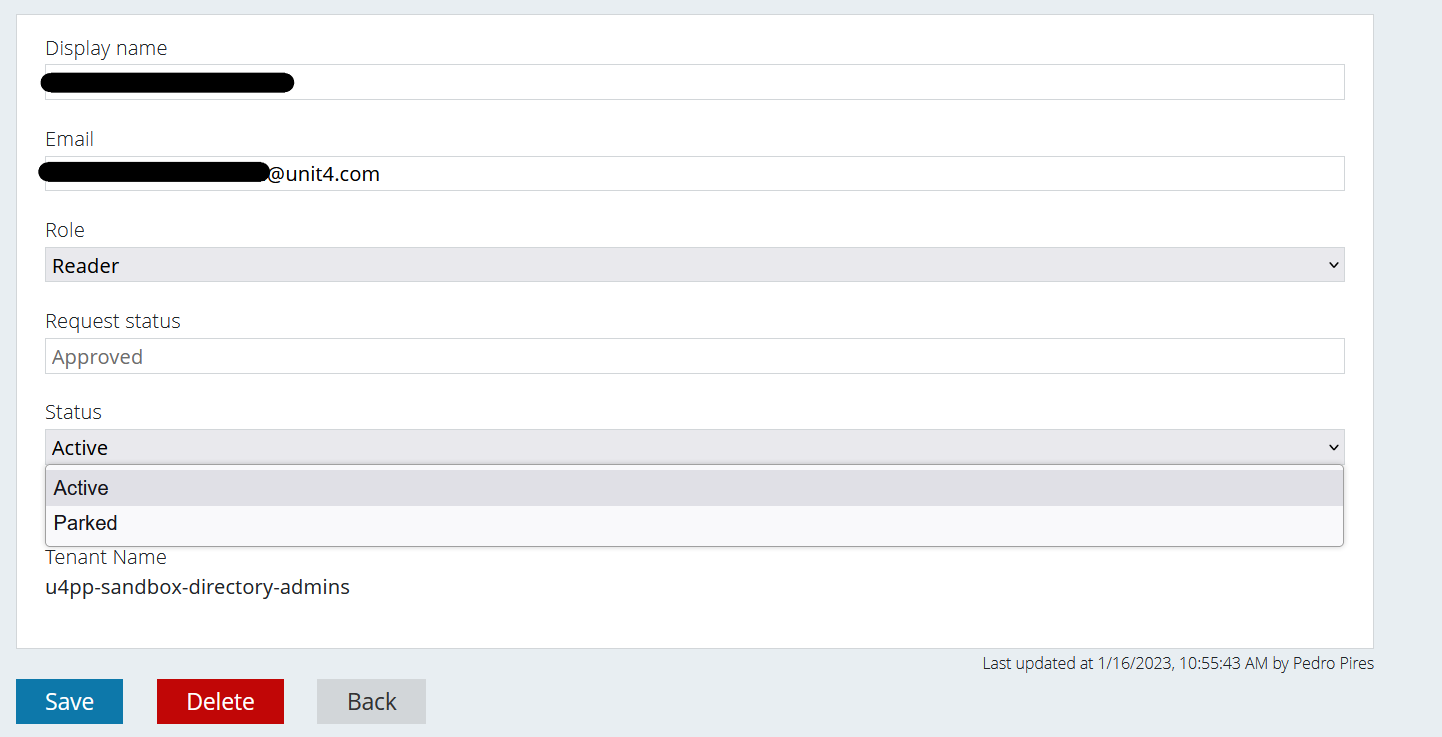
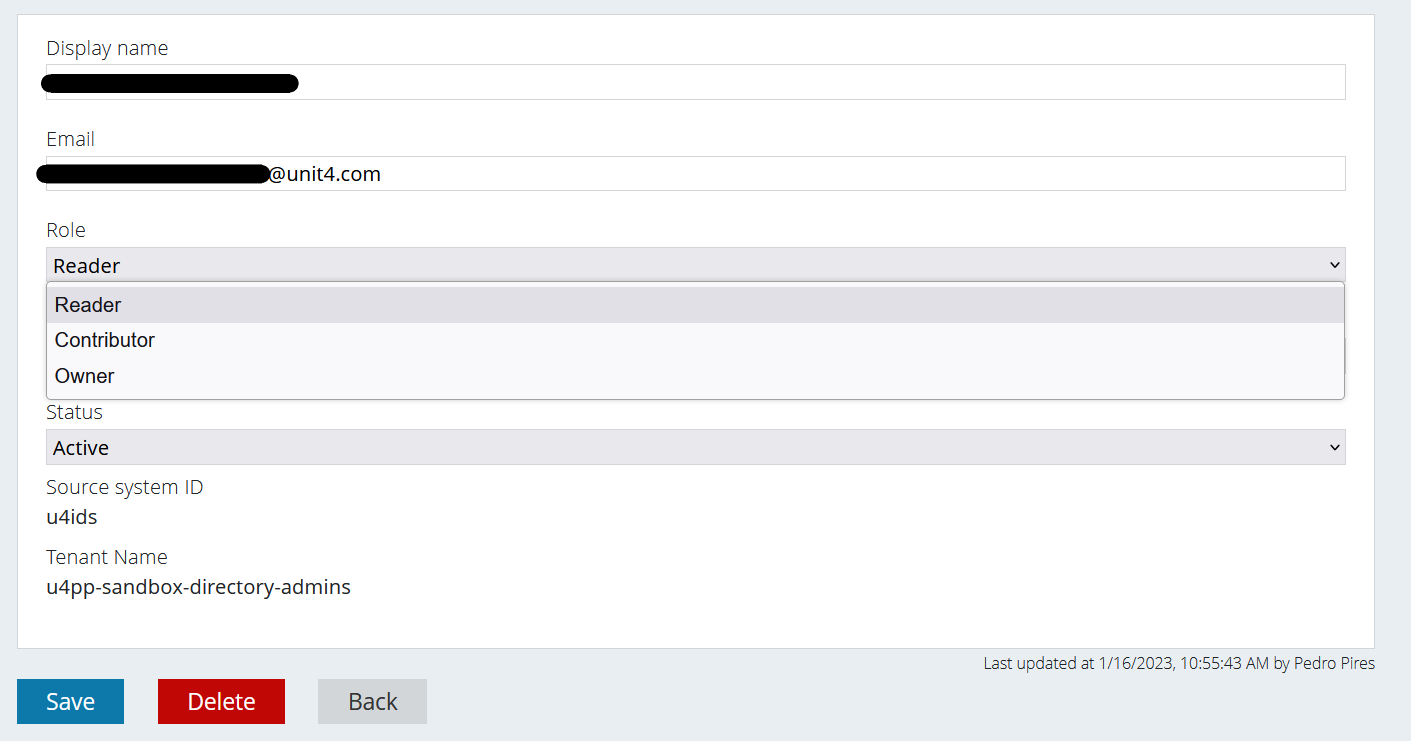
After you’ve made your changes, for example changing the Role from “Reader” to “Owner”, you must press the blue “Save” button. Once that’s done, the changes are visible:

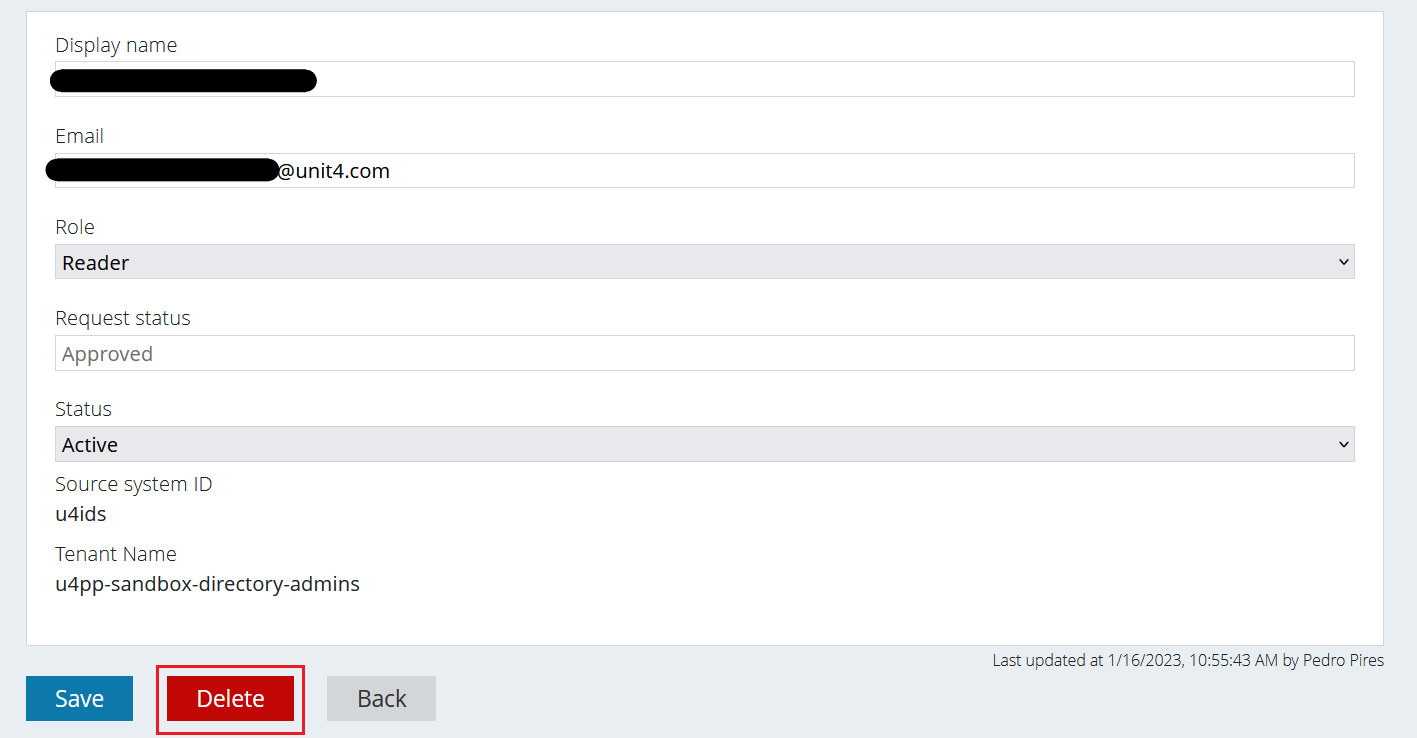
Deleting the user
From the same editing screen, you just press the “Delete” button.
Once you do, a pop-up appears for you to confirm your desired action:
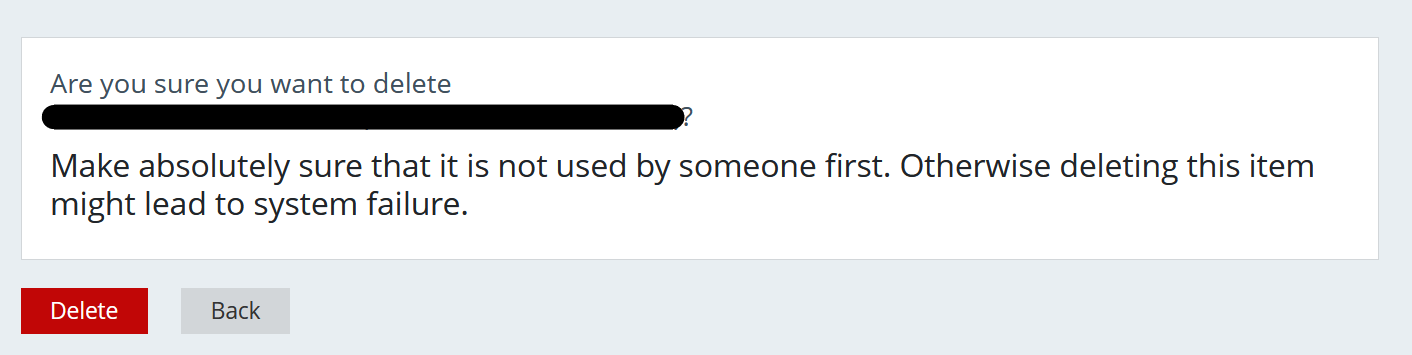
If you click the “Delete” button, the user is deleted.
Sessions
When you log in you will get a session that keeps the information from the login. When that session expires you will get a message that you don't have access and you will have to log in again.