Quick start guide
About this guide
This guide gives an overview of the main features of Extension Kit and helps you get started with building custom flows. The following topics are covered:
- Extension Kit basic concepts
- What you can do with Extension Kit
- How to log in to your Extension Kit account
- An Extension Kit example: Automating employee welcome
Extension Kit basic concepts
Extension Kit flows (flows)
A flow consists of a trigger, an optional filter on the data contained in the Trigger event, and a sequence of one or more actions. When a Trigger event is received the flow is initiated, and based on any filter present, the flow’s actions are executed in the order defined in the flow.
For more information, see Adding flows.
Trigger
A trigger is a step within the Extension Kit flow that is based on external input and is responsible for generating events that will initiate flows.
See Triggers for more information about the supported triggers.
Actions
An action is a step within the Extension Kit flow that accepts an input, processes the data and returns some output back to the same flow.
See Actions for more information about the supported actions.
Ava
Ava is the Unit4 digital assistant that helps you take care of your most routine Unit4 ERP tasks. Ava works with Microsoft Teams, Skype and Slack. See the Ava implementation guide for more details.
Users and roles
The available Extension Kit roles and their access rights are shown below:
| Role | Read flows | Troubleshoot | Create | Edit | Add Users | Manage rights |
|---|---|---|---|---|---|---|
| Reader | X | X | ||||
| Contributor | X | X | X | X | ||
| Owner | X | X | X | X | X | X |
What you can do with Extension Kit
Extension Kit lets you extend the Unit4 ecosystem with new capabilities through new apps. The range of use cases it covers is broad and will grow as we add more functionality. With Extension Kit you can:
- Automate repetitive work routines
- Move information between applications and services
- Create custom apps
- Create custom chatbots
- Automatically send notifications
Build a flow from scratch
Our low-code capabilities let you quickly build flows that meet your needs without having to write complex code.
Work with experts to build a custom flow
If you need help building or designing an Extension Kit flow, or you do not have the resources to do it in-house, then you can contact Unit4 Professional Services or any of Unit4’s technology partners. They will deliver your requirements and can help you extend the Unit4 functionality with custom add-ons.
Log in to your Extension Kit account
You can access the Extension Kit portal upon request. When a new customer environment is connected to Extension Kit, a customer email account is required. This user will be the owner of the portal and is able to invite new users.
IDS authentication
Authentication happens through Unit4 Identity Services (IDS). This means that a user must be registered in the system to be able to gain access.
URL
Unit4 Extension Kit is a multitenant service, and as such the customer’s environment name or tenant must be specified when accessing the portal. The URL structure looks like this:
https://root/tenant/TenantName
Where TenantName must be replaced with the short name identifier of the customer environment.
Extension Kit portal
The Extension Kit portal allows you to (depending on role):
- Add flows
- Read flows
- Edit flows
- Check the flow history and troubleshoot
- Create and publish custom apps using App Studio
- Define parameters
- Create and manage users
- Upload SSL certificates
- Define SFTP connections
- Inspect the usage statistics
Extension Kit example: Automating employee welcome
Plan your flow
Before you start the development work you must:
- Identify the business processes that you want to extend, automate or integrate
- Outline the data that each process is based on
Welcome message flow
You are an HR worker that sends a welcome email to each new employee with a warm welcome message, useful information and links.
The process typically looks something like this:
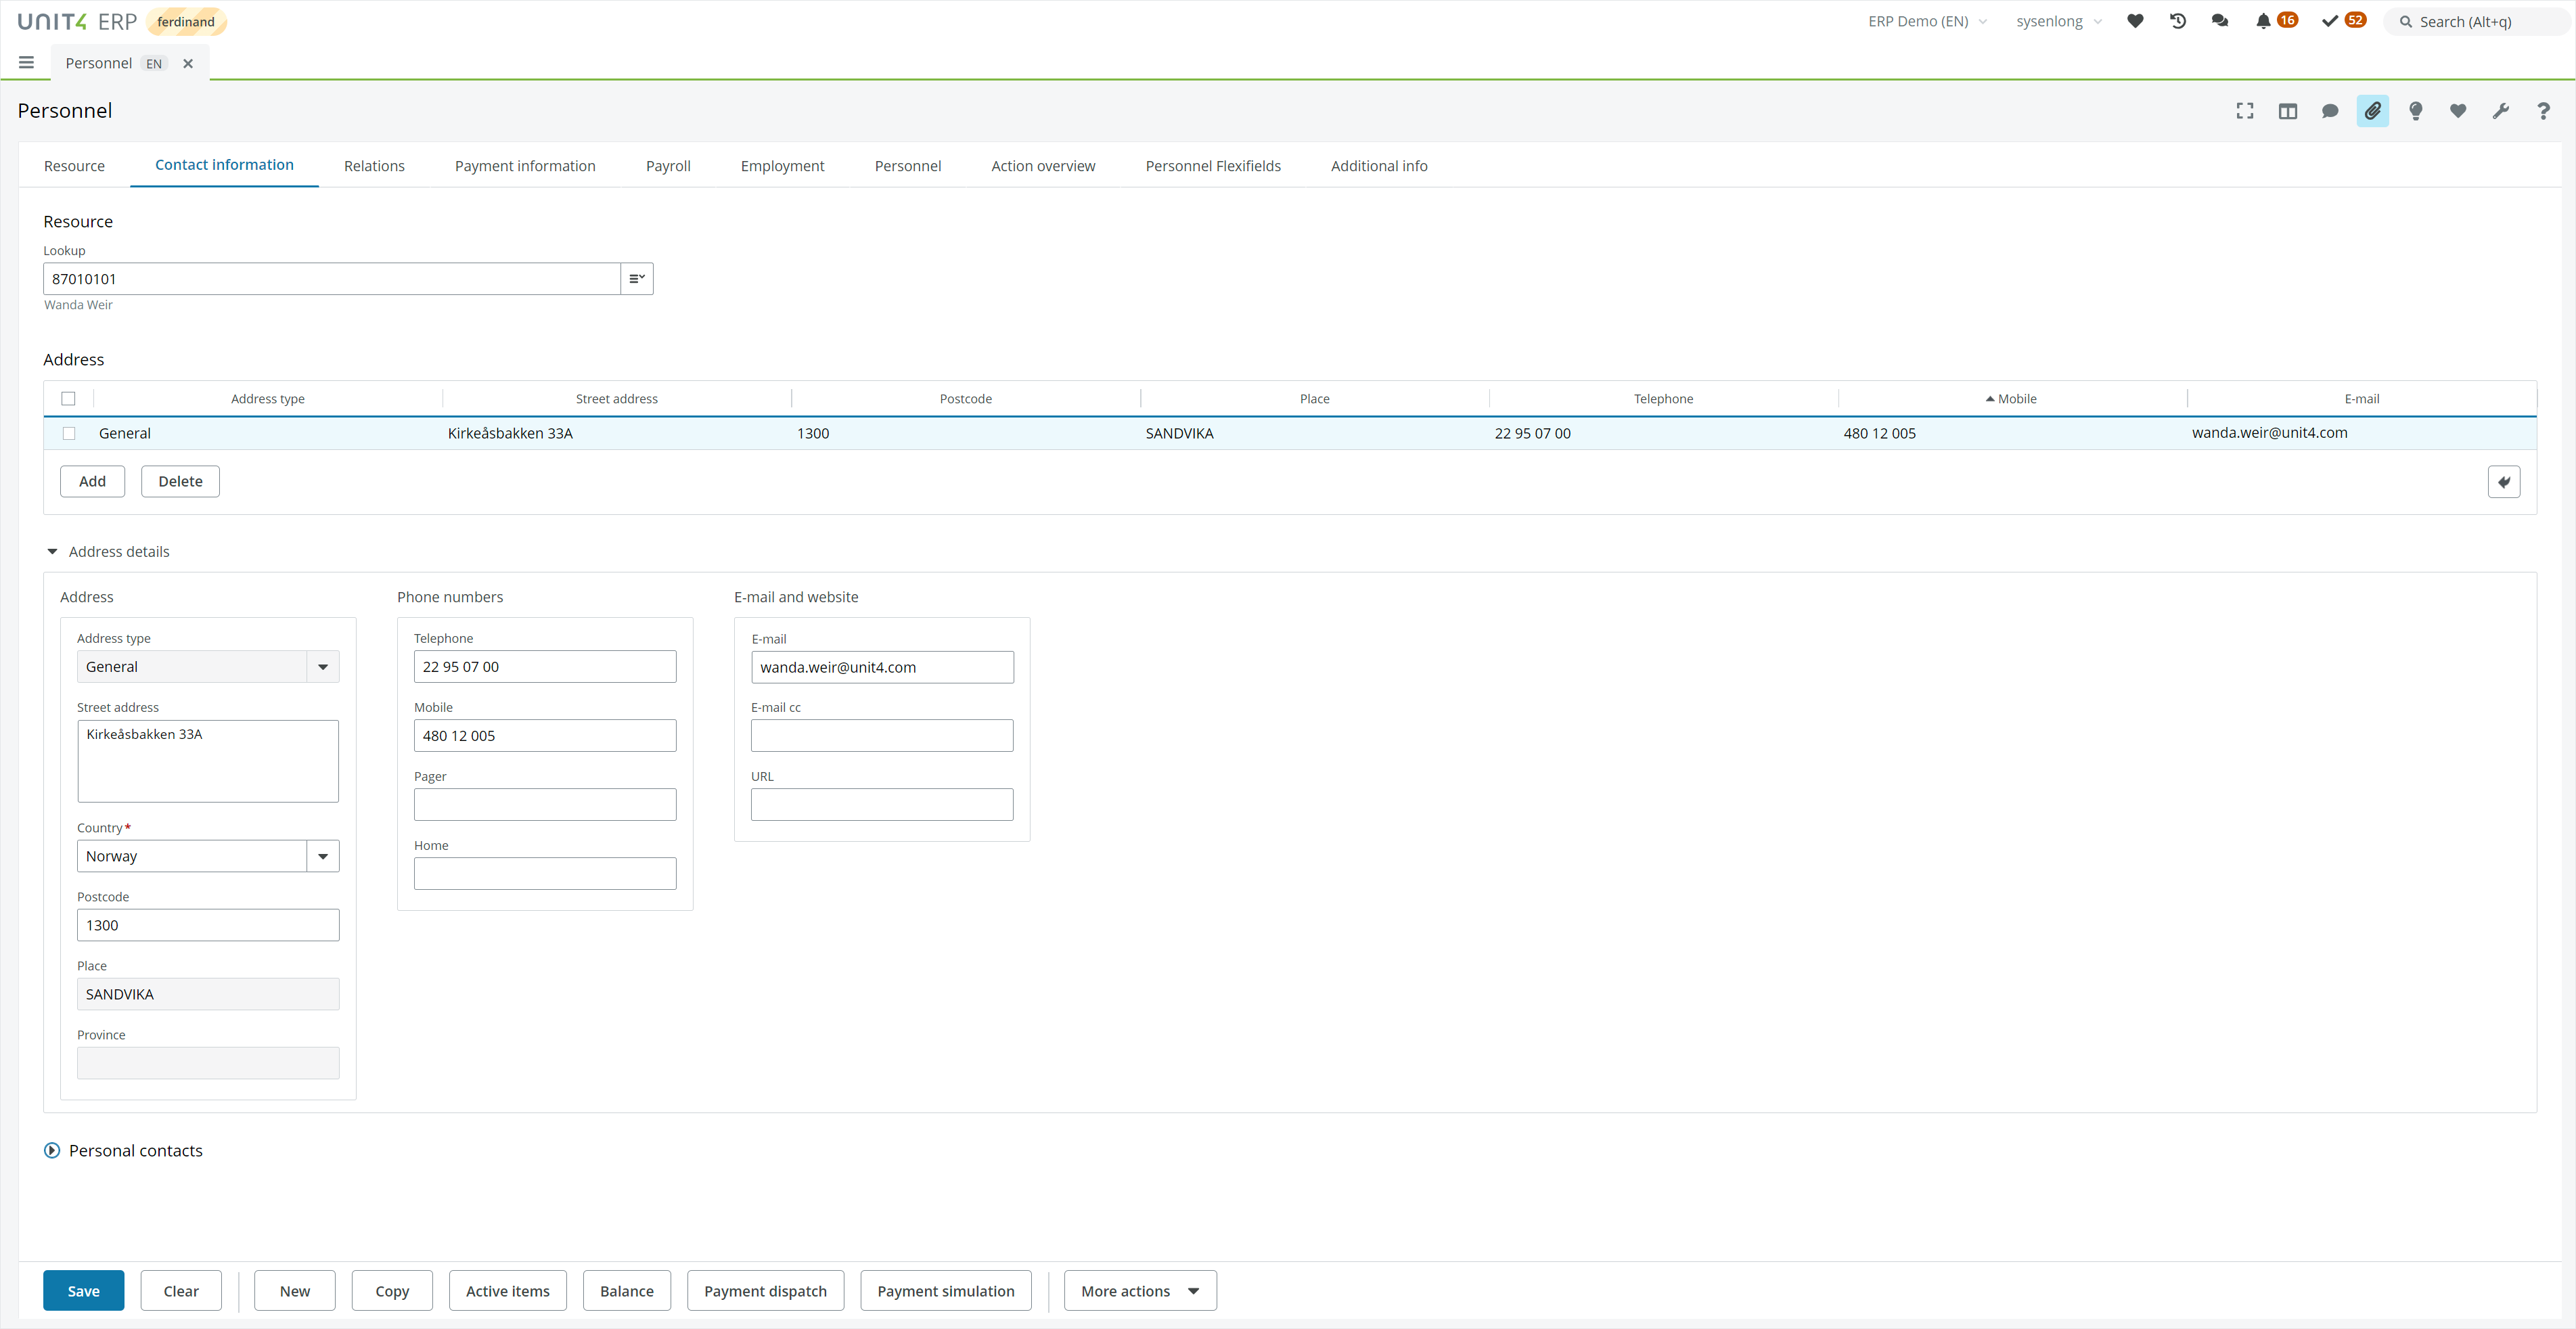
- The HR employee adds the user information in Unit4 ERP.
- The HR employee creates and sends an email with new employee data using a template.
By automating the second task with Extension Kit, the HR employee does not need to enter the information twice, thus saving some time and avoiding potential errors.
Automating this process looks like this:
- The HR employee adds the user information in Unit4 ERP.
- Extension Kit reacts to the new employee’s recorded data.
- Extension Kit sends an email to the new employee with dynamic content.
Create the Extension Kit flow
You must create a flow by configuring a trigger, any filter conditions for the trigger and the required actions within the flow.
Configure the trigger
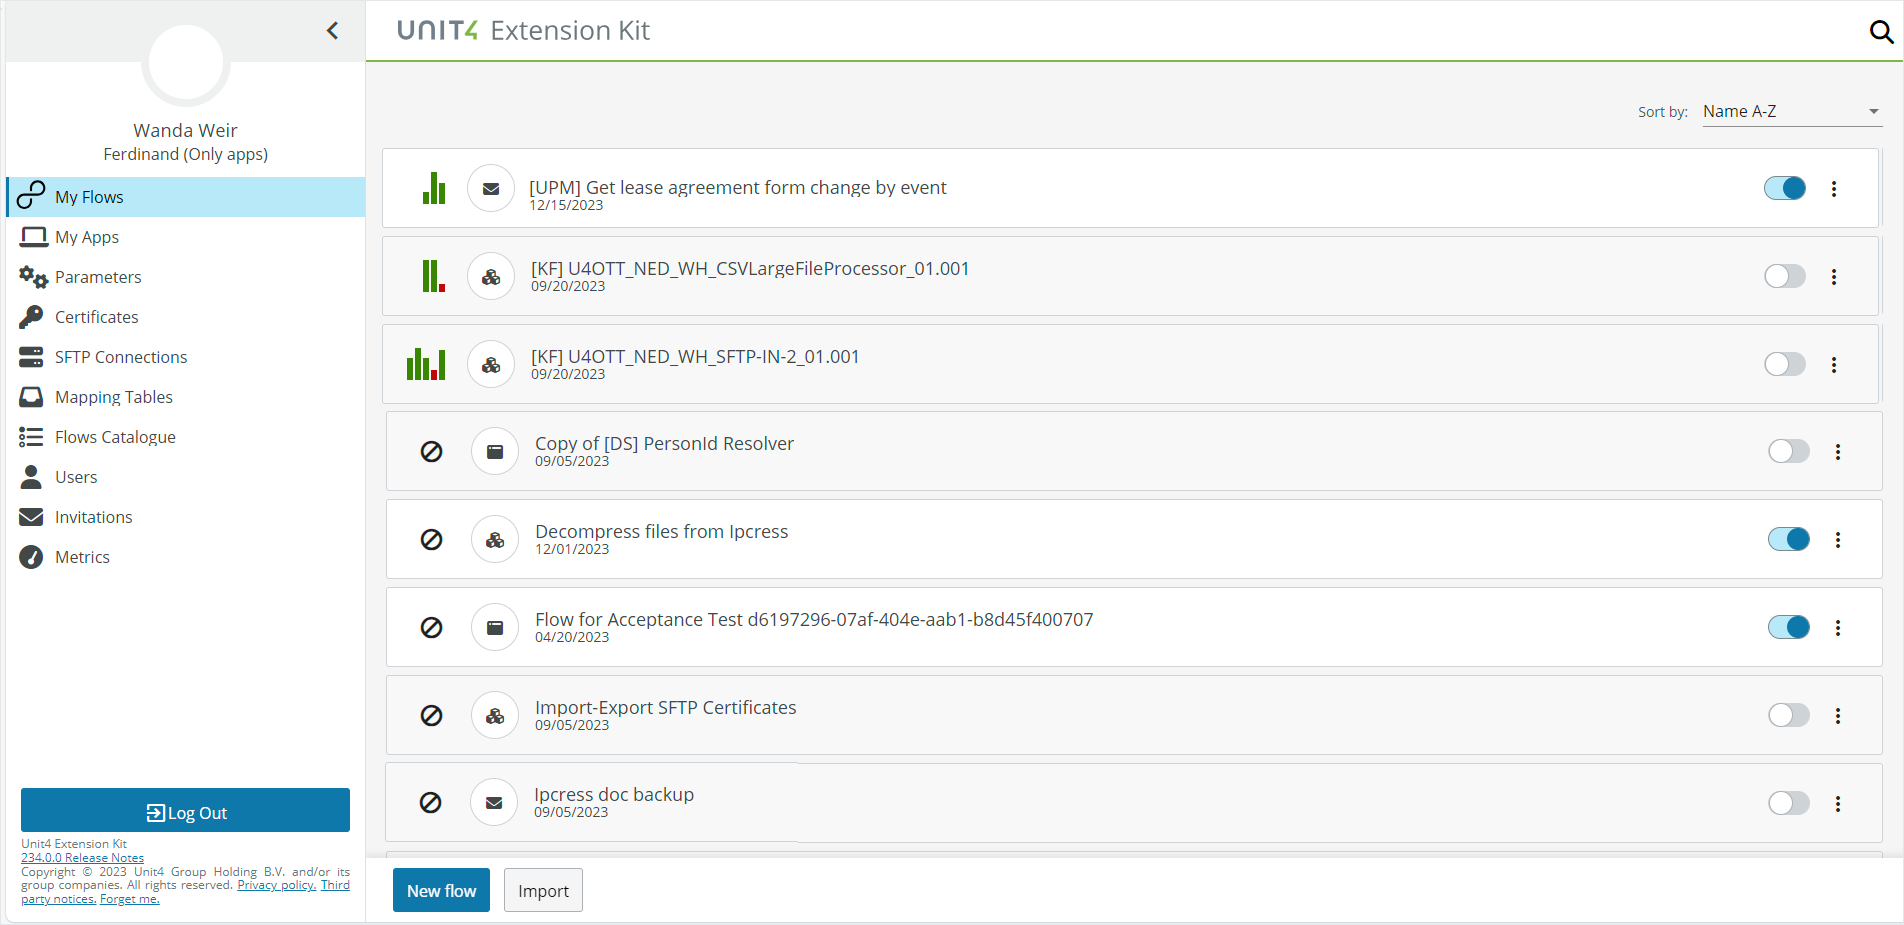
- Log in to your Extension Kit portal.
- Click New flow to open the flow design window.
- Enter a name for your flow: “HR welcome message flow”.
-
Select Message Hub Event trigger and subscribe to Employee changes by entering the:
Category Value Source system U4erp / u4bw Message type Document Name employee Version 1.0 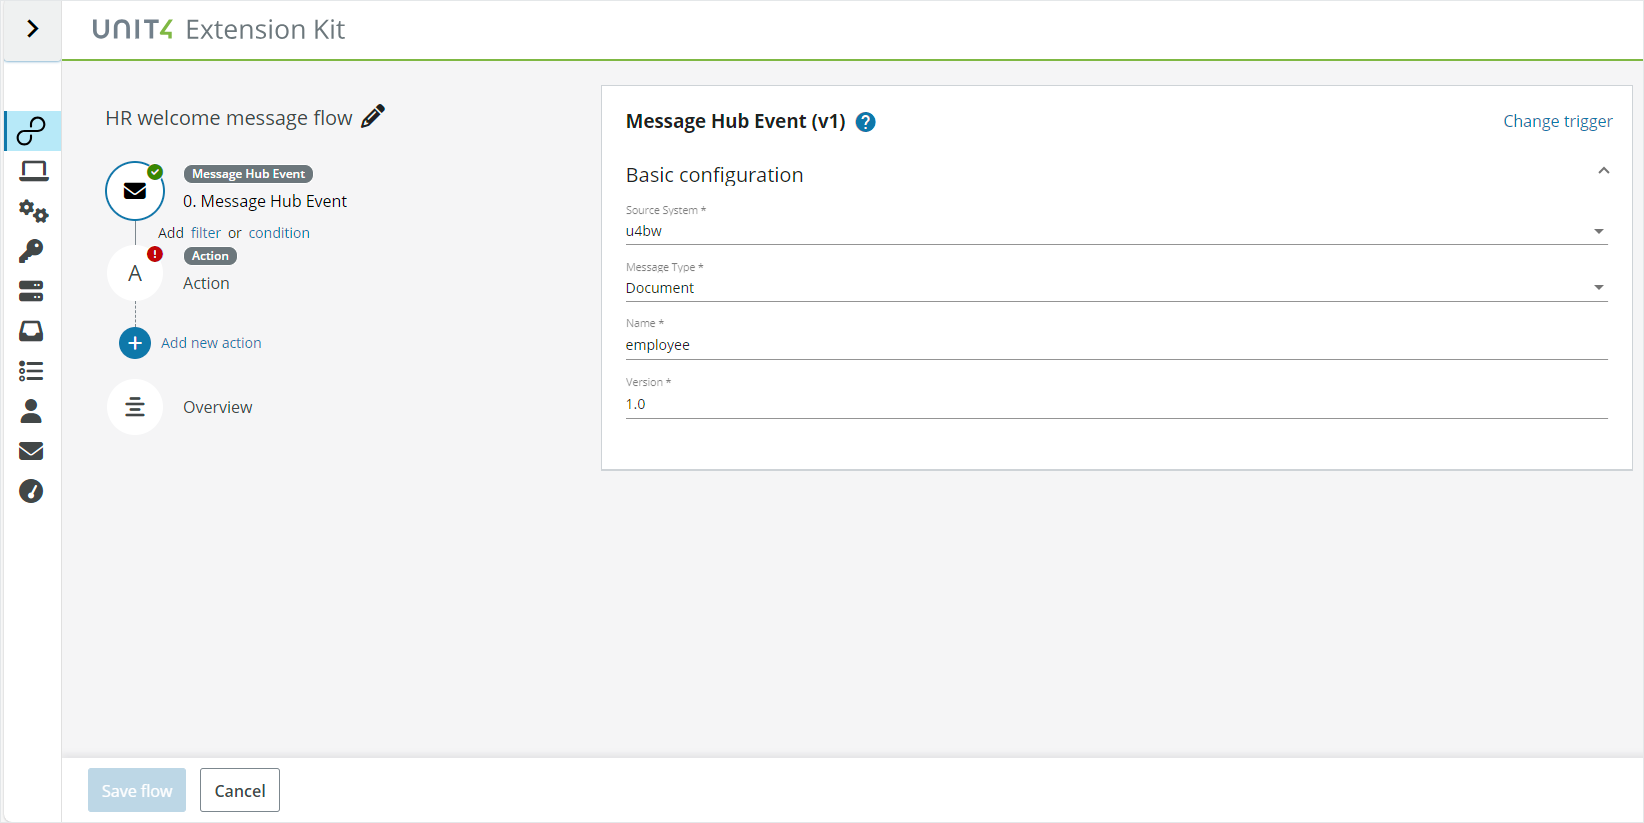
Now your flow is subscribed to the Employee event published by ERP. Every change to an employee document (creation, modification, deletion) triggers this event.
The content of the employee document that triggered the flow in step0 is made available in the subsequent actions by using the tag:
{{step0}}. Each document has the same structure:- Properties: Message header properties
- Body: enterprise document definition. For the list of Enterprise Documents and their corresponding properties see List of Enterprise documents.
- Content-type: The receiver uses this value to understand what is in the body.
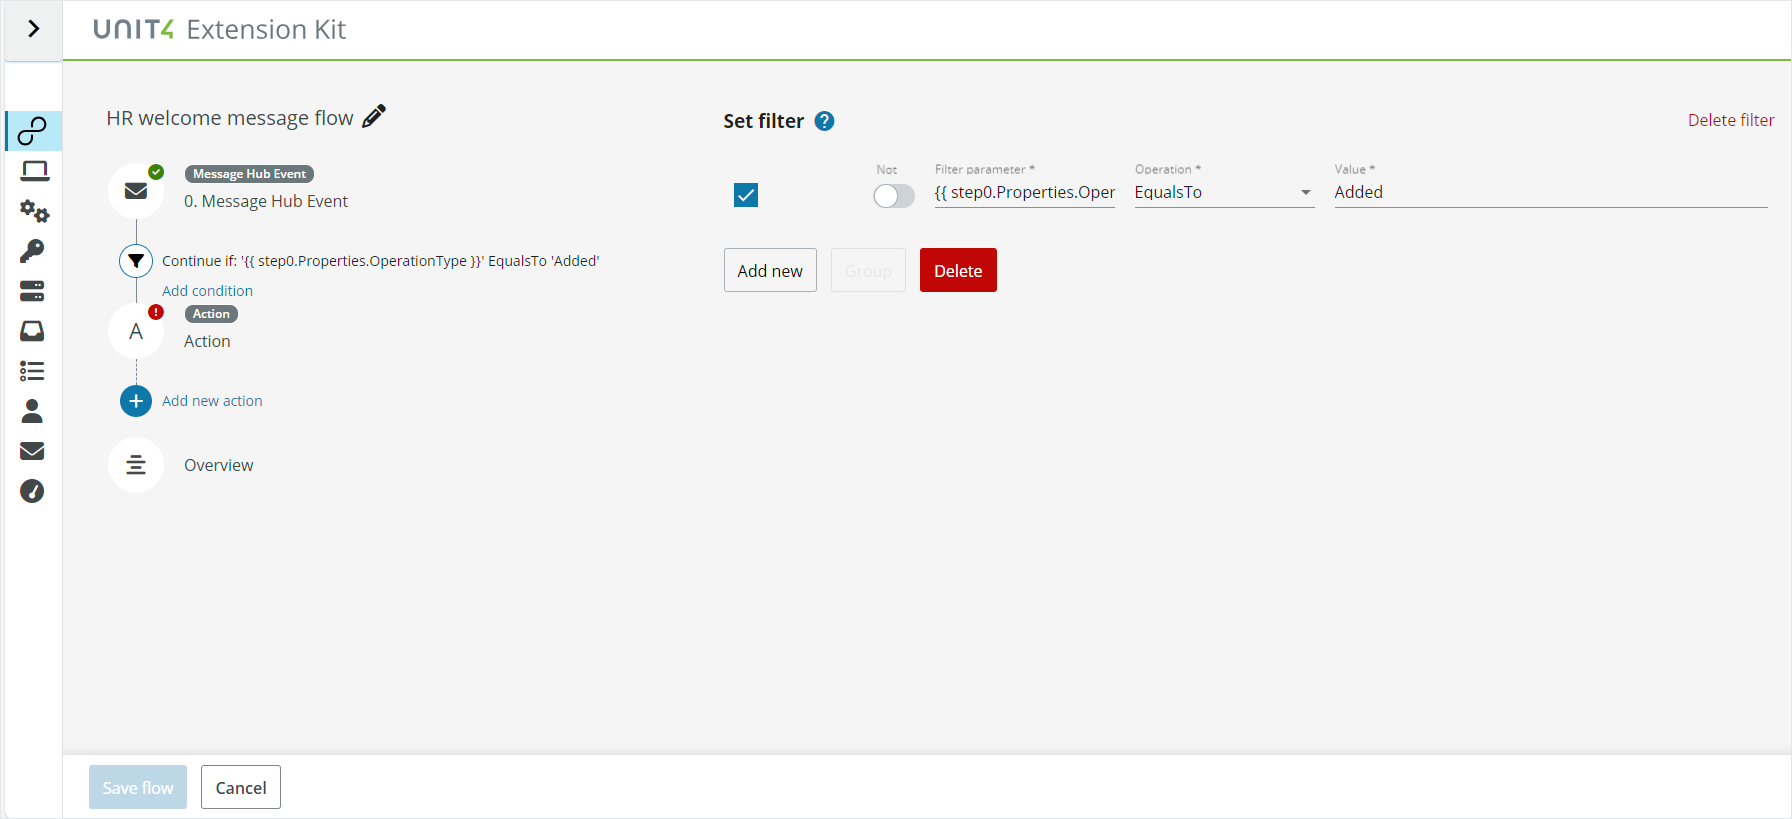
Configure the filter
Click Filter to define the conditions that will make your flow run. In this case we only want to run the flow when the employee is a new (added) record (not modified or deleted).
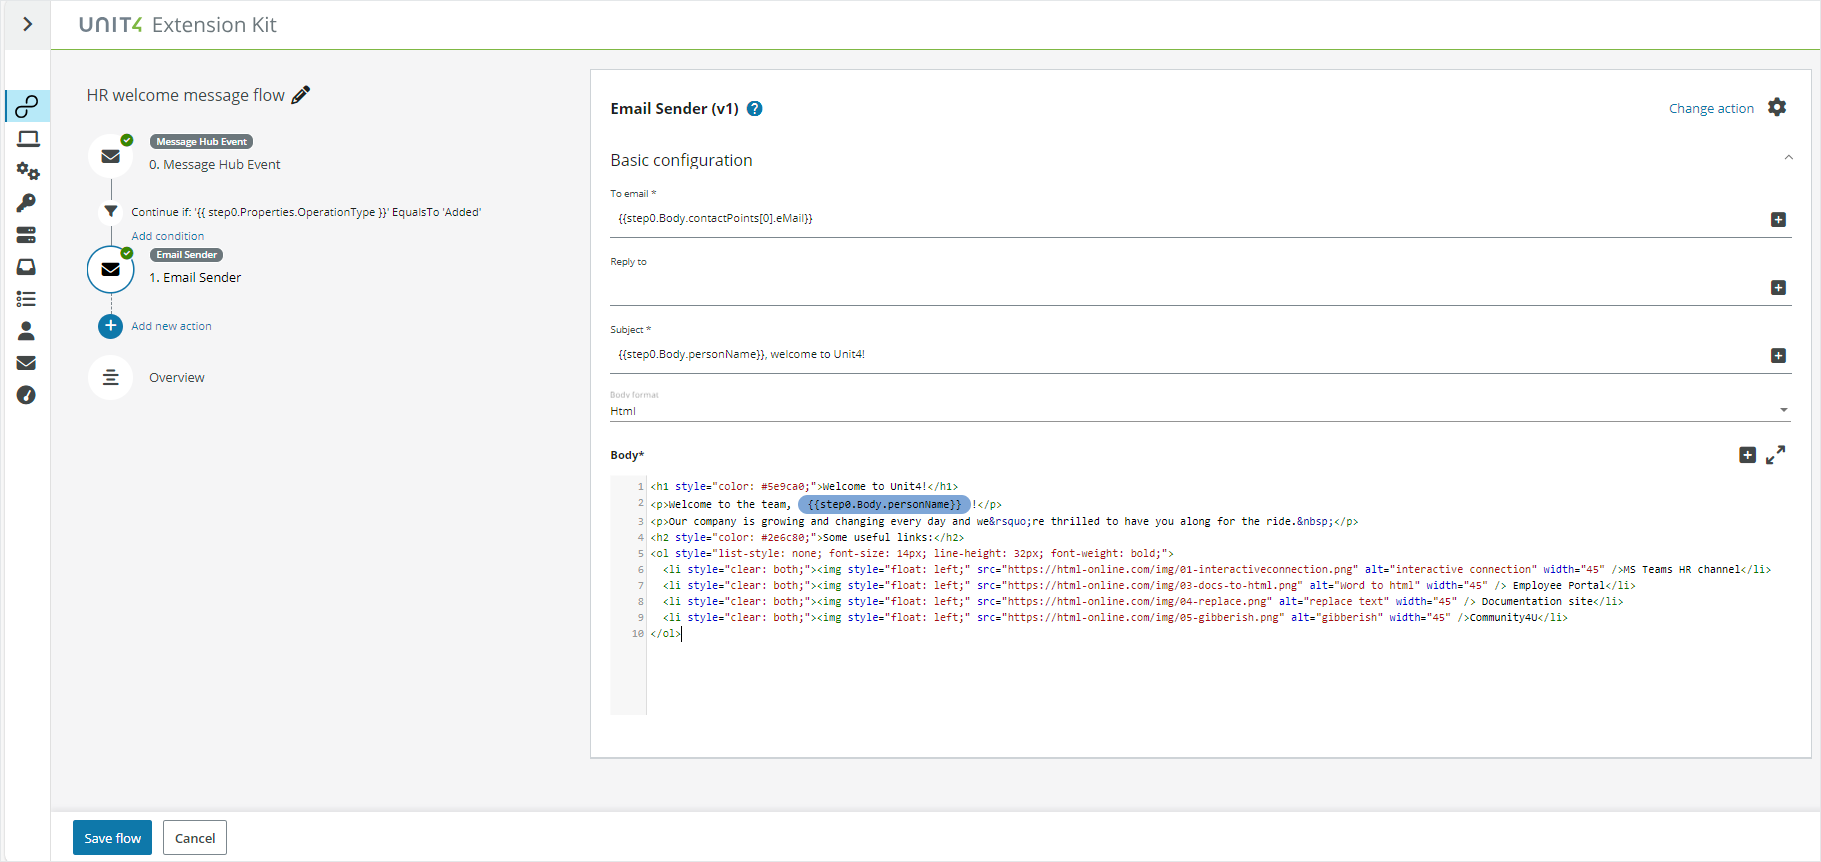
Configure the action
Click the Action icon, select the Email Sender action and configure it as follows:
-
To email:
{{step0.Body.contactPoints[0].eMail}}We select the email address that is registered as the first address in the Employee record.
-
Reply to: Leave blank
-
Subject:
{{step0.Body.personName}}, welcome to Unit4!In this case we use the new employee name.
-
Body format: HTML
-
Body:
<h1 style=”color: #5e9ca0;”>Welcome to Unit4!</h1>
<p>Welcome to the team, {{step0.Body.personName}}!</p>
<p>Our company is growing and changing every day and we’re thrilled to have you along
for the ride. </p>
<h2 style=”color: #2e6c80;”>Some useful links:</h2>
<ol style=”list-style: none; font-size: 14px; line-height: 32px; font-weight: bold;”>
<li style=”clear: both;”><img style=”float: left;” src=”https://html-online.com/img/01-interactiveconnection.
png” alt=”interactive connection” width=”45” />MS Teams HR channel</li>
<li style=”clear: both;”><img style=”float: left;” src=”https://html-online.com/img/03-docs-to-html.
png” alt=”Word to html” width=”45” /> Employee Portal</li>
<li style=”clear: both;”><img style=”float: left;” src=”https://html-online.com/img/04-replace.png”
alt=”replace text” width=”45” /> Documentation site</li>
<li style=”clear: both;”><img style=”float: left;” src=”https://html-online.com/img/05-gibberish.png”
alt=”gibberish” width=”45” />Community4U</li>
</ol>