Configure a table to use a dropdown
This example shows how to configure an app where the user can:
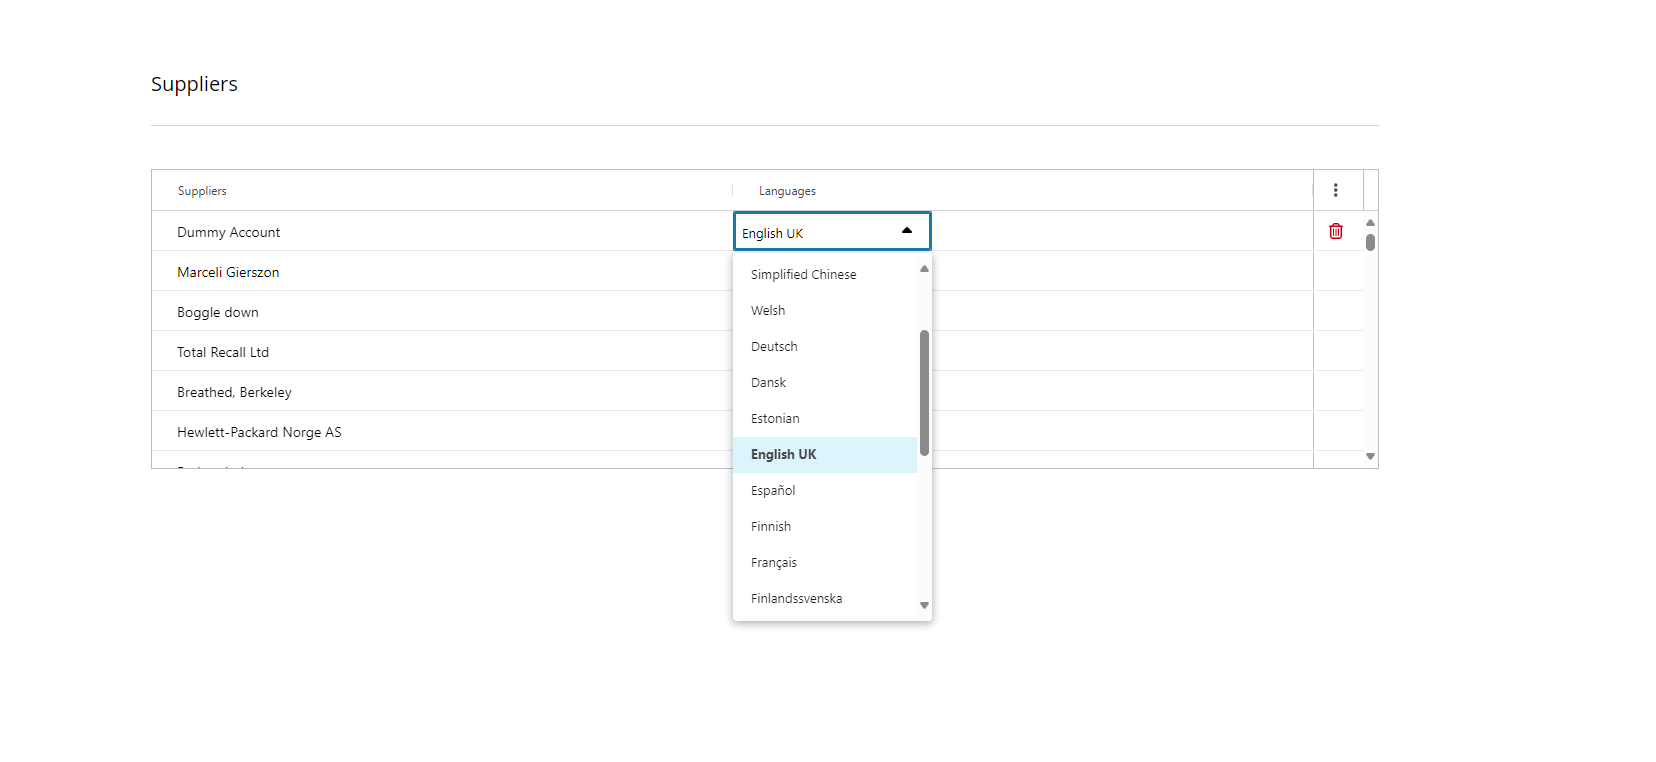
- See the suppliers on a table.
- See the language of the supplier.
- Edit a supplier's language selecting a new one from a dropdown.
To start:
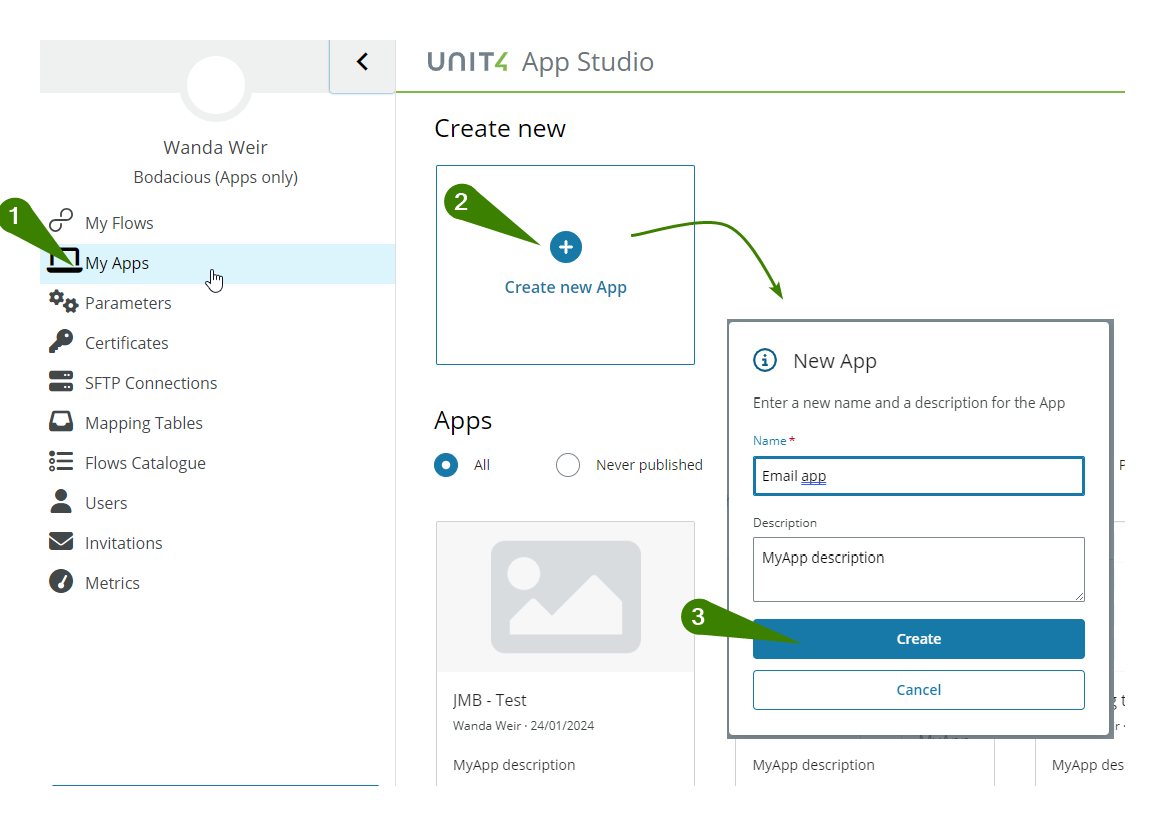
- Select My Apps from the Extension Kit portal main menu.
- Select the Create new app button and name your app.
- Select the Create button.
Configure the app layout
IMPORTANT: The components and resources have dependencies between them. To configure this app, you must go from the Canvas tab to the Resources tab and the Logic flow tab frequently.
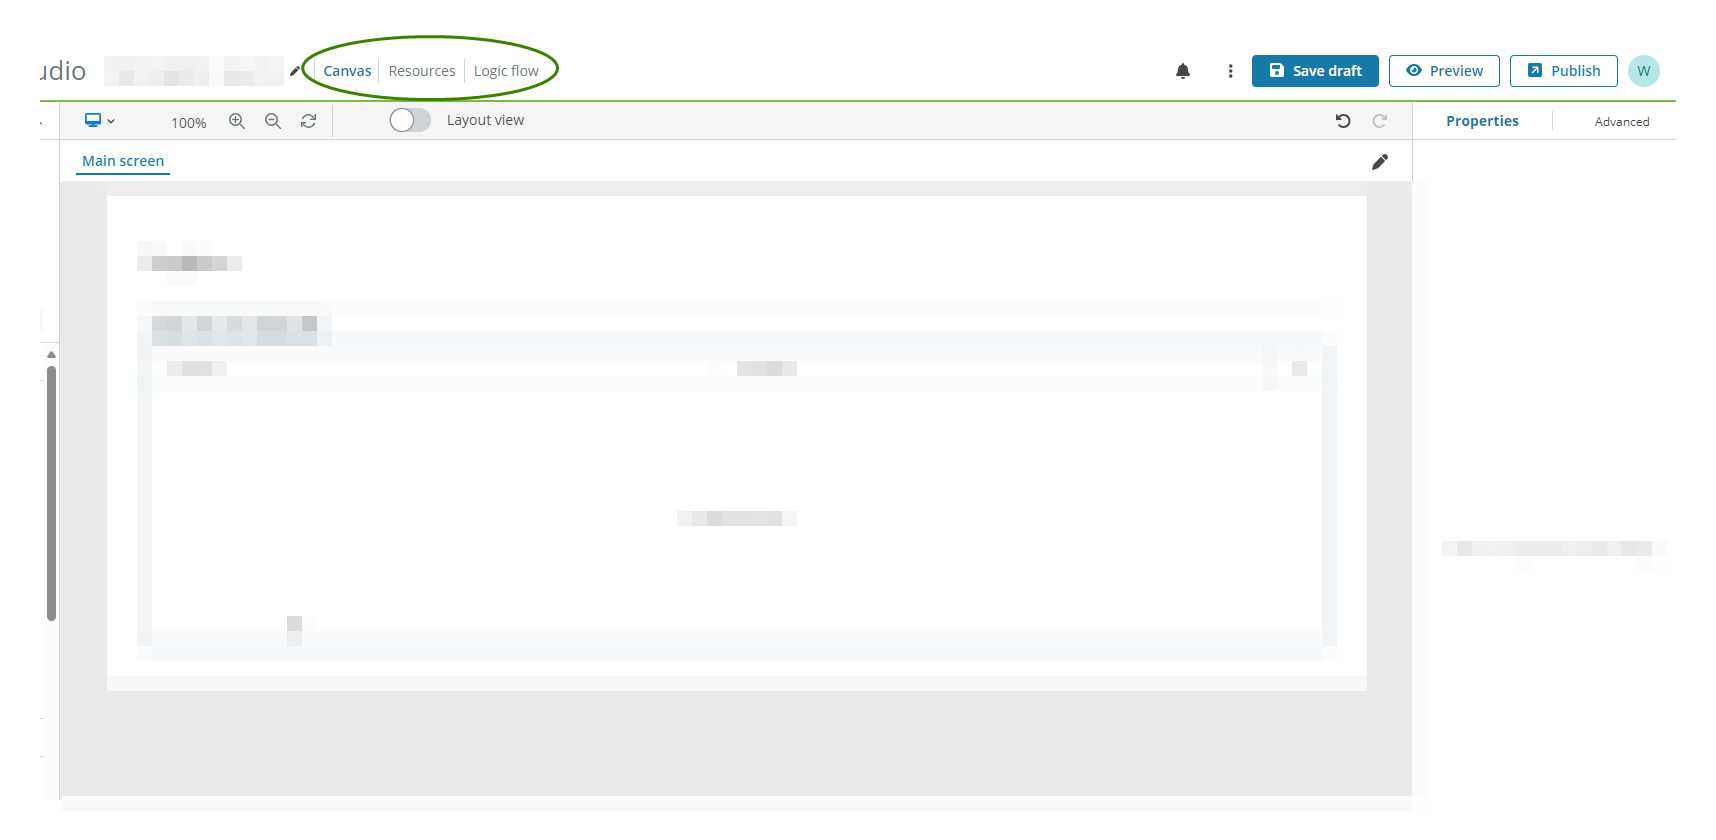
Go to the Canvas tab:
-
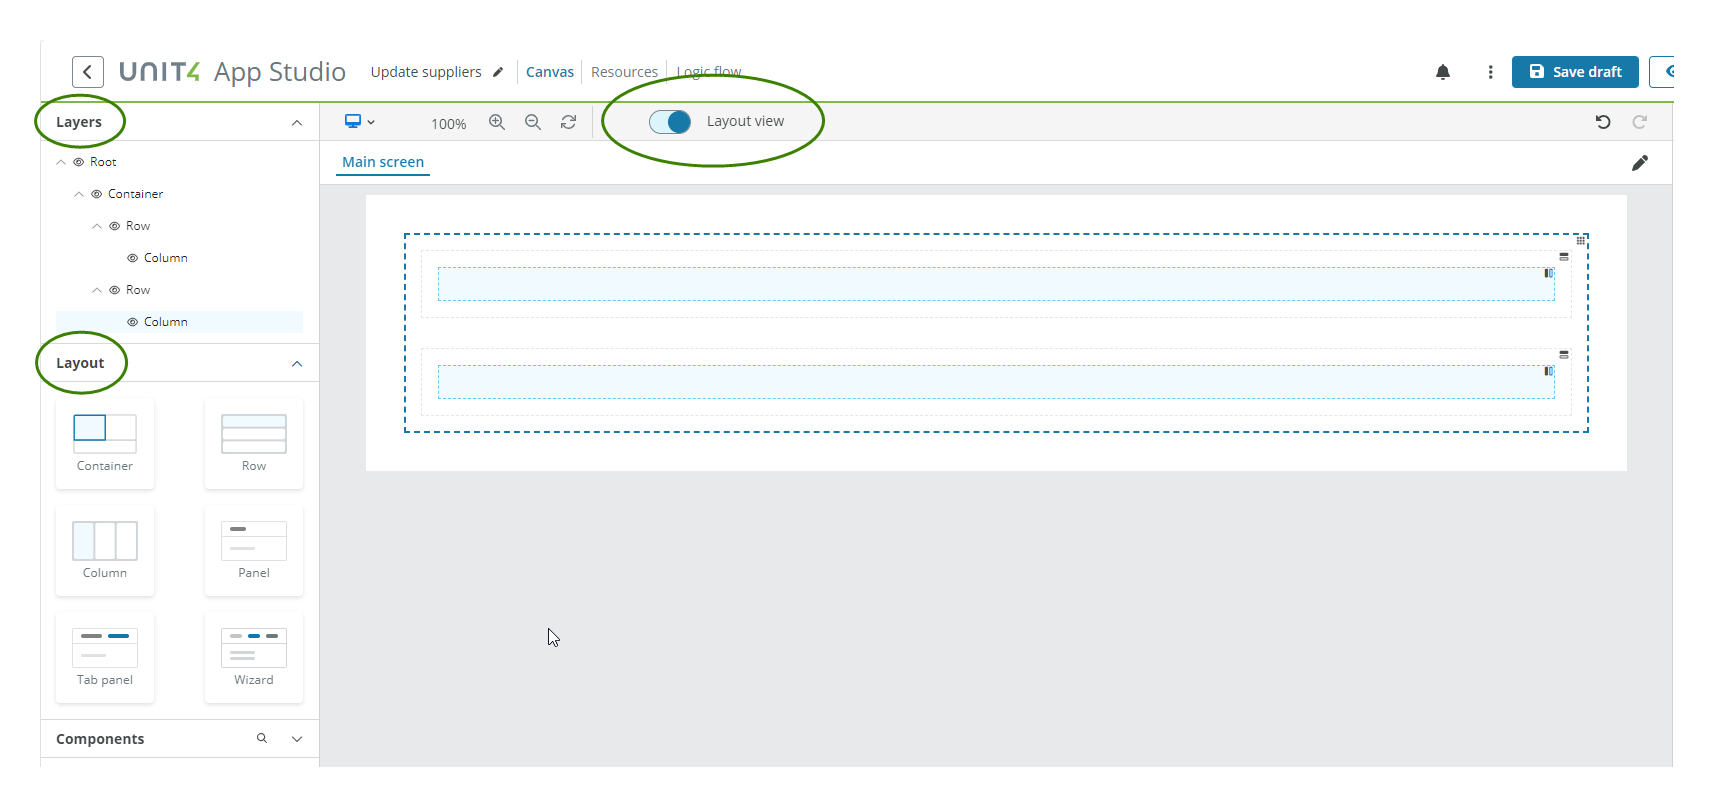
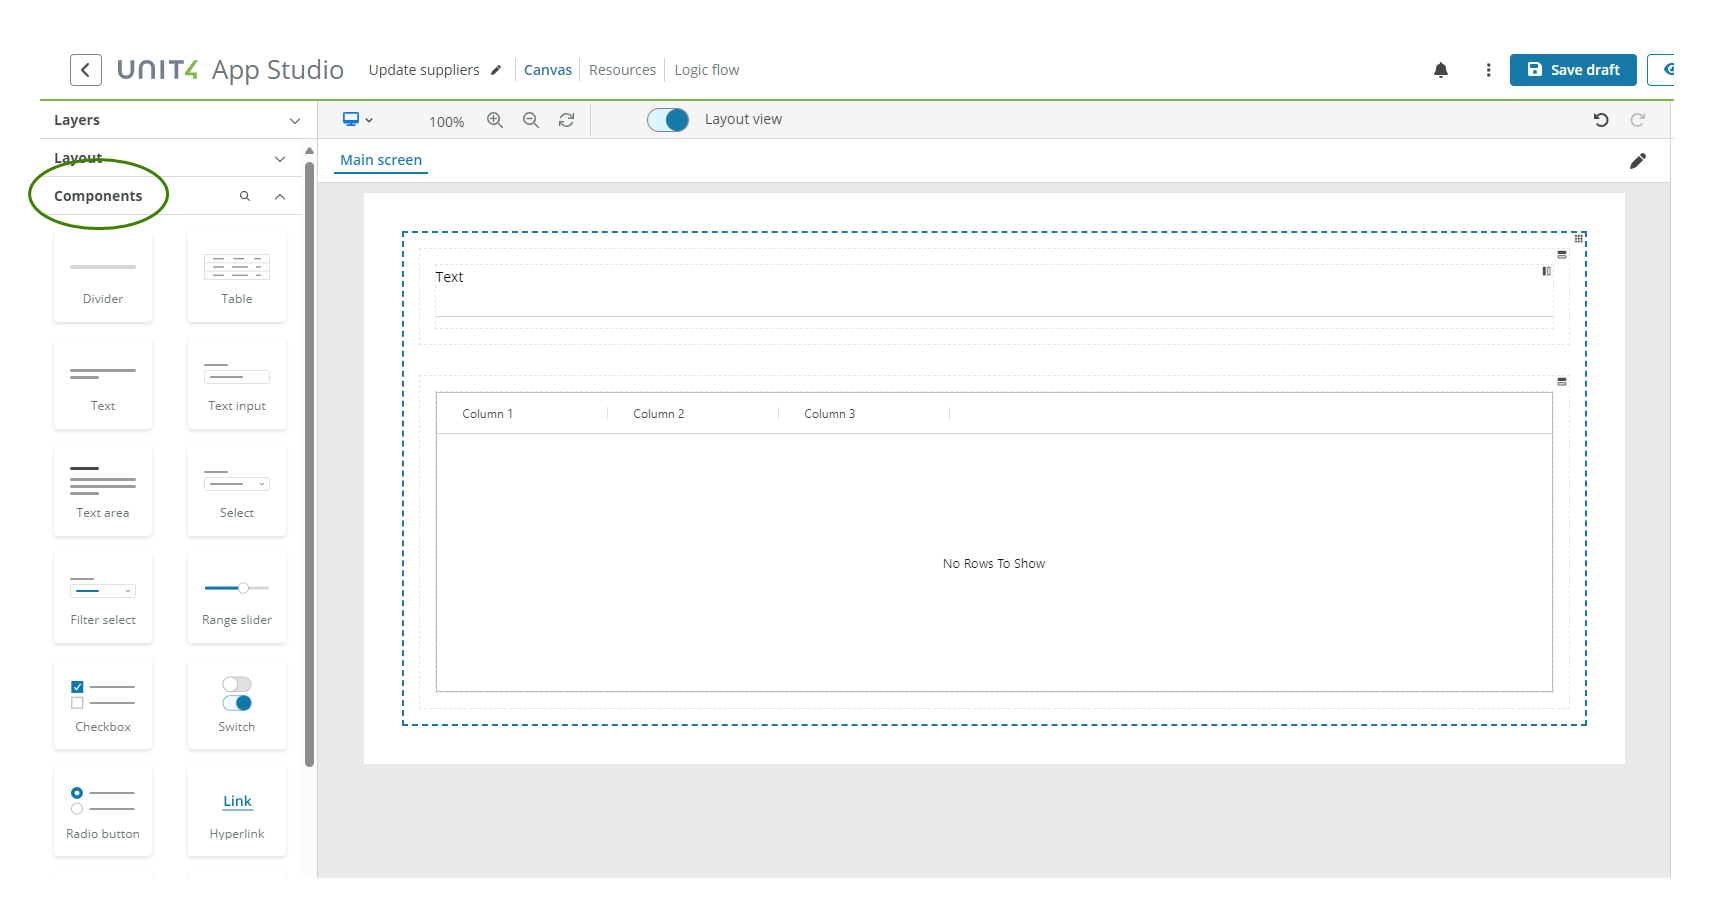
Drag and drop the Layout components to the canvas. In this example we added the following components in this order:
- One container
- Two rows inside the container
- One column in each row
Note: Use the Layout view switch and the Layer panel to help you.
-
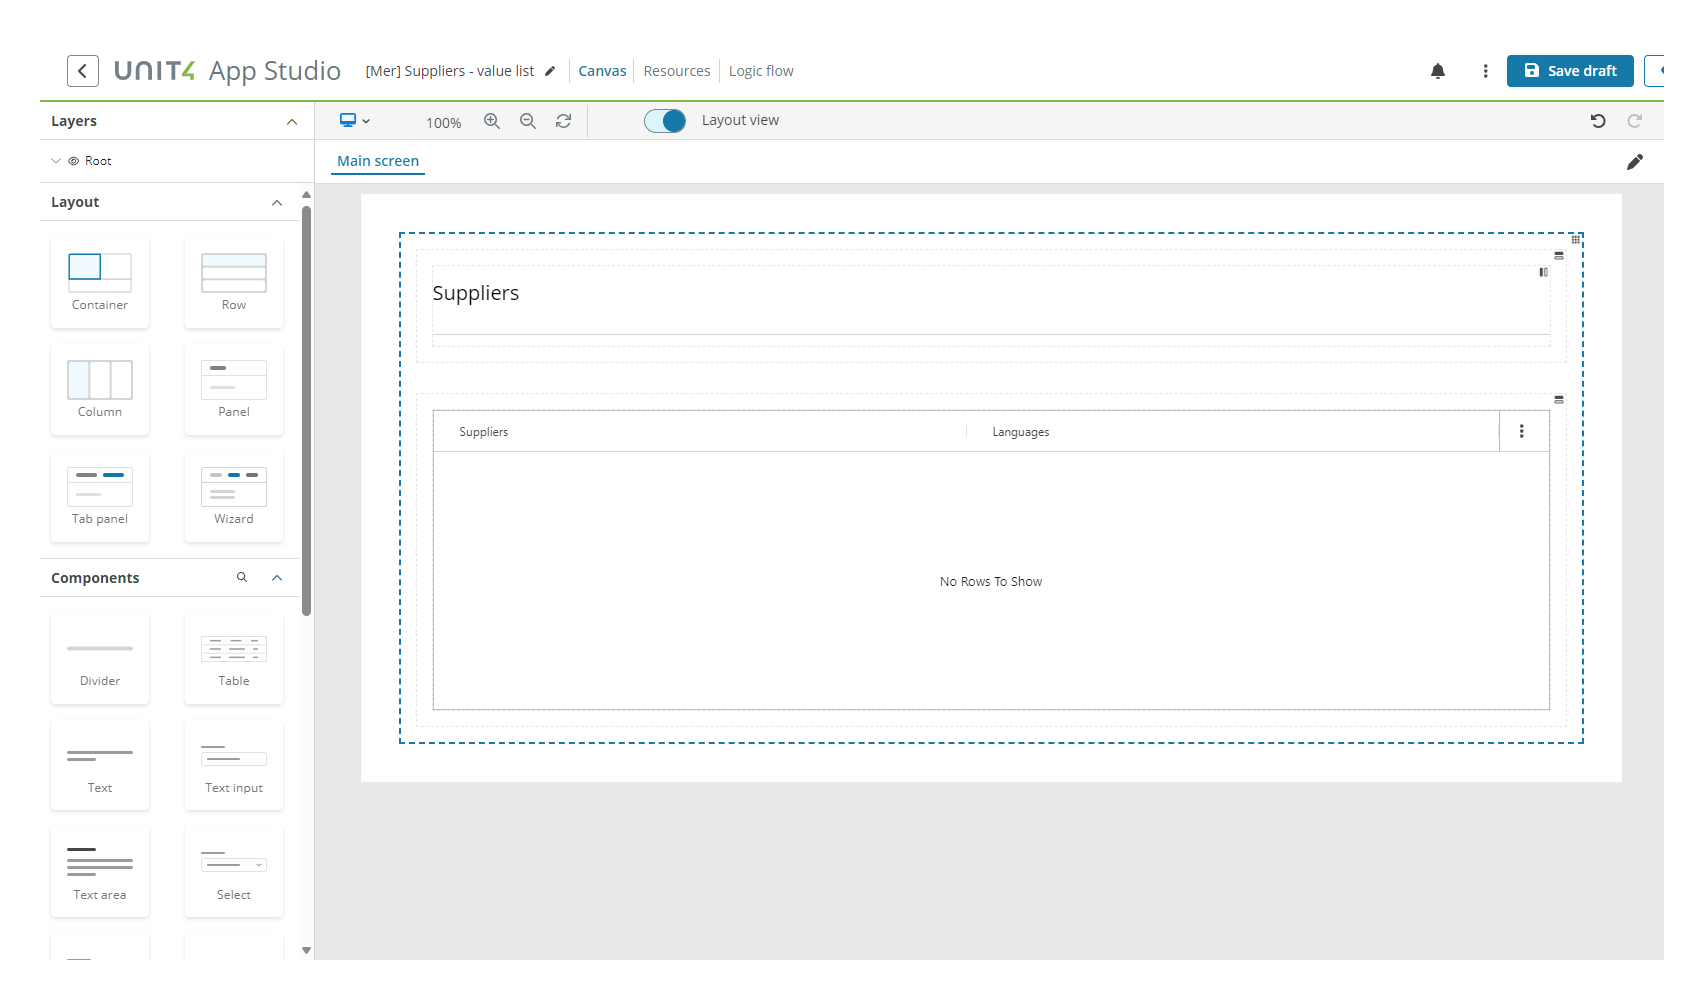
Drag and drop the following components inside the Layout components as shown in the image:
- One Text component
- One Divider component
- One Table component
Configure the Text component
In this example we configure the component as follows:
- Select the Text component in the canvas and go to the Properties panel.
- Open the Main menu and configure:
- Text: Enter the text: Suppliers.
- Open the Styles menu and configure:
- Format: Select Title from the dropdown.
- Open the Main menu and configure:
Note: The Divider component requires no configuration.
Go to the Resources tab next to canvas:
After setting our UI, let's configure our resources to retrieve data:
Create the Suppliers resource
To configure the resource, follow these steps:
- Select the Plus (+) button on top of the left panel to create a new resource.
- Select the new resource on the left panel.
- Select the Pencil icon to change the name to 'Suppliers'.
-
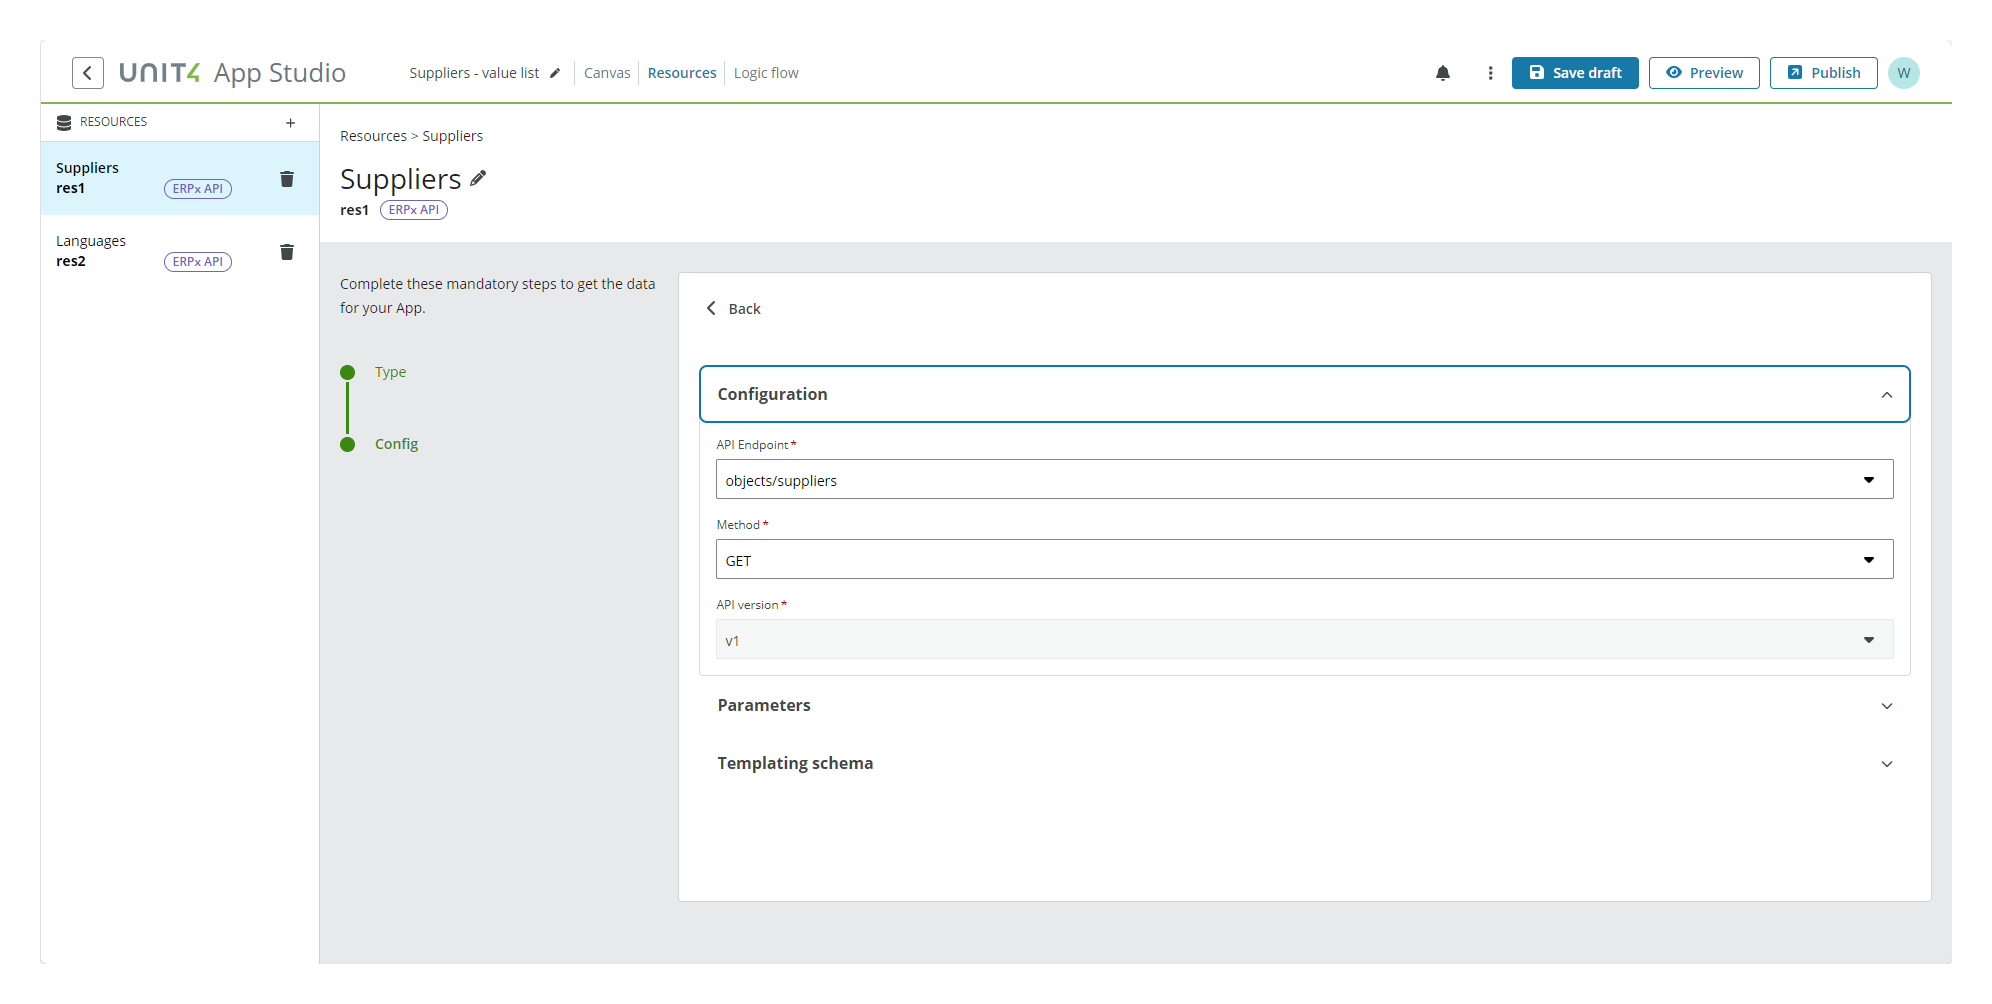
Select ERPx API from the Type menu on the right and configure:
-
Configuration section: - API endpoint: Open the dropdown and select
objects/suppliers- Method: Open the dropdown and select GET. -
Parameters section: - orderBy: Enter the text: supplierName.
-
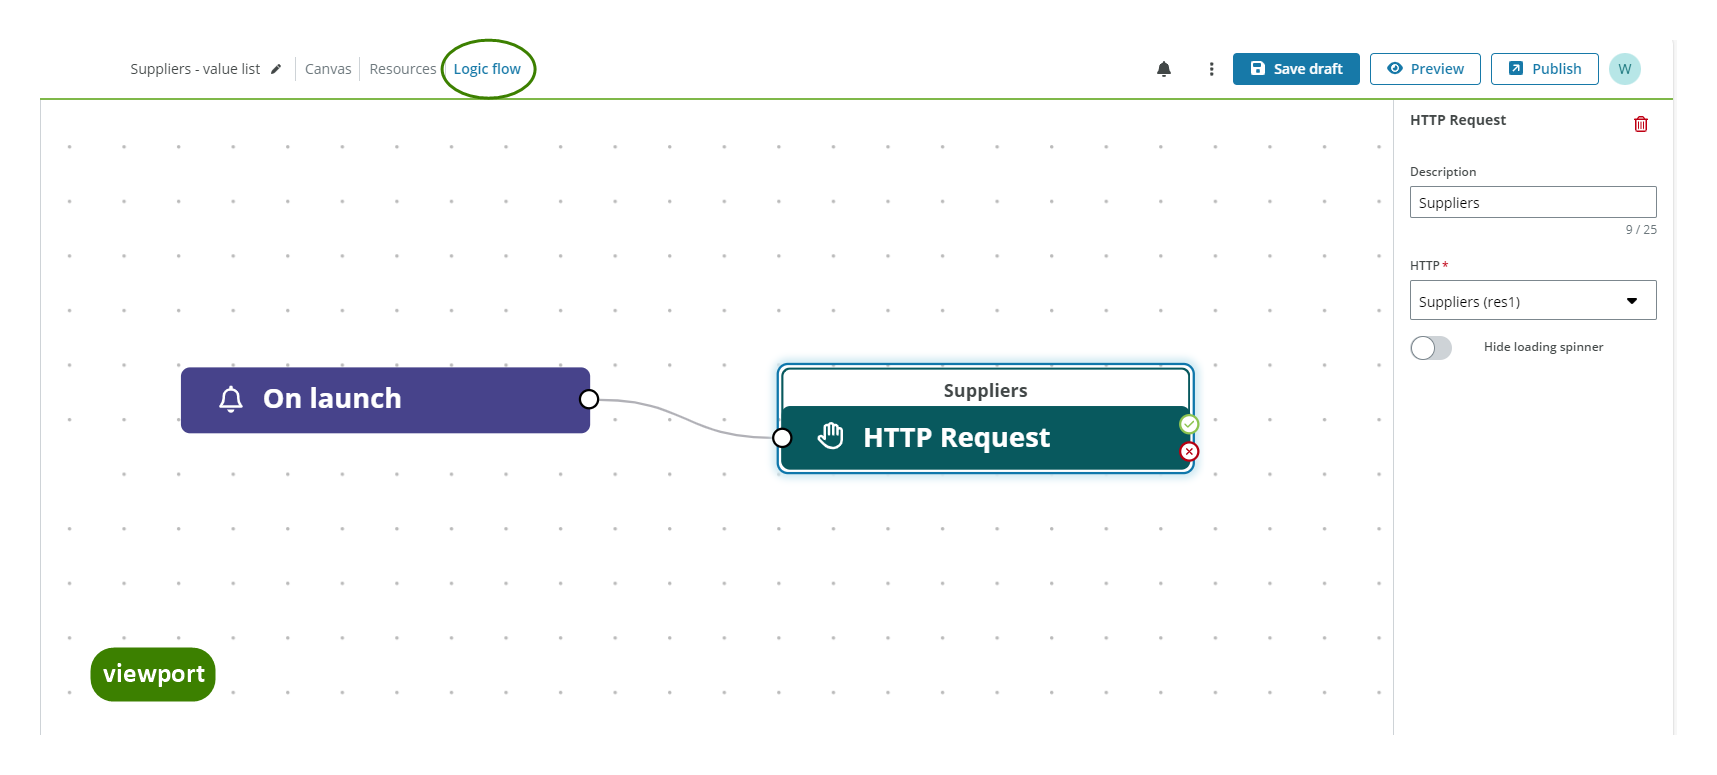
Go to the Logic flow tab next to resources:
To trigger the resource when the app is launched, follow these steps:
- Drag the On launch event to the viewport.
- Drag the HTTP Request action to the viewport and connect it to the On launch event.
- Select HTTP Request action in the viewport to see the properties panel to the right.
- Open the HTTP dropdown.
-
Select the resource, for this example Suppliers (res1).
Go back to the Resources tab:
Create the Languages resource
To configure the resource, follow these steps:
- Select the Plus (+) button on top of the left panel to create a new resource.
- Select the new resource on the left panel.
- Select the Pencil icon to change the name to 'Languages'.
-
Select ERPx API from the Type menu on the right and configure:
-
Configuration section:
- API endpoint: Open the dropdown and select
objects/languages - Method: Open the dropdown and select GET.
- API endpoint: Open the dropdown and select
-
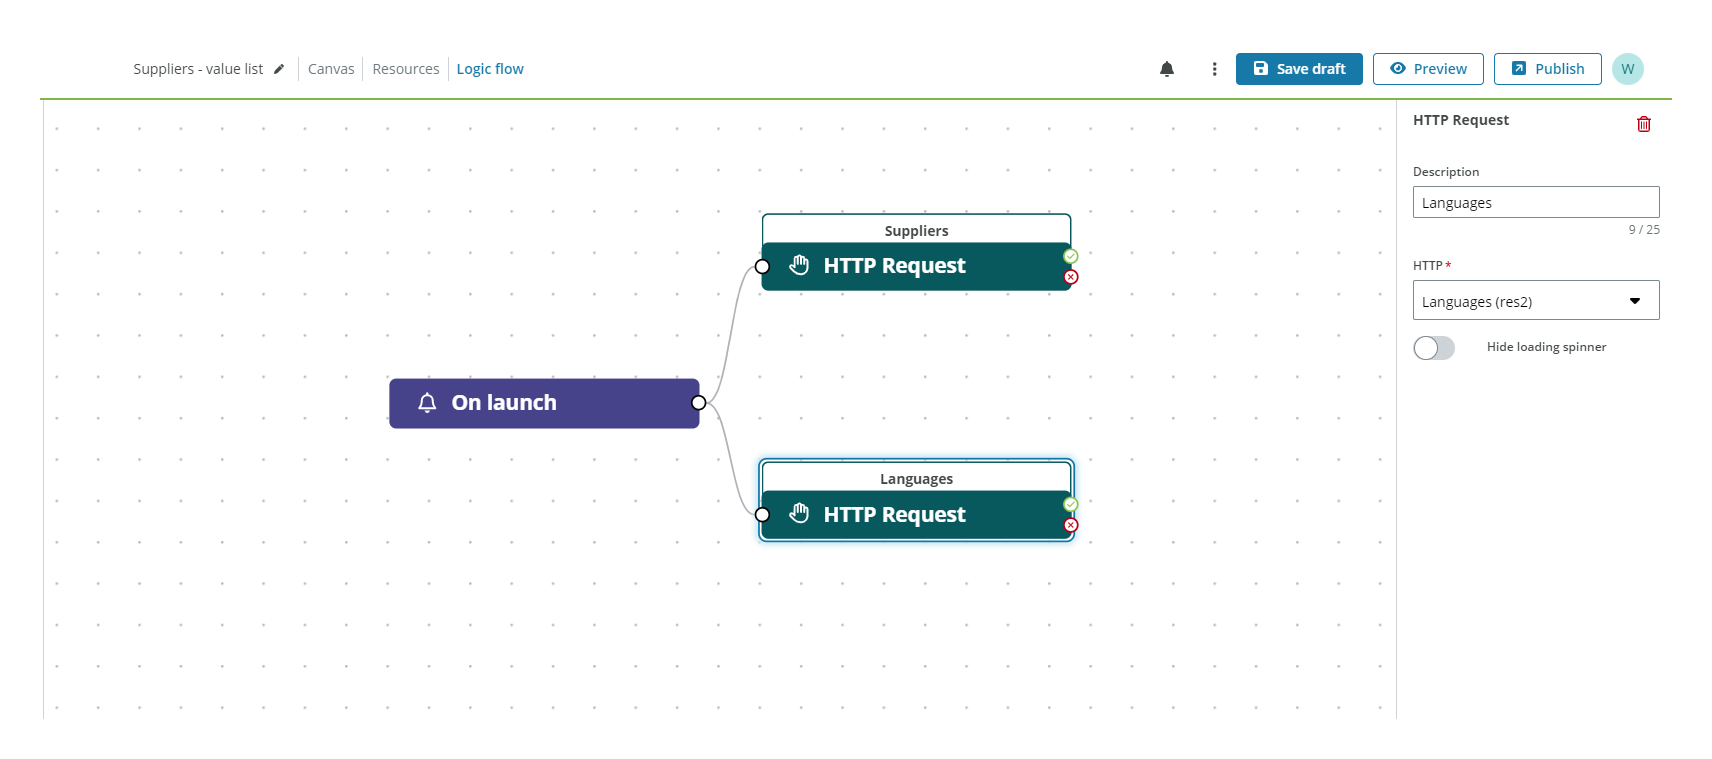
Go to the Logic flow tab next to resources:
To trigger the resource when the app is launched, follow these steps:
- Drag the HTTP Request action to the viewport and connect it to the On launch event.
- Select HTTP Request action in the viewport to see the properties panel to the right.
- Open the HTTP dropdown.
-
Select the resource, for this example Languages (res2).
In the following image you can see the Resource tab with all the resources configured.
Go back to the Canvas tab:
Now, we need to finish configuring our components.
Configure the Table component
In this example we configure the component as follows:
-
Select the Table component in the canvas and go to the Properties panel.
-
Open the Main menu and configure:
- Table data: Enter
{{res1}}or use the Plus (+) button to display the Templating dropdown to select the Suppliers resource.

- Allow editing: Select the checkbox to allow editing in the table. Value list data type will not work if you do not select this checkbox.
- Table data: Enter
-
Open the Columns menu and configure:
-
Open Column 1 and configure:
- Title: Enter the text: Suppliers.
- Column data: Enter
{{supplierName}}or use the Plus (+) button to display the Templating dropdown to select the supplierName property. - Width: Open the dropdown and select Stretch.
- Read only: Select the checkbox to avoid editing in the column.
-
Open Column 2 and configure:
- Title: Enter the text: Languages.
- Column data: Enter
{{languageCode}}or use the Plus (+) button to display the Templating dropdown to select the languageCode property. - Width: Open the dropdown and select Stretch.
- Datatype: Open the dropdown and select Value list.
- Options: Enter
{{res2}}or use the Plus (+) button to display the Templating dropdown to select the Languages resource. - Value field: Enter
{{language}}or use the Plus (+) button to display the Templating dropdown to select the language property. - Display field: Enter
{{description}}or use the Plus (+) button to display the Templating dropdown to select the description property.
-
Open Column 3, scroll down and select the Delete button.
-
-
Note: See Table component for more details.
You can see the final result in the following image:
Note: See Components and events and actions for more details.
Finally, after configuring the components and the resources, select the Save draft button and preview your app.
Related tutorials
- For how to add a button to update the supplier with the user's edits see Configure ERPx API resources