Configure a Flow resource
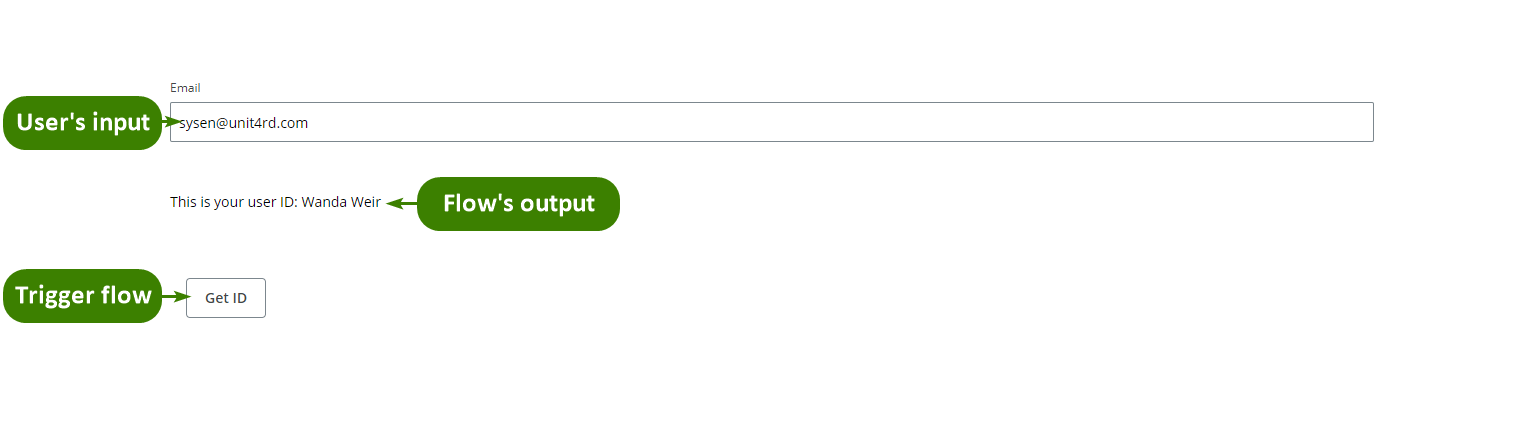
This example shows how to configure an app where the user can:
- Enter an email.
- Trigger a flow using a button.
- See the user's ID corresponding to the email (flow's output).
Configure the flow
To configure a flow that can be triggered from App Studio, follow these steps:
- Select My flows entry from the Extension Kit's portal left menu.
- Select the New flow button.
- Select the App trigger from the right Trigger menu under the Flow assistant, and configure:
- Input Schema: For this example, use the Generate by JSON button and enter this JSON:
{"email":""}. This generates the following schema for the expected input:
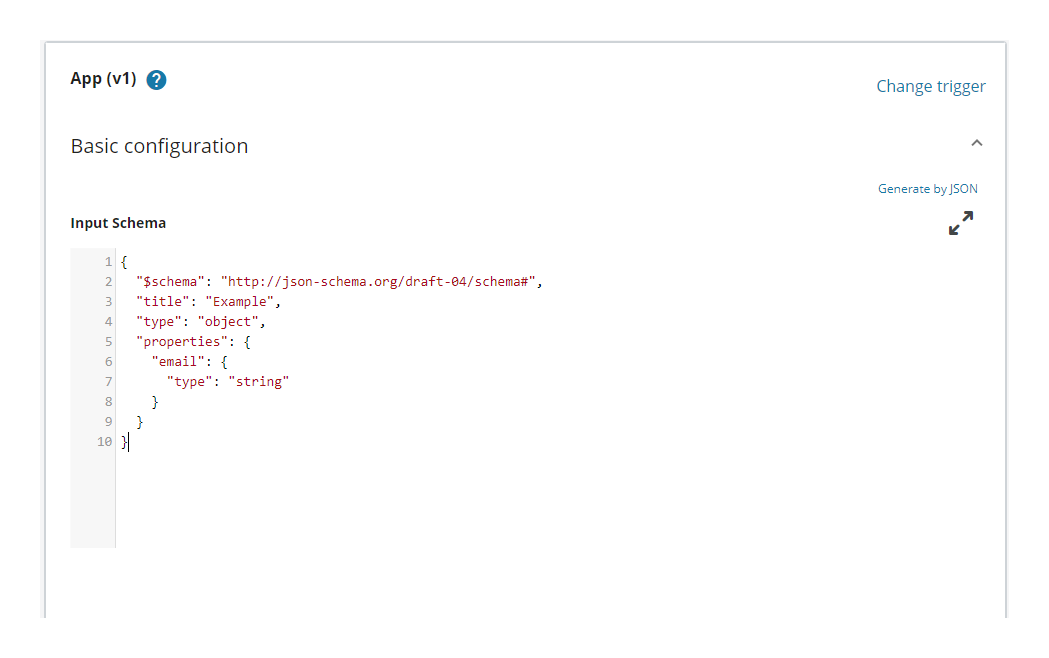
- Input Schema: For this example, use the Generate by JSON button and enter this JSON:
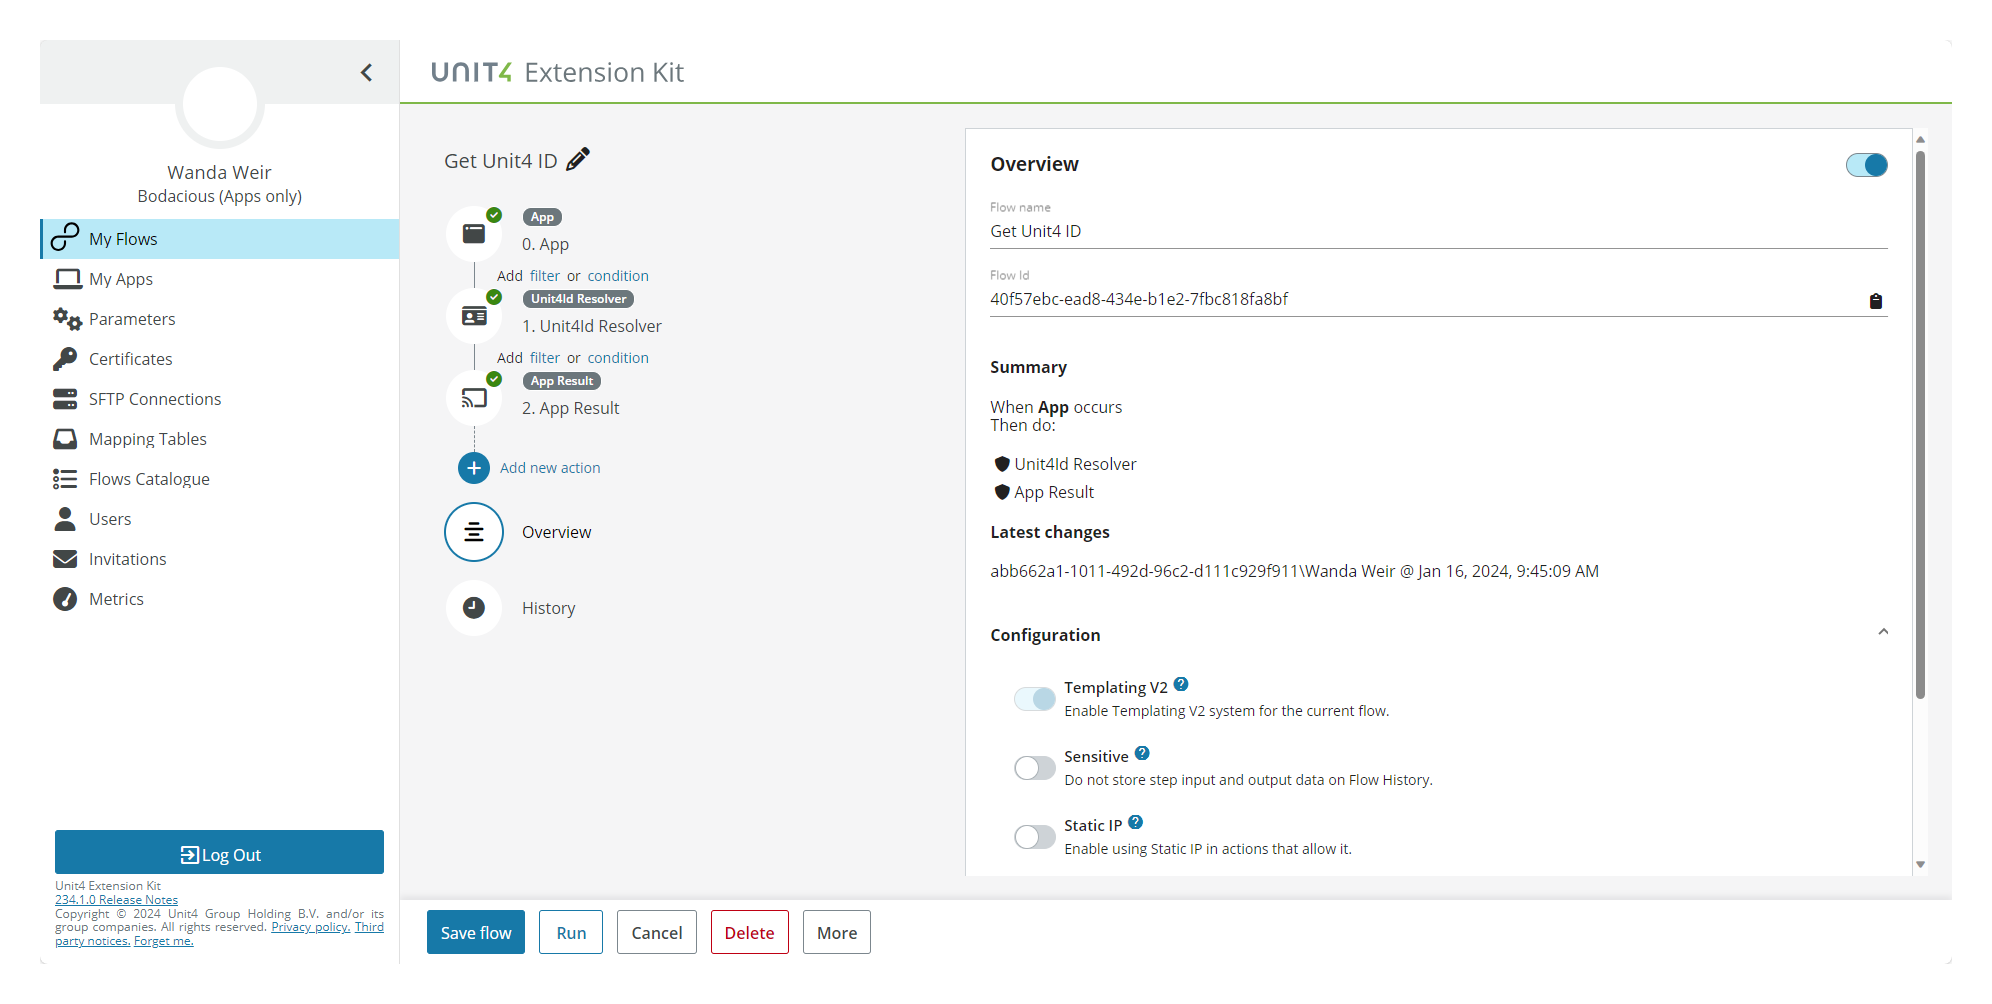
- Add the first action by selecting the Action step from the flow's roadmap and choose the Unit4id Resolver action from the right Action menu under the Action assistant. Configure:
- Email: Select the Plus (+) button and choose the desired output from the trigger. For this example
{{step0.Body.email}}.
- Email: Select the Plus (+) button and choose the desired output from the trigger. For this example
- Add the second action by selecting the Add new action button from the flow's roadmap and choose the App Result action from the right menu. Configure:
- Result with: Display the right dropdown and select success.
Note: You can also use the Add filter option from the flow's roadmap to return failure or success depending on the action's output.
- Content: Enter a JSON with the action's output that you want to send to your app. For this example
{"unit4Id":"{{step1.unit4Id}}"}.Note: You can use the Plus (+) button to help you navigate through the different steps and outputs of your flow.
- Result with: Display the right dropdown and select success.
- Name your flow by using the Pencil icon above the flow's roadmap. For this example: 'Get Unit 4 ID'.
- Select the Save flow button.
Note: You can also create the flow using the Create flow button in the Flow resource in App Studio.
Configure the app
To start:
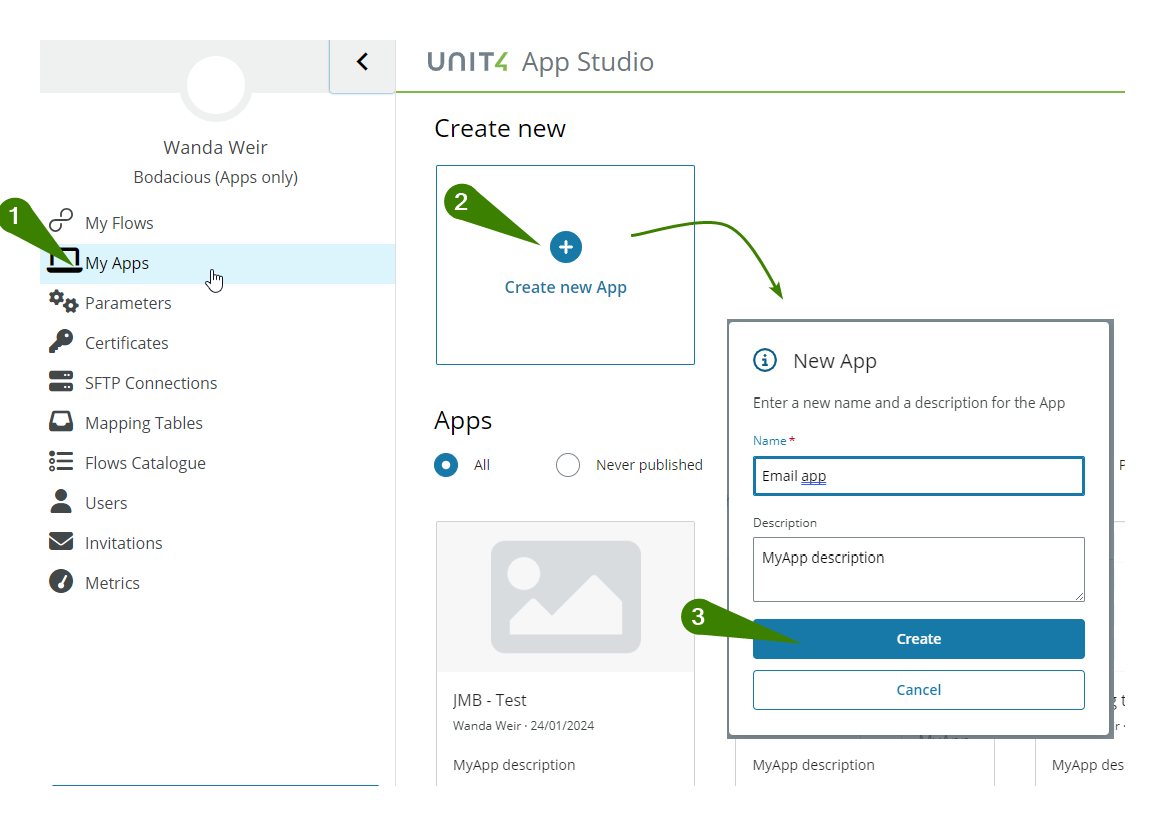
- Select My Apps from the Extension Kit main menu.
- Select the Create new app button and name your app.
- Select the Create button.
Configure the resource
Go to the Resources tab and configure your resource:
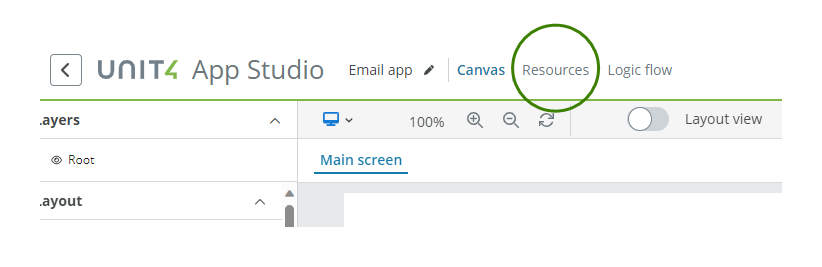
- Select the Plus (+) button on top of the left panel to create a new resource.
- Select the new resource on the left panel.
- Select the Pencil icon to change the name to 'Get Id'.
-
Select Flow from the Type menu on the right and configure:
-
Configuration section:
- Flow: Open the dropdown and select the flow previously created flow. For this example: 'Get Unit 4 ID'.
-
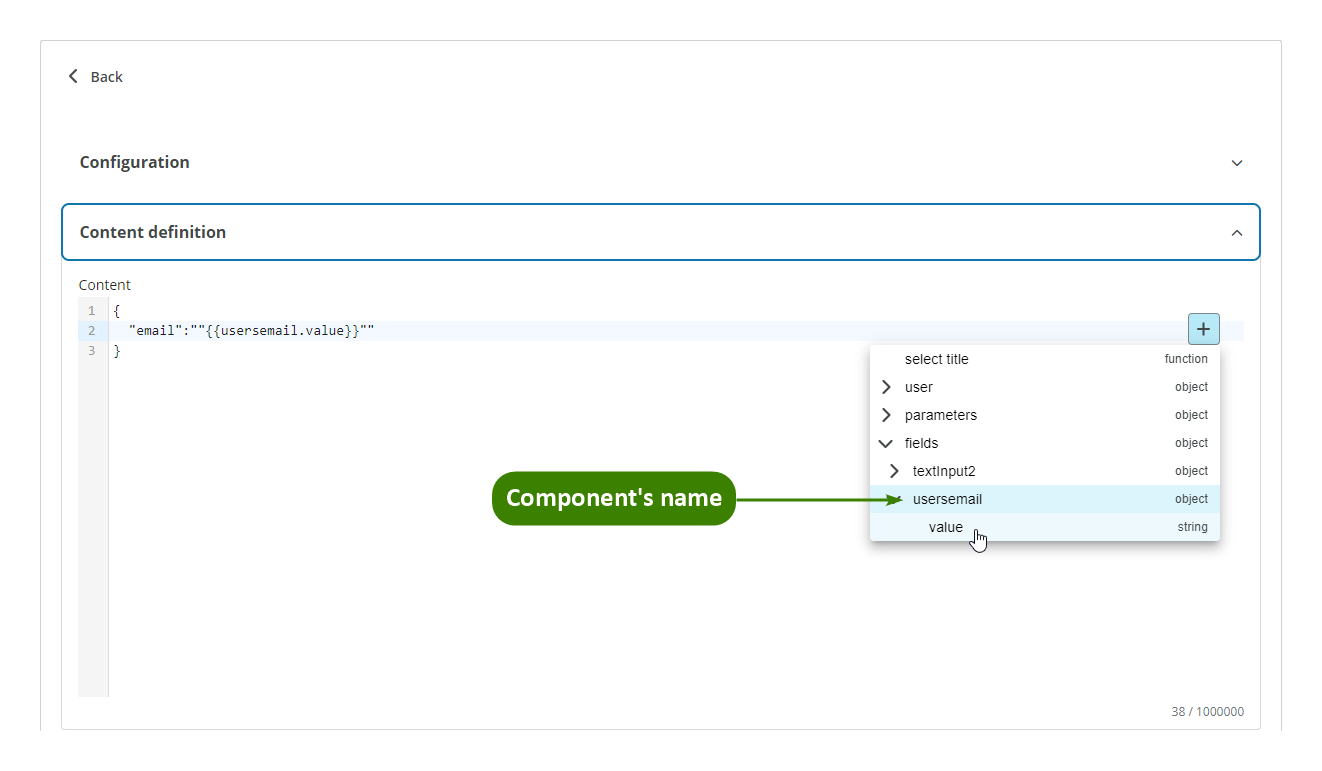
Content definition section:
- Content: Enter a JSON that defines the information you want to send to the flow. In this case we are sending the user's email so we enter this JSON:
{"email":"{{usersemail.value}}"}. You can use the Plus (+) button to help you navigate through your component's outputs.
- Content: Enter a JSON that defines the information you want to send to the flow. In this case we are sending the user's email so we enter this JSON:
-
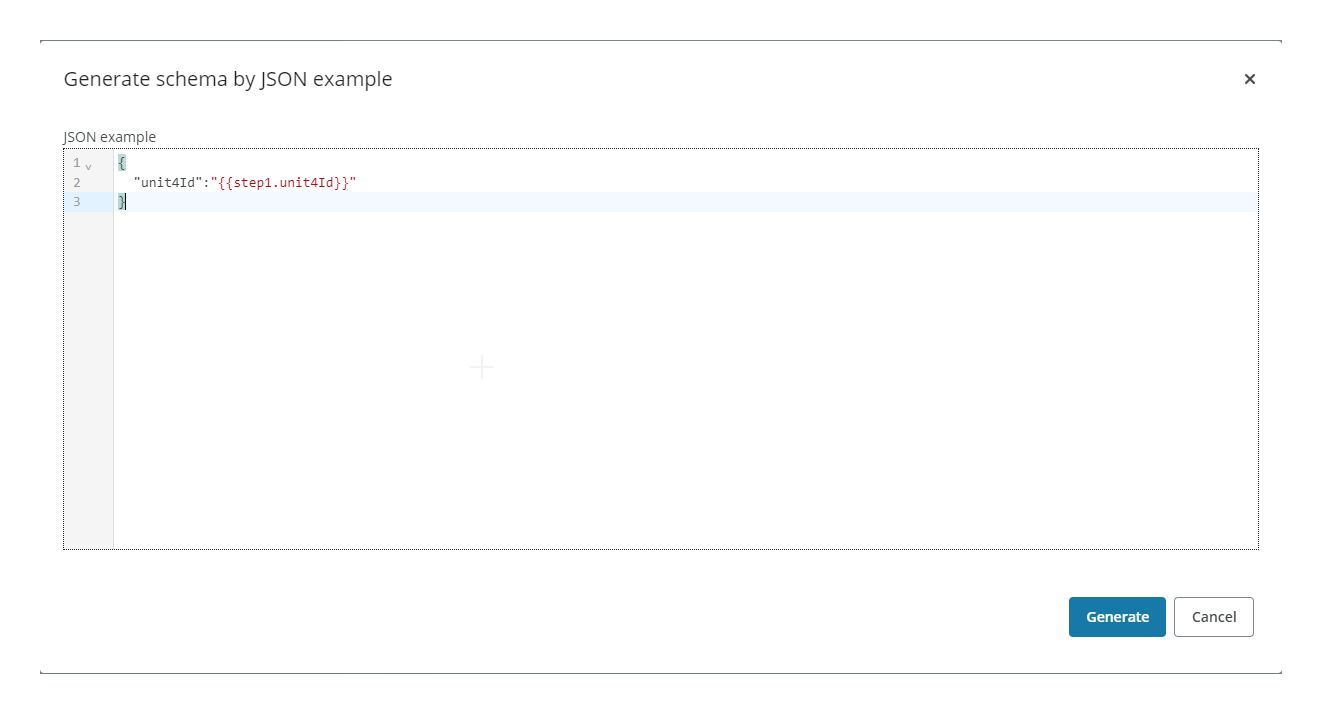
Templating schema section:
- Schema: Select the Generate by JSON button and copy the JSON used in the Content property of the App result action of the previously configured flow, to obtain the correct schema. For this example:
{"unit4Id":"{{step1.unit4Id}}"}
- Schema: Select the Generate by JSON button and copy the JSON used in the Content property of the App result action of the previously configured flow, to obtain the correct schema. For this example:
-
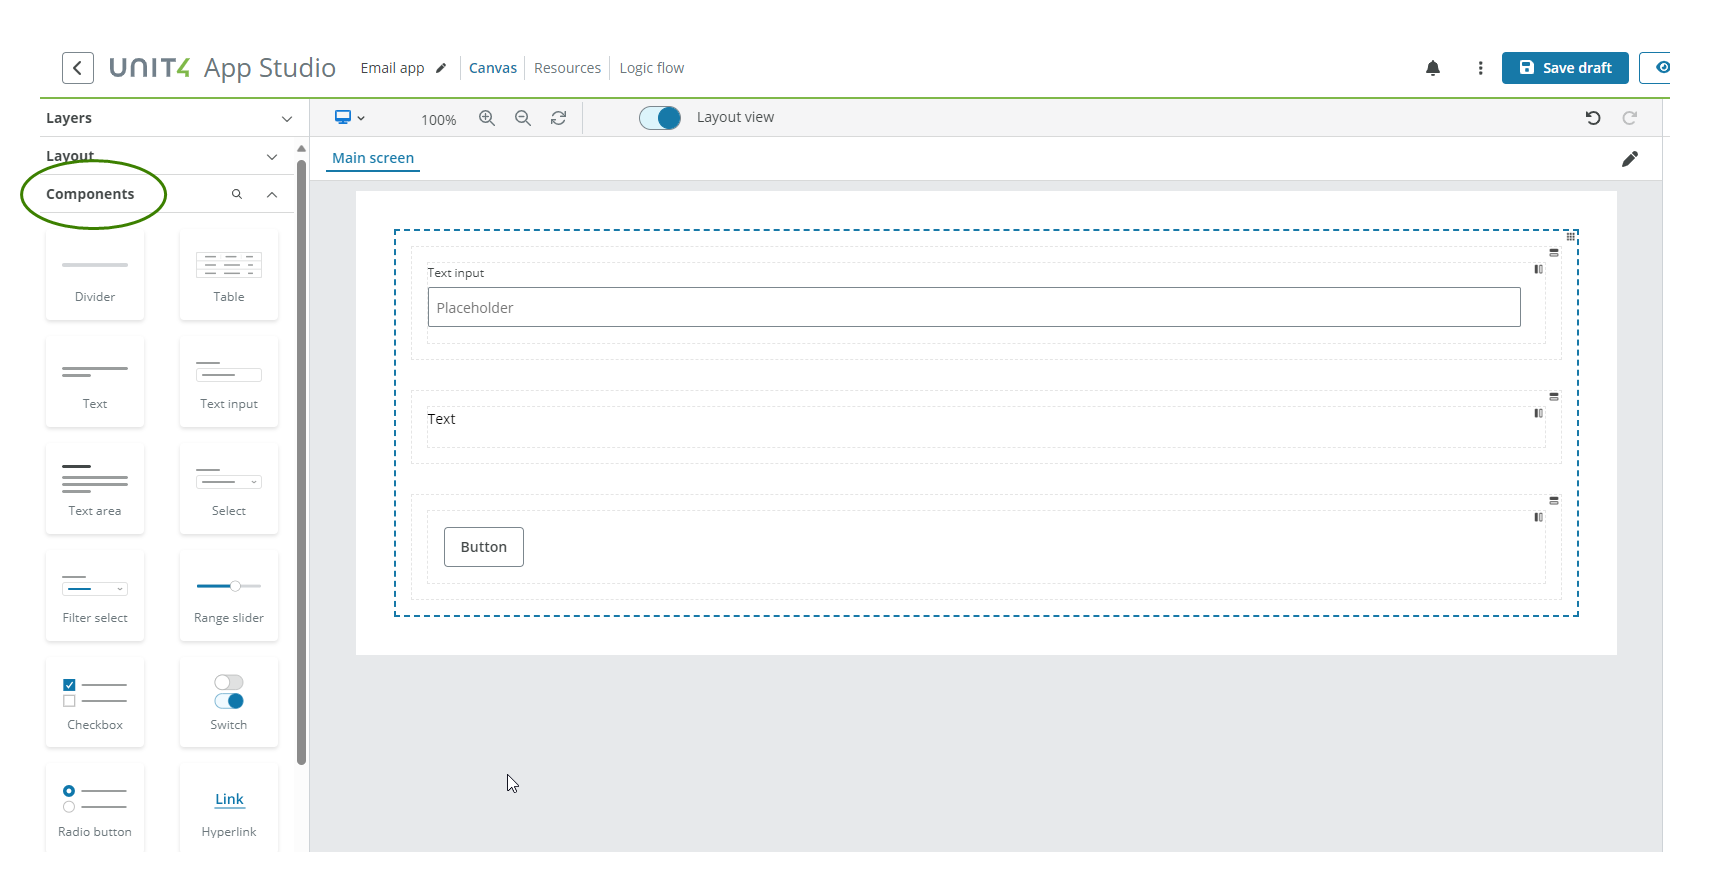
Configure the components
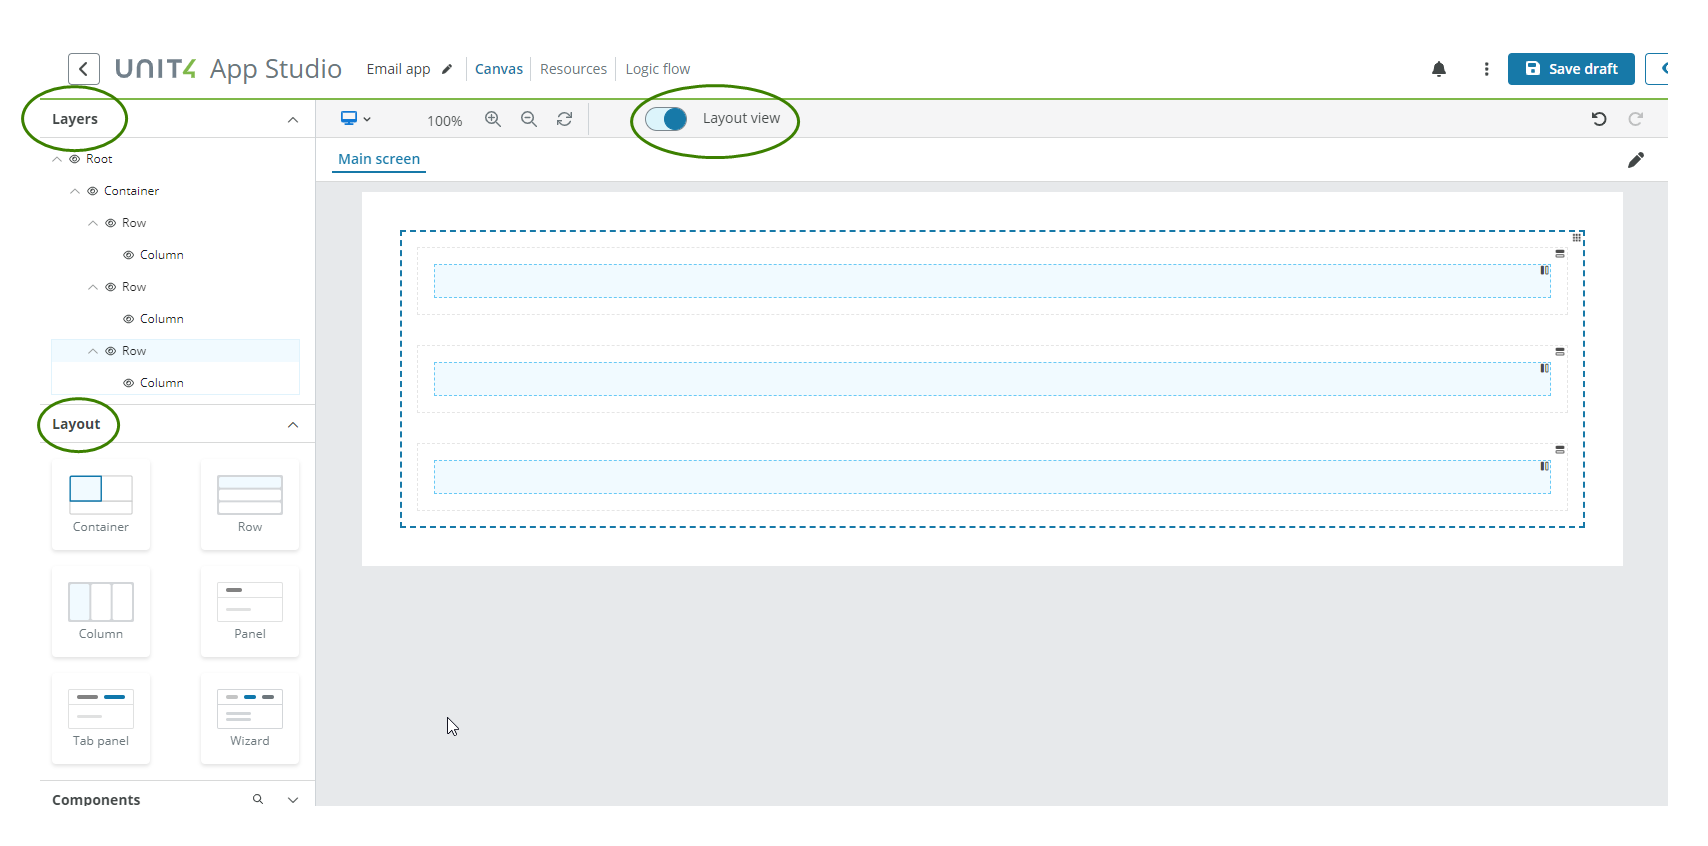
Go to the Canvas tab and design your app:
- Drag and drop the Layout components to the canvas. In this example we added:
- One container
- Three rows inside the container
- One column in each row
Note: Use the Layout view switch and the Layer panel to help you.
- Drag and drop the following components:
- One Text input component
- One Text component
- One Button component
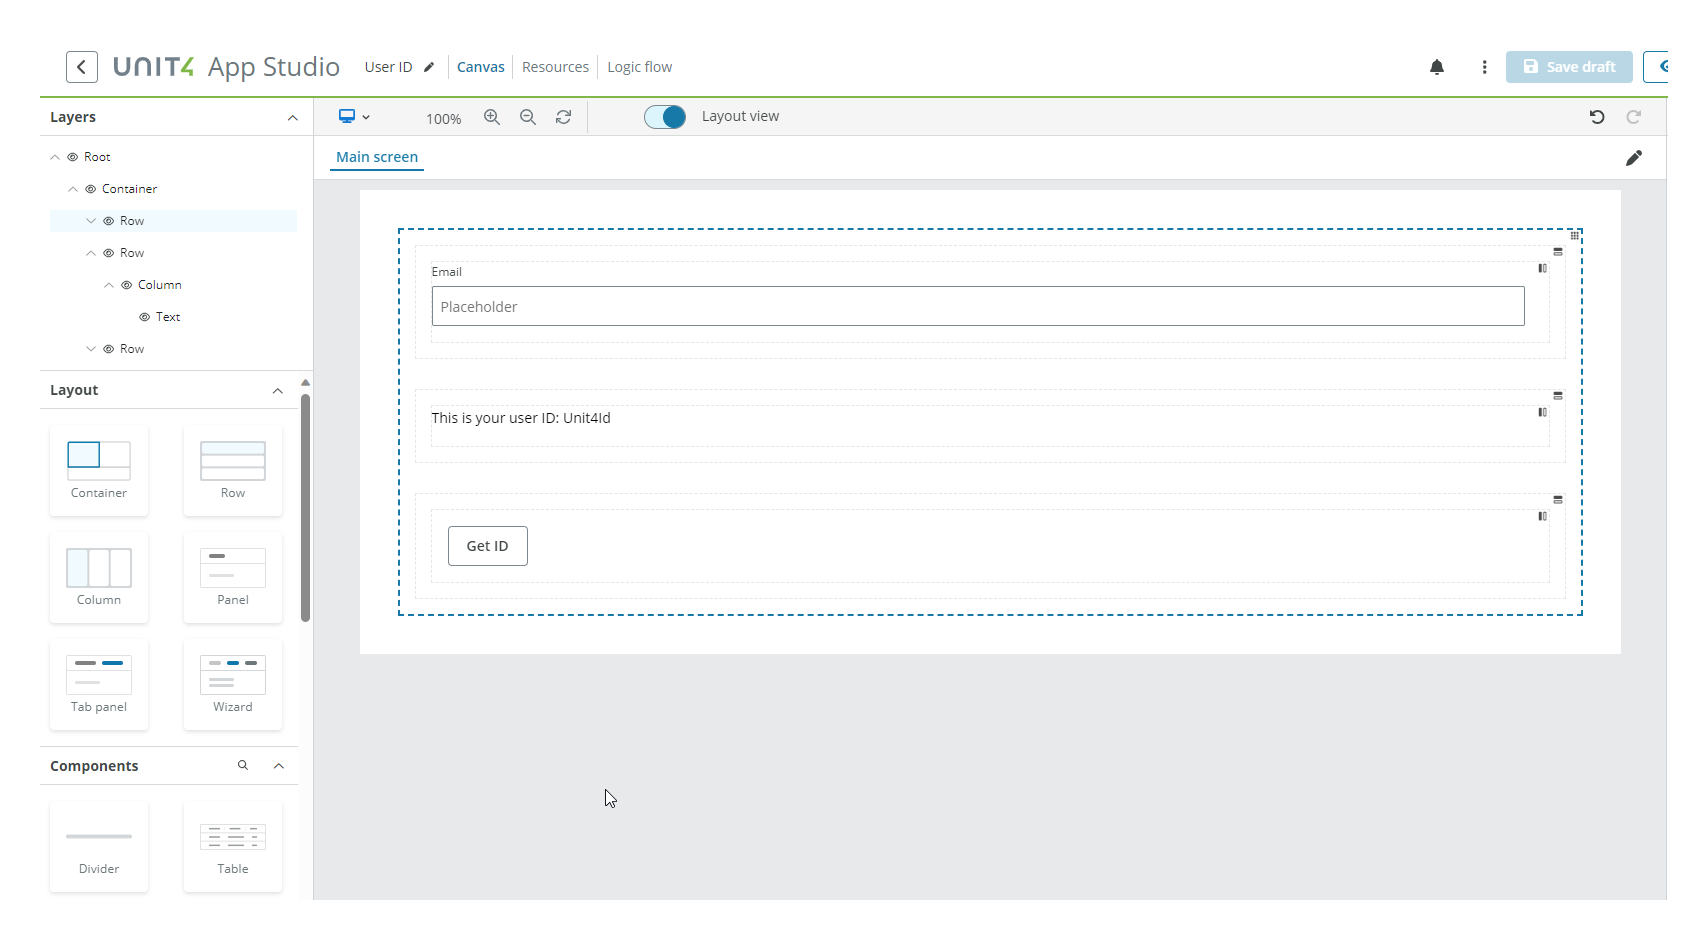
Configure the Text input component
In this example we configure the component for the user to enter an email, as follows:
- Select the Text input component in the canvas and go to the Properties panel.
-
Open the Main menu and configure:
- Component ID: Select the Edit button and enter 'usersemail', then select the Save button.
- Label: Enter 'Email'.
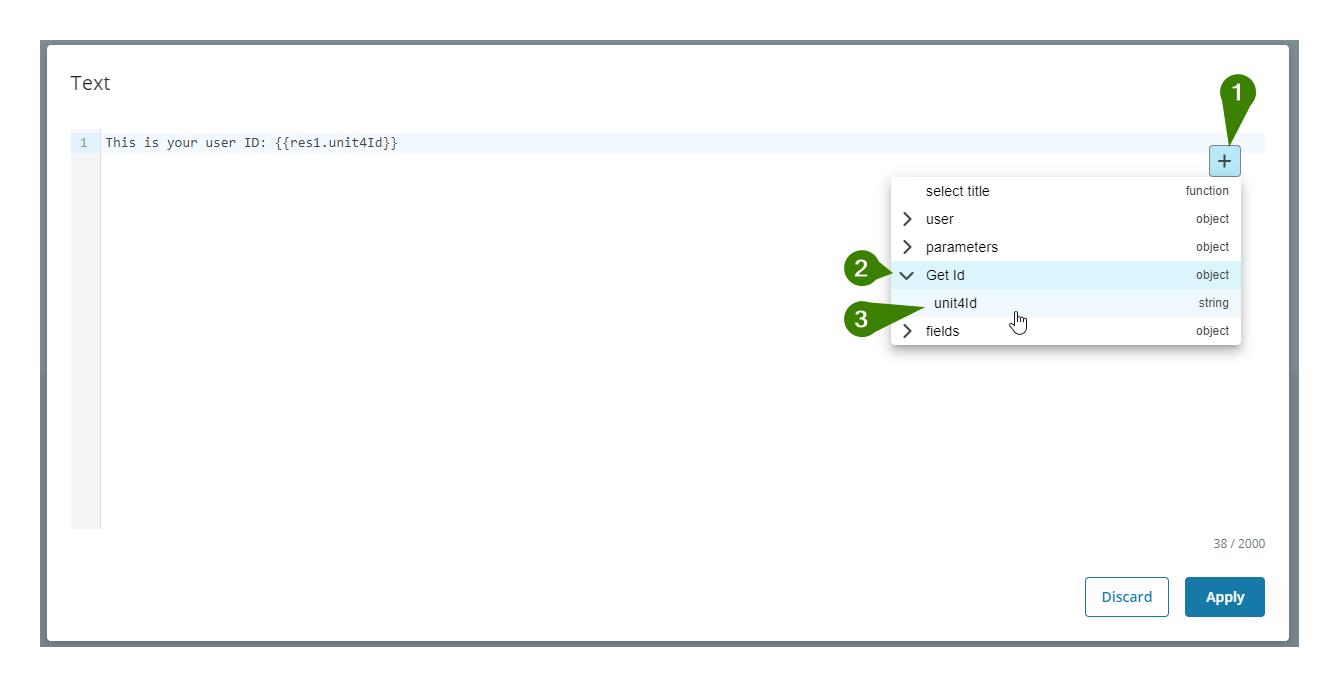
Configure the Text component
In this example we configure the component to display the user's ID, as follows:
- Select the Text component in the canvas and go to the Properties panel.
-
Open the Main menu and configure:
-
Text: Enter 'This is you user ID:' and to show the user ID after the colon, follow these steps:
- Select the Plus (+) button.
-
Select your resource, for this example: Get Id, and open the menu.
Warning: If the resource does not appear in the dropdown, go to Configure the resource section in this tutorial and come back to this step.
-
Select the data you want to display. In this example: unit4Id.
-
This is the final result for this example: 'This is your user ID:
{{res1.unit4Id}}'
-
Configure the Button component
In this example we configure the component as follows:
- Select the Button component in the canvas and go to the Properties panel.
- Open the Main menu and configure:
- Text: Enter the text: Get ID.
-
Open the Logic map tab in the bottom-right corner and configure:
- Drag the On click event to the viewport.
- Drag the Trigger flow action to the viewport and connect it to the On click event.
- Select Trigger flow action in the viewport to see the properties panel to the right.
- Display the Flow dropdown.
-
Select the resource, for this example Get Id.
Warning: If the resource does not appear in the dropdown, go to Configure the resource section in this tutorial and come back to this step.
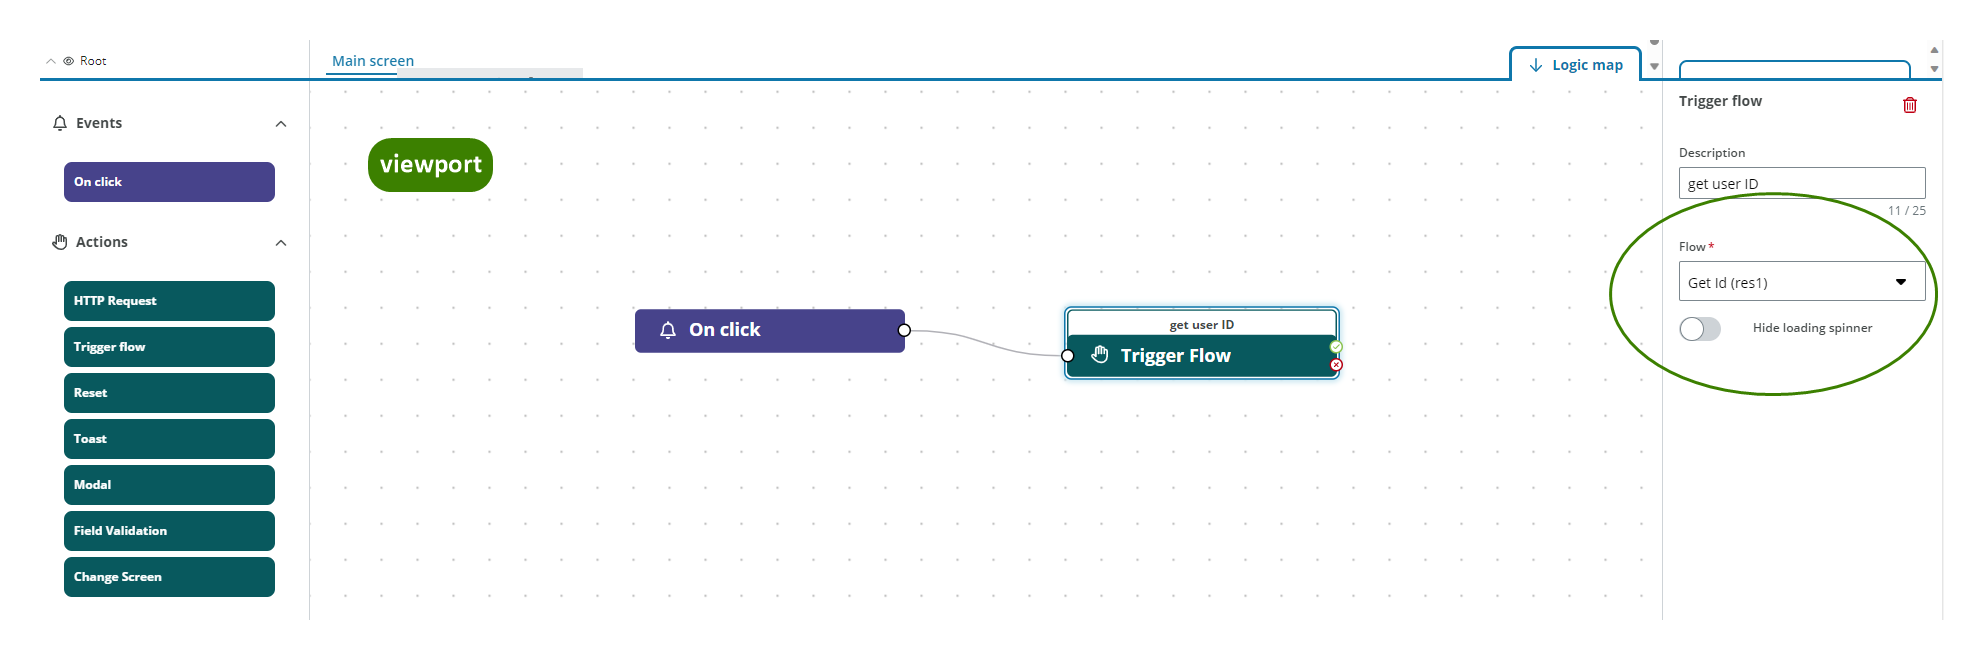
You can see the final result in the following image:
Note: See Components and events and actions for more details.
Finally, after configuring the flow, the app and the resource, select the Save draft button and preview you app.